
Best Insulation For Metal Shed Walls

So, you've got that trusty metal shed. Maybe it’s the weekend escape pad, the garage-adjacent sanctuary for your gardening gear, or the place where that vintage bicycle you swore you'd restore is currently residing. Whatever its noble purpose, there's one thing that can turn your cool, industrial haven into an oven in July or a frosty fortress in January: its walls. Yes, those shiny metal panels, while durable and low-maintenance, are about as insulating as a crisp autumn leaf. But fear not, fellow dwellers of the shed life! We're about to dive into the wonderfully cozy world of shed insulation, making your metallic abode a place you'll actually want to spend time in, no matter the season. Think of it as giving your shed a stylish, climate-controlled hug.
Let's be honest, the idea of insulating a metal shed might sound like a chore worthy of Hercules, but it’s really not. It’s more like giving your shed a spa day. And the benefits? Oh, they’re manifold. Beyond the obvious comfort factor (no more wrestling with frosty tools or fanning yourself with a watering can), a well-insulated shed can help regulate temperature, protecting your precious belongings from extreme heat and cold. Imagine: your paint cans won't be bubbling in the summer sun, and your antique tools won't be at risk of rust from condensation in the winter. It’s like a little miracle worker for your stuff.
The Chill Factor: Why Bother Insulating?
The fundamental issue with metal is its thermal conductivity. Basically, it’s a highway for heat. In summer, that highway is buzzing with incoming heat from the sun. In winter, it’s a superhighway for the precious warmth you do have inside to escape. Without insulation, your shed's temperature will closely mirror the outside temperature. If it’s a scorching 90 degrees Fahrenheit outside, your shed will likely be pushing 110. Conversely, if it’s a frosty 20 degrees, expect your shed to feel like a walk-in freezer.
This isn't just about personal comfort, though that's a huge part of it. Think about what you store in your shed. Many items can be damaged by temperature fluctuations. Lawn mowers, gardening equipment, bicycles, paint, chemicals, even important documents – they all have optimal temperature ranges. Extreme heat can degrade plastics, evaporate solvents, and even cause some metals to expand and contract excessively. Extreme cold can make lubricants thick and sluggish, crack plastic components, and freeze water-based solutions.
And then there's the condensation issue. When warm, humid air inside your shed meets the cold metal walls, moisture forms. This is prime real estate for mold, mildew, and rust. So, insulation isn't just about keeping it warm or cool; it's about creating a stable, dry environment that preserves your belongings and prevents costly damage. It's an investment in the longevity of your shed and its contents.
Your Insulation Toolkit: A Guide to the Best Bets
Now, onto the good stuff! When we talk about the "best" insulation, it's a bit like choosing your favorite pizza topping – it depends on your priorities. Are you on a tight budget? Do you want something super easy to install? Are you aiming for eco-friendliness? We've got options for every shed-dweller.
Foam Boards: The Sturdy & Reliable Choice
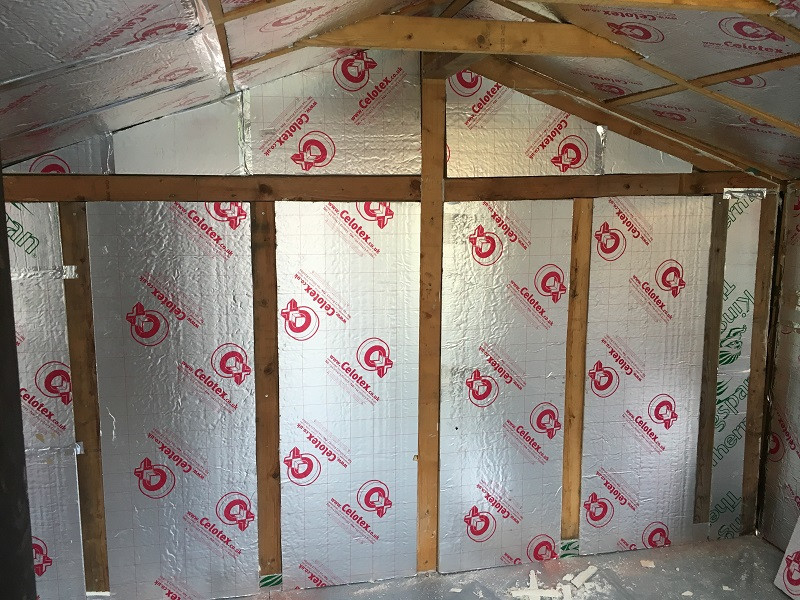
These are often the go-to for many shed projects, and for good reason. Think rigid panels of polystyrene or polyisocyanurate. They offer excellent R-value (that’s the measure of thermal resistance – higher is better!) for their thickness. They’re relatively lightweight, easy to cut, and can be attached directly to the metal walls.
Types of Foam Boards:
- Expanded Polystyrene (EPS): This is the classic white beaded foam. It’s the most budget-friendly option and decent at insulating, but not quite as efficient as some others. It's also more susceptible to moisture.
- Extruded Polystyrene (XPS): Usually pink, blue, or green, XPS is denser and has a higher R-value than EPS. It's also more moisture-resistant, making it a great choice for sheds.
- Polyisocyanurate (Polyiso): This is the high-performance champion. It boasts the highest R-value per inch and often comes with a foil facing that adds radiant barrier properties. It's usually the most expensive, but you get what you pay for.
Pro Tip: When installing foam boards, make sure to seal all the gaps between the boards and around the edges with expanding foam or special tape. This prevents drafts and maximizes the insulation’s effectiveness. Think of it like putting a cozy blanket on without any holes!
Fun Fact: The first patent for polystyrene foam was granted in 1931 to a German chemist named Dr. Willy Zwerger. Little did he know, his invention would one day be keeping our garden gnomes from freezing!
Fiberglass Batts: The Classic Comfort Provider
This is probably what most people picture when they think of insulation. It’s the fluffy, pink or yellow stuff that comes in rolls or pre-cut batts. Fiberglass is a great all-rounder, offering good thermal performance and being relatively inexpensive. It’s also quite flexible, making it forgiving to install in less-than-perfectly-square sheds.
Installation Considerations: Fiberglass needs a bit more care during installation. Wear gloves, a mask, and eye protection because the tiny glass fibers can irritate your skin and lungs. It’s also crucial to have a vapor barrier (like plastic sheeting) on the warm side of the insulation (usually the interior side in colder climates) to prevent moisture from condensing within the wall cavity.
Cultural Reference: Think of your grandmother's cozy knitted sweaters – fiberglass insulation is kind of the industrial-strength, non-itchy version for your shed. It's all about trapping air to keep you warm!
Pro Tip: Don't compress fiberglass batts! When you squish them down, you reduce their ability to trap air, which is their main insulating superpower. Cut them to fit snugly but don't force them into tight spaces. It’s like giving your shed a fluffy hug, not a suffocating squeeze.
Spray Foam: The High-Tech, Gap-Sealing Marvel
This is the "I want the best, and I want it done right" option. Spray foam insulation, whether it's closed-cell or open-cell, is applied as a liquid that expands and hardens, creating a seamless, airtight barrier. It’s incredibly effective at both insulating and air-sealing, filling every nook and cranny. This means no drafts, no thermal bridging, and a very well-insulated space.
Types of Spray Foam:
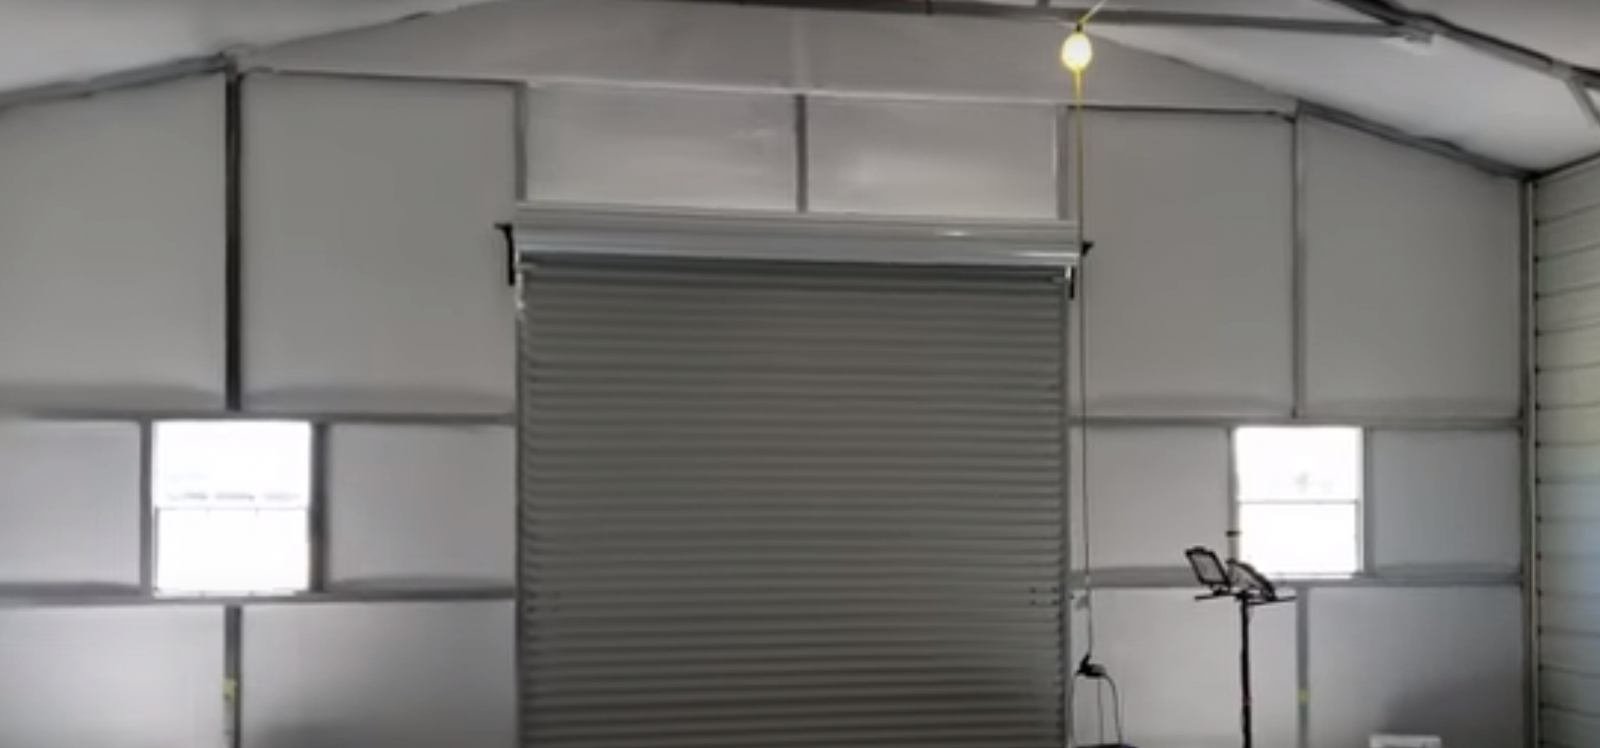
- Open-Cell Spray Foam: This is less dense and more flexible. It has a lower R-value per inch than closed-cell but is more cost-effective and allows some moisture to pass through (which can be a good or bad thing depending on your climate and ventilation).
- Closed-Cell Spray Foam: This is much denser and has a higher R-value. It also acts as a vapor barrier and adds structural rigidity to the walls. It's the premium choice for maximum insulation and sealing.
Installation Note: Spray foam is usually a DIY job best left to professionals unless you have specialized equipment and training. It requires precise mixing and application for safety and effectiveness. But the results are undeniably impressive.
Entertaining Aside: Imagine your shed walls getting a spa treatment, but instead of cucumber slices, they get a mist of magic foam that hardens into a cozy embrace. It’s like giving your shed a superhero cape made of pure comfort!
Fun Fact: The development of spray foam insulation is often linked to advancements in the aerospace industry, where lightweight, insulating, and sealing materials were crucial for spacecraft. So, your shed might be getting a touch of astronaut technology!
Reflective Insulation (Radiant Barrier): The Sun-Bouncer
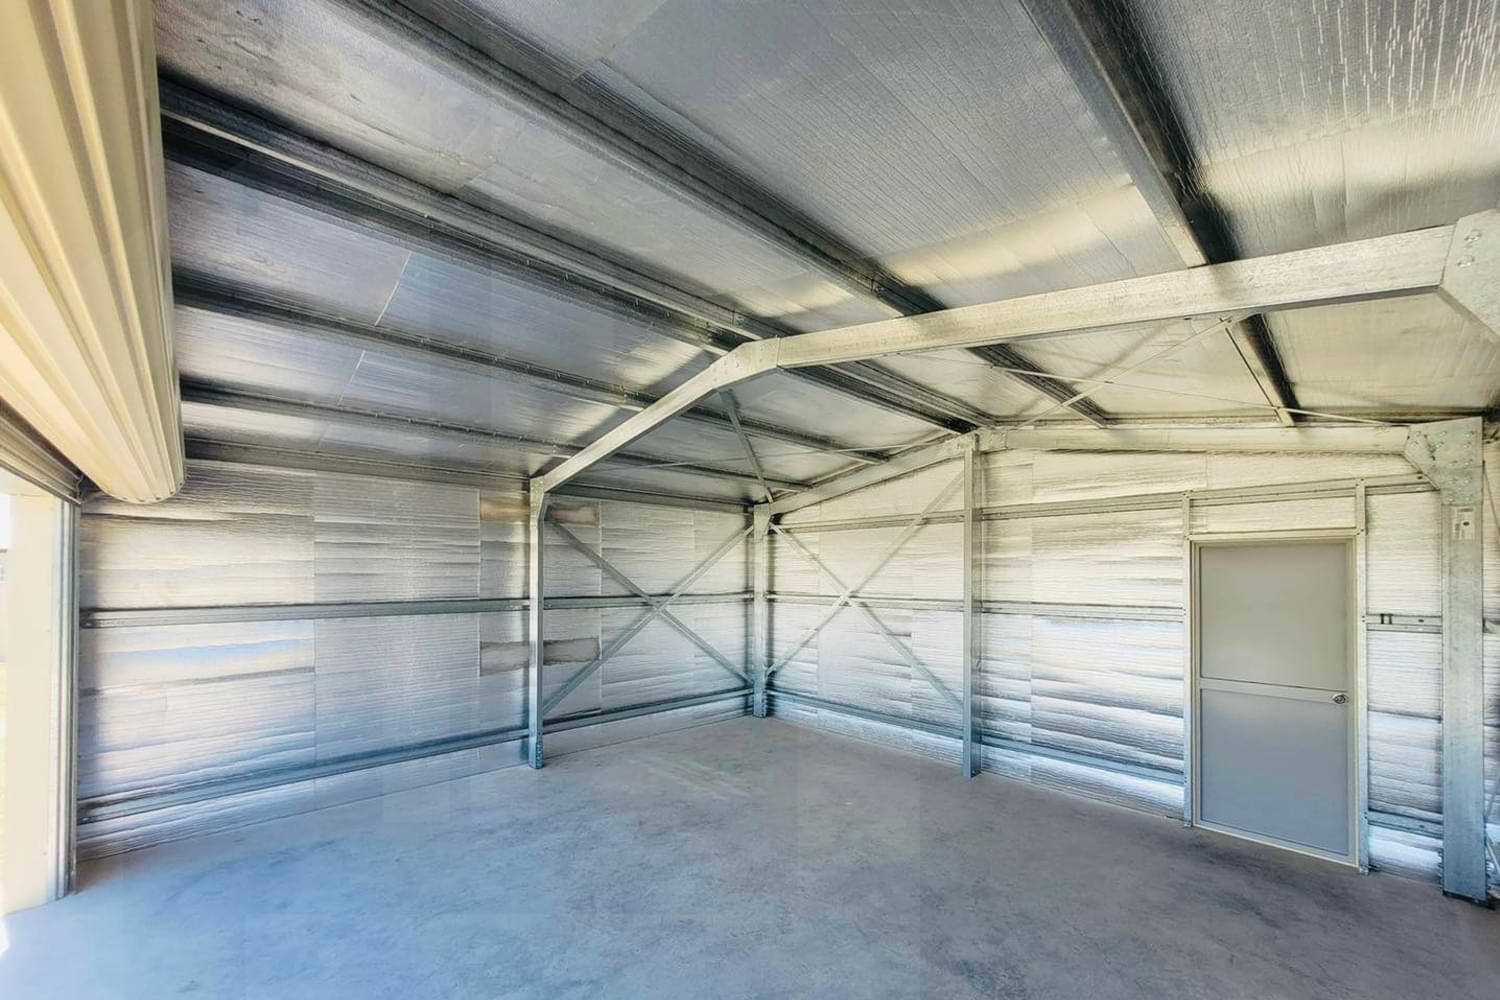
This isn't your primary insulation but can be a fantastic addition, especially in hot climates. Reflective insulation typically consists of a layer of reflective material (like aluminum foil) bonded to a layer of bubble wrap, foam, or other backing. Its main job is to reflect radiant heat away from your shed, significantly reducing solar gain in the summer.
How it Works: In summer, the sun’s rays hit your metal shed and get absorbed, turning it into a greenhouse. A radiant barrier on the inside of the metal walls reflects a good portion of that heat back out, keeping things cooler. In winter, it can help reflect internal heat back into the shed, but its effectiveness is less pronounced than dedicated thermal insulation.
Installation: It’s usually stapled to the studs or framing within your shed, with an air gap between the reflective surface and the outer wall. This air gap is crucial for it to work effectively.
Cultural Reference: Think of it like wearing a light-colored, reflective jacket on a sunny day. It bounces the sun's rays away, keeping you cooler. Your shed can have its own stylish, sun-repelling outfit!
Pro Tip: For maximum effect, combine reflective insulation with another type of insulation, like foam boards or fiberglass. This gives you the best of both worlds: thermal resistance and radiant heat reflection.
Making the Choice: What's Right for Your Shed?
So, how do you pick the winner for your metal shed? Let’s break it down:
Budget-Friendly & DIY-Friendly:
If you're on a budget and don't mind a bit of hands-on work, fiberglass batts are a solid choice. Just remember to get your safety gear! EPS foam boards are also a good entry-level option for a cleaner, slightly more rigid installation.
Best All-Around Performance (DIY-Friendly):
XPS foam boards offer a great balance of R-value, moisture resistance, and ease of installation. They’re a fantastic upgrade from basic EPS and a good middle ground in terms of cost.
Premium Performance & Airtightness:
For the ultimate in insulation and sealing, polyisocyanurate foam boards (especially with foil facing) and professional spray foam installation are the top dogs. If you're serious about temperature control and energy efficiency, these are worth the investment.
Hot Climate Companion:
Don’t underestimate the power of reflective insulation. It’s a fantastic, relatively inexpensive add-on that can make a significant difference in summer heat gain, especially when paired with other insulation types.

The Installation Process: A Gentle Walkthrough
No matter which material you choose, the basic principle for insulating a metal shed wall is similar:
- Clean the Walls: Start by giving your metal walls a good clean. Remove any dirt, cobwebs, or potential rust spots. A fresh surface is always best.
- Framing (Optional but Recommended): While you can sometimes attach insulation directly to the metal, building a simple wooden frame (like 2x2s or 2x4s) inside the shed creates cavities for batts or foam boards and provides a surface to attach interior sheathing later if desired. This also helps create an air gap, which is beneficial.
- Measure and Cut: Precisely measure the spaces you need to fill. For foam boards, a sharp utility knife or a foam saw works best. For fiberglass, use a long serrated knife or insulation knife.
- Install the Insulation:
- Foam Boards: Fit them snugly into the framed cavities. Use a can of expanding foam to seal any small gaps around the edges.
- Fiberglass Batts: Place them into the cavities, ensuring they fill the space without being compressed.
- Spray Foam: This is where you’d typically have professionals. They spray it into the cavities, and it expands to fill everything.
- Reflective Insulation: Staple it to your framing, ensuring the reflective side faces the air gap.
- Seal Everything: This is critical! Use appropriate tapes, sealants, or expanding foam to close up all gaps, no matter how small. Air leaks are the enemy of good insulation.
- Add a Vapor Barrier (If Needed): In colder climates, you'll likely want to add a plastic vapor barrier on the interior side of your insulation before adding any interior walls or panels.
DIY Warrior's Wisdom: Take your time. Rushing can lead to mistakes that compromise your insulation. Put on some good tunes, maybe a podcast about ancient Roman engineering (why not?), and enjoy the process of transforming your shed into a cozy retreat.
Beyond the Walls: Don't Forget the Ceiling and Floor!
While the walls are the main event, remember that heat rises, and cold can seep up from the ground. If you're serious about a comfortable shed, consider insulating the ceiling (roof) and the floor as well. The same types of insulation can be used, adapting the installation method to the specific area.
Ceiling: For many sheds, insulating the roof rafters is similar to insulating walls. For sheds with a simple metal roof, you might attach foam boards directly to the underside of the roof panels, again ensuring an air gap between the metal and the insulation.
Floor: If your shed has a wooden floor, you can add insulation between the floor joists before laying down any flooring. If it's a concrete slab, you might consider a layer of rigid foam board underneath your finished floor. This makes a massive difference in keeping the space toasty in winter.
A Reflection: The Comfort of a Cozy Space
In our fast-paced, often impersonal world, creating cozy, functional spaces for ourselves and our passions is more important than ever. That metal shed, which might have once been just a utilitarian box, can become so much more with a little attention. It can be a place for quiet contemplation, a dedicated workshop, a haven for hobbies, or simply a comfortable spot to escape the everyday. The act of insulating it is an act of self-care for your belongings and for your own peace of mind. It’s about turning a functional structure into a cherished extension of your home, a place where the weather outside doesn't dictate your comfort inside.
Think about it: a perfectly insulated shed means you can finally get to that woodworking project without your fingers going numb, or you can enjoy your morning coffee amongst your thriving plants without feeling like you’re in a sauna. It's the small comforts that often bring the most joy. So, go forth, embrace the insulation, and make your metal shed the most comfortable place to be, one cozy wall at a time.