Cooking Steel Cut Oats On Stovetop

You know, the other day, I was rummaging through my pantry, a place that, let's be honest, often resembles a miniature archaeological dig site. There, nestled behind a forgotten bag of quinoa and a rather optimistic jar of pickled beets, I found it. A dusty, unopened bag of steel-cut oats. My initial reaction was a mix of nostalgia and mild panic. Nostalgia because I remembered a time when I used to actually cook these things, and panic because, well, the thought of standing over a hot stove on a bleary-eyed Saturday morning felt… ambitious. Especially when my usual breakfast routine involves a desperate grab for a banana and a silent prayer that I don't spill coffee on myself on the way to the door.
But then, a little voice in my head – probably the one that also whispers "you should really organize that pantry" – said, "Hey, remember how good those were? Like, properly satisfying good?" And you know what? It was right. Those pre-portioned instant oat packets, while undeniably convenient, are a far cry from the hearty, chewy, deeply comforting bowl of steel-cut oats that can fuel you for, like, actual hours. So, I decided to embrace my inner Martha Stewart (or at least my inner slightly-less-lazy person) and tackle the stovetop. And honestly? It wasn't nearly as daunting as I’d built it up to be. In fact, it’s become my new favorite weekend ritual. Go figure!
So, if you're like me and have a bag of these little oat powerhouses gathering dust, or if you're just curious about what all the fuss is about, pull up a chair (or, you know, just keep scrolling). We're diving headfirst into the wonderful world of stovetop steel-cut oats. And trust me, it’s a journey worth taking. No fancy equipment required, just a little patience and a willingness to embrace the deliciousness that awaits.
The Lowdown on Steel-Cut Oats: Why Bother?
Let’s start with a quick reality check. Steel-cut oats, also known as Irish oats or pinhead oats, are basically whole oat groats that have been chopped into two or three pieces with steel blades. That’s it. No steaming, no rolling, no flattening. They’re the least processed of the common oat varieties. This difference in processing is actually a big deal, and here's why you should care.
Firstly, they boast a lower glycemic index than their rolled or instant cousins. What does that mean for you? It means they release their energy slowly. You know that feeling you get after a bowl of sugary cereal where you're bouncing off the walls for about an hour and then crash harder than a deflated soufflé? Steel-cut oats prevent that. They provide a steady stream of energy, keeping you feeling full and satisfied for much, much longer. This is especially great if you tend to skip breakfast or grab something quick on the go. A good bowl of steel-cut oats is like a warm, edible hug for your digestive system.
Secondly, the texture is just chef's kiss. Instead of being mushy and homogenous, steel-cut oats retain a delightful chewiness. Each bite offers a little resistance, a satisfying gnaw. It’s a more complex, engaging eating experience. Think of it as the difference between a flimsy cracker and a hearty piece of artisan bread. Same basic ingredient, totally different experience. I, for one, am a texture person. If my food feels like baby food, I’m out. Steel-cut oats, however, pass the texture test with flying colors.
And finally, they’re packed with nutrients. Oats are a fantastic source of fiber, particularly beta-glucan, which is known for its cholesterol-lowering benefits. They also offer important vitamins and minerals like manganese, phosphorus, magnesium, and iron. So, not only do they taste good and keep you full, but they’re genuinely good for you. It's like a delicious double whammy.
The Stovetop Method: It's Not Rocket Science (Promise!)
Okay, so you're convinced. You've got your bag of steel-cut oats, and you're ready to ditch the instant stuff. Excellent! Now, let's talk about the actual cooking. The stovetop method is, in my opinion, the most rewarding. It allows you to control the texture and is, surprisingly, not that time-consuming if you plan ahead a little.
The basic ratio is generally 1 part steel-cut oats to 4 parts liquid. You can use water, milk (dairy or non-dairy), or a combination of both. I personally love a mix of water and almond milk for a nice balance of creaminess and lightness. Experiment with what you like! Some people are strictly water purists, others are all about the dairy. There’s no wrong answer here, as long as you’re happy with the result.
You'll need a medium saucepan. Nothing fancy, just something that can hold your oats and liquid without boiling over. And, of course, a stirring utensil. A wooden spoon is always a classic choice, but honestly, whatever you have handy will do. I’m a big fan of a silicone spatula for its non-stick properties.
Here's the simple breakdown:

1. Combine your ingredients:
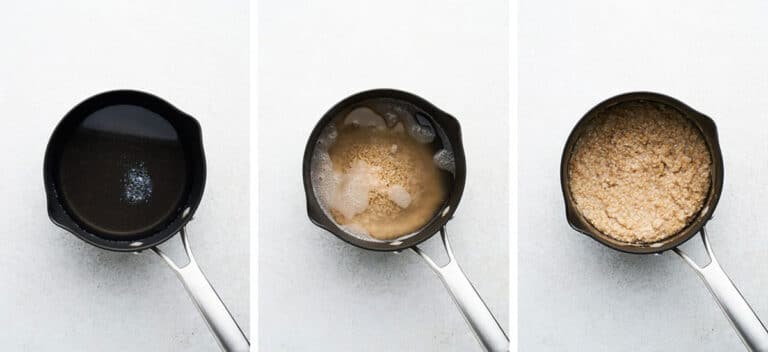
In your saucepan, combine your steel-cut oats and your chosen liquid. So, for example, if you're using 1 cup of oats, you'll need 4 cups of liquid. Easy peasy.
2. Bring to a boil, then reduce heat:
Place the saucepan over medium-high heat and bring the mixture to a boil. This usually takes a few minutes. Once it's bubbling, immediately reduce the heat to low, low, low. We're talking a gentle simmer here, not a rolling boil that’s going to slosh all over your stove. If it looks like it's about to get out of control, turn the heat down even more. Seriously, low and slow is the name of the game here.
3. Simmer and stir:
Now, this is where the "patience" part comes in. You'll want to let the oats simmer, uncovered or partially covered, for about 20 to 30 minutes. And here's the crucial part: stir occasionally. Don't just walk away and forget about them! Stirring prevents them from sticking to the bottom of the pan and ensures they cook evenly. You’ll see the liquid gradually get absorbed, and the oats will start to thicken and become tender.
I usually find myself stirring every 5-7 minutes. It’s a good excuse to stretch your legs, make that cup of coffee (carefully!), or just stare out the window and contemplate the meaning of life. Or, you know, check your phone for a bit. Just don't get so engrossed in TikTok that you burn your breakfast.
4. Check for doneness:
After about 20 minutes, start checking the consistency. The oats should be tender but still have a slight chew. If they’re still too firm or the liquid is all gone, add a splash more liquid and continue simmering for a few more minutes. If they’re too mushy for your liking, you might have let them go a tad too long, but that's okay! Every stove and every oat brand can be a little different.
5. Rest and serve:
Once they're cooked to your desired texture, remove the saucepan from the heat. I like to let them sit, covered, for about 5 minutes. This allows them to thicken up a bit more and really absorb any remaining liquid. Then, spoon them into your favorite bowl and get ready to customize!
Toppings: The Fun Part!
This is where you can really let your personality shine. The base of steel-cut oats is wonderfully neutral, which makes it the perfect canvas for all sorts of deliciousness. Don't be shy!
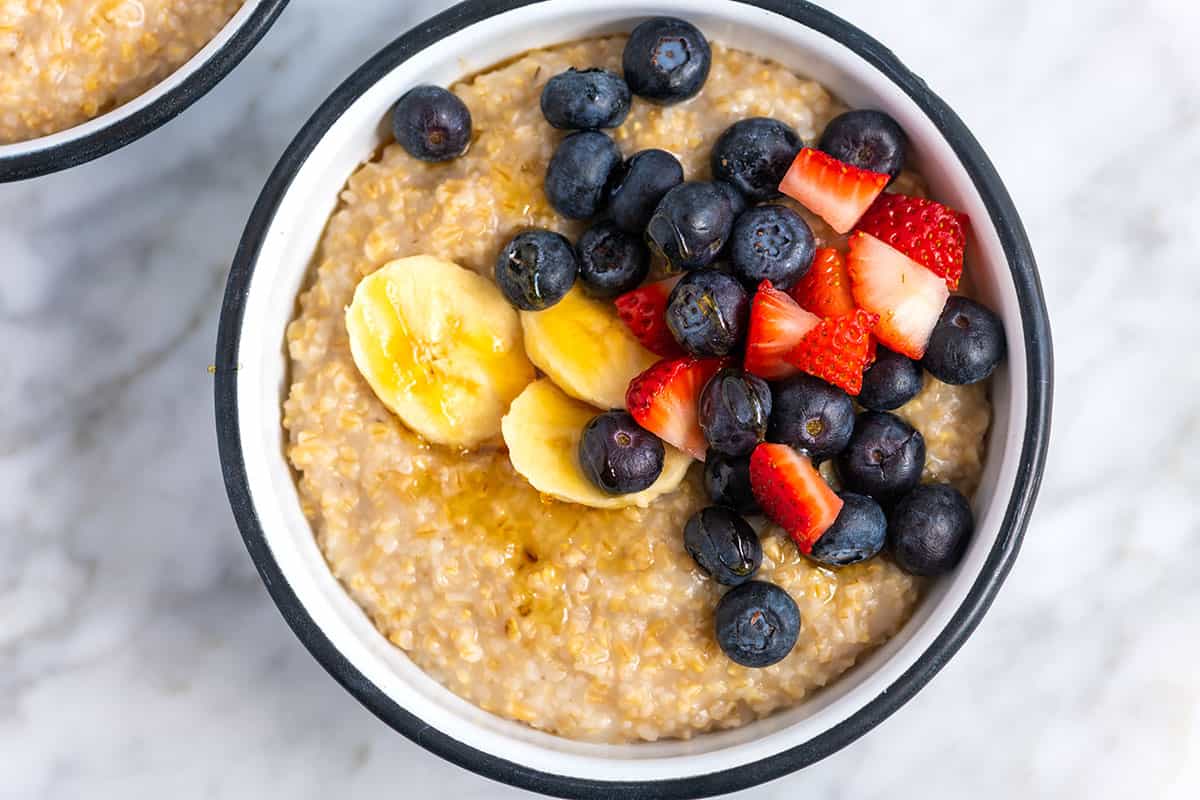
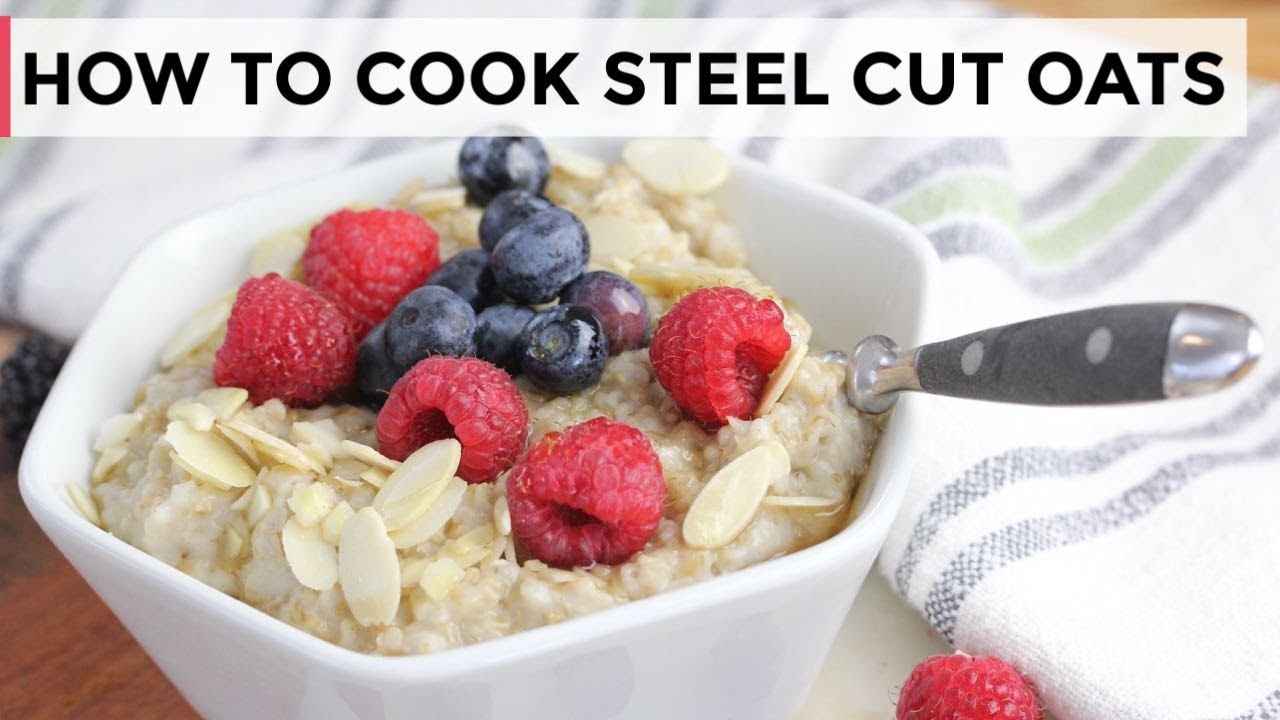
Fruit: Fresh berries are a classic for a reason. Strawberries, blueberries, raspberries – they all add a burst of freshness and a touch of sweetness. Sliced bananas are also a no-brainer, adding creaminess and natural sweetness. If you're feeling fancy, try some grilled peaches or sautéed apples with cinnamon. Oh, and don't forget about dried fruit like raisins, cranberries, or chopped dates. They add a chewy sweetness that’s just divine.
Nuts and Seeds: For that extra crunch and healthy fats, a sprinkle of chopped nuts like walnuts, almonds, or pecans is fantastic. Chia seeds, flax seeds, or pumpkin seeds also add a nutritional boost and a subtle texture. Sunflower seeds are another great option.
Sweeteners: While the fruit often provides enough sweetness, a drizzle of maple syrup, honey, or agave nectar can be a lovely addition. Brown sugar is also a popular choice, adding a richer, caramel-like flavor. Just a little goes a long way to enhance the overall taste.
Spices: Cinnamon is king here, but don't underestimate the power of nutmeg, cardamom, or even a pinch of ginger. These warm spices can transform a simple bowl of oats into something truly special, especially on a chilly morning.
Dairy/Non-Dairy: A splash of milk or cream can add extra richness. A dollop of yogurt (Greek yogurt is great for added protein!) or a swirl of nut butter can also be fantastic additions, adding creaminess and flavor. Peanut butter or almond butter? Yes, please!
Savory Twist? Okay, bear with me on this one. While most people go sweet, have you ever tried steel-cut oats with a fried egg on top, a drizzle of hot sauce, and some chopped chives? It sounds wild, I know, but it’s surprisingly delicious! It’s a hearty, protein-packed breakfast that will keep you going all day. Give it a try sometime when you're feeling adventurous. You might be surprised!
My personal go-to combination lately is a sprinkle of mixed berries, a spoonful of almond butter, and a drizzle of maple syrup. It’s simple, satisfying, and hits all the right notes for me. But the beauty of steel-cut oats is that they’re so versatile, you can truly make them your own.
The "I Don't Have Time for This" Secret Weapon: Overnight Oats (Stovetop Edition!)
I get it. Even 30 minutes of stovetop simmering can feel like an eternity on a busy weekday. But what if I told you there’s a way to get that wonderful steel-cut oat goodness with minimal morning effort? Enter the "overnight" method, but with a stovetop twist.
This is my absolute favorite hack for enjoying steel-cut oats on a weekday without sacrificing flavor or texture. It’s called the "boil and soak" method, and it’s a game-changer. Here’s how it works:
1. The Night Before:
Combine your steel-cut oats and liquid in your saucepan in the evening. Use the same 1:4 ratio (e.g., 1 cup oats to 4 cups liquid). Bring the mixture to a rolling boil over medium-high heat. This is important – you want it to boil vigorously for just a minute or two.
2. Turn Off the Heat and Cover:
Once it’s boiled for a minute, immediately remove the saucepan from the heat. Cover it tightly with a lid (or even some foil if your lid is wonky). Then, you just… leave it. Let it sit on the stove, undisturbed, overnight.
3. In the Morning:
In the morning, uncover the saucepan. What you'll find is that the oats have cooked themselves! They'll be perfectly tender and creamy, almost like they've been simmered all night. You might need to add a splash more liquid if they're a bit too thick for your liking, but often they're just right. Then, just reheat gently on the stove for a minute or two, add your toppings, and you're good to go!
This method is brilliant because it dramatically reduces the active cooking time in the morning. You’re basically just bringing it back up to temperature. It’s perfect for those days when you need to be out the door in a flash but still want a proper, satisfying breakfast. It’s the best of both worlds – that amazing steel-cut oat texture and flavor, with next-to-no morning fuss.
I've tried this with water, milk, and a mix of both, and it works like a charm every time. The oats absorb the liquid overnight and become wonderfully tender. Just be sure to use a saucepan that's large enough, as the mixture can expand a bit when it boils.
A Few Final Thoughts (Because We're Friends Now, Right?)
So there you have it. Cooking steel-cut oats on the stovetop isn't some ancient culinary secret reserved for the elite. It's an accessible, rewarding, and incredibly delicious way to start your day. It's about embracing a slower pace, even if it's just for 30 minutes, and enjoying food that truly nourishes you.
Don't be afraid to experiment. Play with different liquids, explore a world of toppings, and find what makes your taste buds sing. And if you're a busy bee, definitely give that overnight boil-and-soak method a whirl. You won't regret it.
The next time you find yourself staring at that bag of steel-cut oats in the back of your pantry, don’t sigh. Smile. Because a world of wholesome, satisfying, and utterly delicious breakfast awaits. Happy cooking!