
Gskyer Telescope How To Use
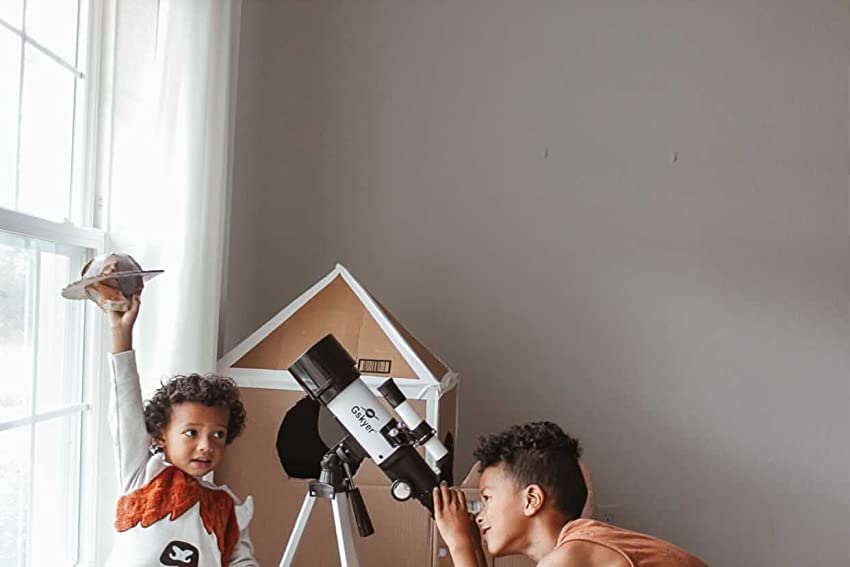
Hey there, aspiring stargazer! So, you’ve got yourself a shiny new Gskyer telescope, huh? Awesome choice! These little beauties are fantastic for dipping your toes into the cosmic ocean without needing a PhD in astrophysics. Think of me as your friendly neighborhood astro-guide, here to make this whole telescope-using thing as easy as, well, pointing and looking. No need to get all freaked out by all those knobs and tubes; we're going to tackle this like a pro, even if your biggest star-gazing experience so far has been counting streetlights. Let's get this cosmic party started!
First things first, let’s unpack this bad boy. You've probably got a few main pieces: the main telescope tube (that long, skinny bit), a tripod (the legs that keep it steady – super important!), and a couple of eyepieces (these are the little cylinders you look through, and they’re like magic lenses!). There might also be a finderscope – a smaller scope attached to the main tube. Don't ignore that finderscope; it's your best friend when you're starting out, like a GPS for the stars. We'll get to that in a sec.
Setting Up Your Gskyer: The Foundation of Fun
Alright, let’s get this tripod sorted. Pop it open, extend those legs, and make sure it's nice and stable. You don't want your telescope doing the wobbly-kneed dance every time a squirrel scurries by. Find a nice, flat spot, ideally away from bright lights. Trust me, those streetlights are the ultimate party poopers for stargazing. They kind of drown out all the subtle beauty of the night sky. Think of it as giving your eyes a chance to actually see something other than urban glow.
Now, carefully attach the telescope tube to the tripod. Most Gskyer models have a bracket or a mount that makes this pretty straightforward. Just follow the instructions that came with it, or if you’re feeling adventurous, just gently wiggle things around until they feel secure. If it feels wobbly, tighten those knobs! Seriously, tighten those knobs. It’s the difference between seeing a blurry smudge and a crystal-clear view of Jupiter's moons. And who wants blurry smudges when you can have tiny, distant worlds?
The Finderscope: Your Cosmic Compass
Okay, let’s talk about the finderscope. This little guy is often overlooked, but it's an absolute game-changer, especially when you're trying to find things that are, you know, really far away and small. Imagine trying to aim a laser pointer at a fly across a football field – the finderscope is like your super-powered eyesight to help you get that laser pointer roughly in the right direction.
Most Gskyer finderscopes are either red dot finders or small optical finders. If it's a red dot finder, you’ll usually see a little window and a power button. Turn it on, and you’ll see a red dot in the middle of the window. The goal here is to align the red dot with the main telescope's view. This is best done during the day, pointing at something far away, like a distant tree or a building. Look through your main telescope with your lowest magnification eyepiece (we'll talk about those soon!). Once you've got that distant object centered in your main scope, adjust the finderscope (there are usually little screws for this) until the red dot is also right on that same object. Boom! Your finderscope is now calibrated. High five yourself!

If you have an optical finderscope (the smaller tube kind), it works similarly. You'll look through this smaller scope and see a magnified view, often with crosshairs. Again, point your main telescope at a distant object, center it in your main scope, and then adjust the finderscope until that same object is centered in the crosshairs of the finderscope. It’s like playing a celestial game of ‘Where’s Waldo?’, but instead of a striped shirt, you’re looking for planets and stars!
Eyepieces: Your Magnification Magic Wands
Now, let’s dive into the fun stuff: the eyepieces. These little fellas determine how much you zoom in. You probably have a couple of them in your Gskyer kit, often with numbers like "25mm" or "10mm." The lower the number, the higher the magnification. Think of it like a camera lens: a wide-angle lens shows you more of the scene, while a telephoto lens zooms in super close. So, a 25mm eyepiece will give you a wider, less magnified view, and a 10mm eyepiece will give you a tighter, more magnified view.
When you’re first starting, especially at night, it’s best to begin with your lowest magnification eyepiece (the one with the biggest number, like 25mm). Why? Because it gives you a wider field of view, making it much easier to find things. Imagine trying to catch a firefly in a dark room while wearing a snorkel mask versus trying to catch it while wearing perfectly clear glasses. The wider view is your friend! You can always switch to a higher magnification later once you’ve got your target locked in.

To use an eyepiece, simply pop it into the focuser tube on your telescope. There’s usually a small screw that you tighten to hold it in place. Make sure it's snug, but don't go all Hulk on it. We don't want to strip any threads, and nobody wants to have to call the telescope doctor.
Focusing: The Key to Clarity
This is where the magic really happens. You've got your telescope pointed, you've got your eyepiece in, and now… it's probably blurry. Don't panic! That's what the focuser knob is for. It's usually a pair of knobs on the side of the focuser tube. You'll slowly turn these knobs, back and forth, until the image snaps into sharp focus. It’s like tuning an old radio; you’re just trying to find that sweet spot where everything becomes clear.
Start by pointing at a bright, distant object during the day to practice. A tree, a sign, anything you can see clearly from a distance. Look through the eyepiece and slowly turn the focuser knobs. You’ll notice the image go from blurry, to sort of clear, to super sharp. Once you’ve nailed that, you're ready for the night sky!

At night, you’ll be doing the same thing. Find your target using the finderscope (remember, it's your buddy!). Then, look through the eyepiece. It will likely be dark and blurry. Gently turn the focuser knobs until the celestial object pops into view. Sometimes, especially with fainter objects, you might need to adjust the focus a few times. Be patient! The universe isn't going anywhere, and it rewards patience with stunning views.
Navigating the Night Sky: Your First Adventures
Okay, you're set up, you're focused, and now it's time to explore! Where do you even start? The night sky can seem overwhelming at first, like a giant black canvas with tiny sparkly things. But with a little guidance, you'll be a pro in no time.
For your first few outings, I highly recommend starting with the Moon. Yep, that big, bright, friendly orb in the sky. It’s relatively easy to find and incredibly rewarding to look at. You’ll see craters, mountains, and plains! It’s like a whole other world right there. Point your telescope at the Moon, use your lowest magnification eyepiece first, and then focus. Get used to the process of finding and focusing.

Once you're comfortable with the Moon, you can move on to planets. Jupiter is a fantastic target. You can often see its four largest moons as tiny pinpricks of light next to it. Saturn is another showstopper, and you can usually see its magnificent rings. You might need to experiment with your higher magnification eyepieces for these. Just remember to start with the low magnification to find them first, then switch.
Tips for Stellar Stargazing
Here are a few more nuggets of wisdom to make your Gskyer experience even more awesome:
- Be patient! Stargazing is a marathon, not a sprint. Don't get discouraged if you can't find something right away.
- Let your eyes adapt. Your eyes need about 20-30 minutes to get fully adjusted to the dark. Avoid looking at your phone or other bright lights during this time. If you must use your phone, get a red light filter app.
- Know what you're looking for. Before you go out, check an astronomy app or website to see what planets or interesting objects are visible that night. This gives you a target!
- Don't be afraid to experiment. Try different eyepieces, different focusing levels. See what works best for you.
- Dress warmly! Even on a warm day, nights can get chilly. Layers are your friend.
- Join a local astronomy club. These folks are super friendly and have a wealth of knowledge to share. Plus, they often have bigger telescopes you can peek through!
- Keep a logbook. Jot down what you see, the conditions, and any notes. It’s fun to look back on your celestial journey.
Remember, your Gskyer telescope is your ticket to a universe of wonders. It's a tool that allows you to connect with something ancient and awe-inspiring. Every time you look through it, you’re peering billions of years into the past, witnessing the same starlight that ancient civilizations gazed upon.
So go forth, my friend! Point your Gskyer towards the heavens. Embrace the darkness, welcome the wonder, and let the vastness of space fill you with a sense of joy and curiosity. The stars are waiting for you, and with your trusty Gskyer, you're ready to meet them. Happy stargazing, and may your cosmic adventures be filled with dazzling sights and endless smiles!