
How To Clean A Metal Mesh Cooker Hood Filter

Let's face it, talking about cleaning cooker hood filters might not be the first thing that springs to mind when you think of "fun." But hear us out! There's a surprising satisfaction in tackling a task that makes a real, tangible difference to your kitchen. Imagine your cooker hood, that silent guardian of your air quality, performing at its peak, efficiently whisking away grease and odors. That's where our metal mesh heroes come in. Cleaning them isn't just a chore; it's a mini-makeover for your kitchen's unseen workhorse, revealing its true sparkling potential. Plus, who doesn't love a good before-and-after story? So, buckle up, because we're about to embark on a journey to revive your cooker hood filter, and trust us, it's more rewarding than you might think!
The unsung heroes of your kitchen air
Your metal mesh cooker hood filter is working overtime, even when you don't realize it. Its primary mission? To trap grease, oil particles, and those lingering cooking smells that threaten to take over your entire living space. Without a clean filter, your cooker hood can't do its job effectively. Think of it like a clogged-up nose – it makes breathing difficult! A well-functioning filter means cleaner air, a fresher-smelling kitchen, and a more pleasant cooking experience. Not to mention, a buildup of grease on the filter can become a potential fire hazard, so regular cleaning is a crucial safety step. It's a simple act of maintenance that pays off in so many ways, from aesthetics to safety and everything in between.
Let's get this grease party started!
Ready to dive in? Grab your cleaning supplies and let's make those filters gleam! You'll be amazed at the transformation. Start by carefully removing the metal mesh filter from your cooker hood. Most filters have simple clips or latches that allow them to slide out easily. Take a moment to admire (or perhaps recoil from!) the current state of your filter. It's probably coated in a sticky, brownish-yellow layer of accumulated grease – a testament to all the delicious meals you've cooked!
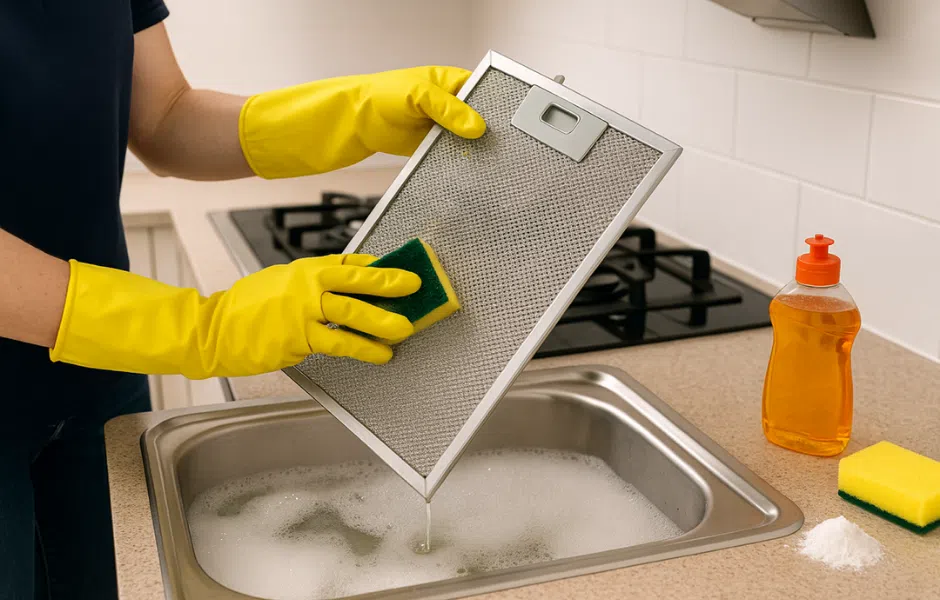
Now, for the main event: the cleaning! You have a few effective options. For a quick and easy clean, a soak in hot soapy water is often all that’s needed. Fill a sink or a large basin with the hottest water you can manage and add a generous amount of dish soap. Dish soap is specifically designed to cut through grease, so it's your best friend here. Submerge the filter and let it soak for at least 15-30 minutes. You might even see the grease start to loosen and float away on its own. For tougher, more stubborn grime, you might need a bit more elbow grease. Use a soft brush or an old toothbrush to gently scrub away any remaining residue. Be firm but gentle; you don't want to damage the mesh.

If your filter is particularly grimy, you can try a more potent cleaning solution. A mixture of baking soda and water can work wonders. Create a paste with baking soda and a little water and apply it to the greasy areas. Let it sit for a while, then scrub with your brush. Another effective method is to use a solution of white vinegar and water. The acidity of the vinegar helps to break down grease. Mix equal parts white vinegar and hot water in your sink or basin and soak the filter. For really tough jobs, some people swear by using a mild degreaser designed for kitchen appliances. Always follow the manufacturer's instructions if you opt for a commercial cleaner and ensure good ventilation.
Pro Tip: For extra sparkle, after scrubbing, you can rinse the filter under hot running water. The heat will help to melt away any remaining stubborn bits of grease.
Once you've scrubbed and rinsed, it's time for the drying phase. This is important to prevent rust and ensure your filter is ready to go back into the hood. The best way to dry is to let it air dry completely. You can place it on a drying rack or lean it against something in a well-ventilated area. If you're in a hurry, you can gently pat it dry with a clean towel, but ensure it's thoroughly dry before reinstallation.
Putting it all back together
Once your metal mesh filter is sparkling clean and completely dry, it's time to put it back in its rightful place. Carefully slide it back into the cooker hood, making sure it’s securely in place. You might even notice that your cooker hood seems quieter and more efficient now. That's the power of a clean filter!
How often should you do this? It really depends on how often you cook and what you cook. If you're a frequent fryer or griller, you might need to clean your filters every 2-4 weeks. For less intensive cooking, once a month is a good general guideline. Regular cleaning will prevent excessive buildup, making each cleaning session easier and quicker. Consider it a small investment of time for a cleaner, safer, and more enjoyable kitchen environment. So there you have it – a clean and gleaming metal mesh cooker hood filter, ready to tackle whatever delicious aromas your culinary adventures throw its way!