
How To Clean Burn Marks From Stainless Steel
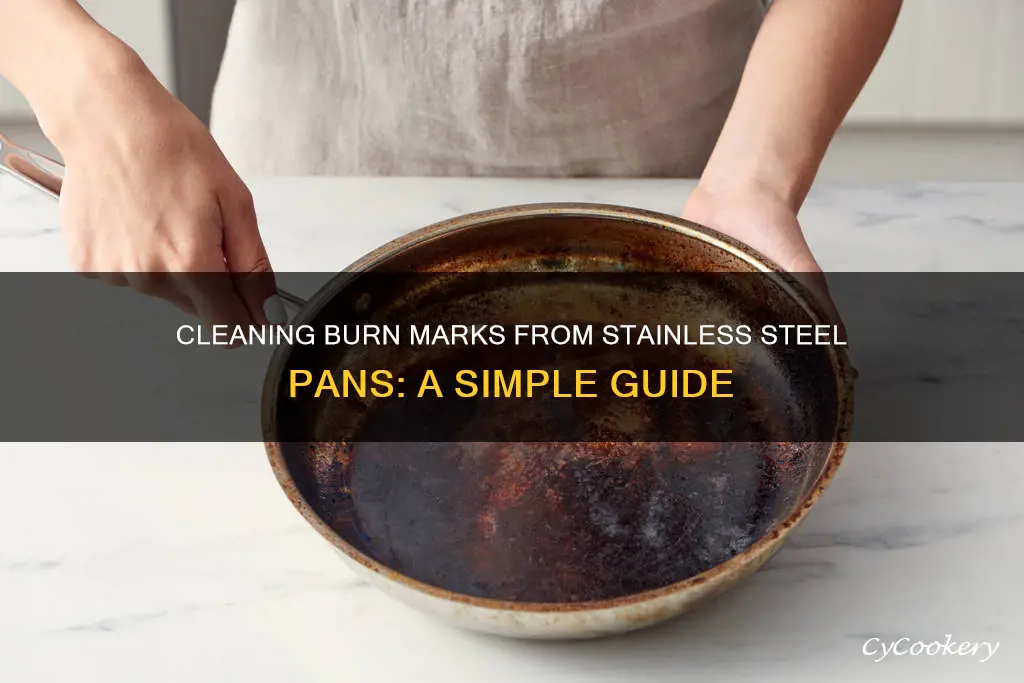
So, confession time. I’m a bit of a kitchen disaster. Not like, “set the whole place on fire” disaster, thankfully. More like, “accidentally scorched my favorite saucepan to an unrecognizable state” disaster. You know, the kind where you stare at the blackened abyss and wonder if it’s now a modern art installation or just…ruined. That happened last week, during what I thought was going to be a serene Sunday morning pancake session. Turns out, my attention span and a simmering pan of butter are not a good combination. The smell of burnt sugar, a scent I usually associate with toffee and childhood dreams, quickly transformed into the acrid stench of my own culinary ineptitude.
The aftermath was…grim. My once gleaming stainless steel saucepan looked like it had survived a small volcanic eruption. It was coated in this stubborn, black, carbonized gunk that just wouldn't budge. I tried scraping, I tried scrubbing, I even tried muttering sternly at it, which, in retrospect, was probably less effective than a gentle breeze. I was on the verge of giving up and ordering a new one, mourning the loss of my trusty kitchen companion. But then, a spark of defiance ignited within me! Surely, there had to be a way to rescue this poor, victimized pan. After all, it’s stainless steel, right? It’s supposed to be tough!
And that, my friends, is how I embarked on a slightly obsessive, deeply satisfying quest to discover the secrets of banishing burn marks from stainless steel. And let me tell you, after much trial and error (and a few more near-disasters, but we don’t talk about those), I’ve got some seriously good news. You don't have to live with a permanently scarred stainless steel surface. Your pots, pans, and even that shiny backsplash can be brought back from the brink of blackened despair.
The Science (or lack thereof) Behind the Black Stuff
Before we dive into the nitty-gritty of cleaning, let's have a little chat about why this happens. Stainless steel, despite its name, isn’t completely stain-proof. It's actually an alloy, mostly iron, with chromium added to prevent rust. That chromium forms a thin, invisible layer of oxide on the surface that’s supposed to protect it. Pretty neat, huh?
But, when you overheat food or liquids, especially sugary or starchy stuff, they can caramelize and then carbonize. This burnt-on gunk is basically charcoal. And charcoal, as we know, is incredibly stubborn. It adheres to the steel like a limpet to a rock, and no amount of polite scrubbing is going to dislodge it easily. Think of it as the ultimate kitchen tattoo, one you didn't ask for.
The good news is that even though the stuff is tough, the stainless steel itself is usually pretty resilient. It’s designed to withstand heat, after all! The trick is to find a cleaning agent that’s strong enough to break down the carbonized food without being so harsh that it scratches or damages the steel's protective layer. And that, my friends, is where the magic happens.
The Gentle Giants: Everyday Heroes for Mild Burns
Let's start with the less catastrophic scenarios. Did you just get a few dark spots from a quick boil-over or a minor scorching? You might be surprised at how effective some common household items can be. These are your go-to methods for when the burn is more of a blemish than a bomb crater.
The Baking Soda Brigade
Ah, baking soda. The undisputed champion of gentle abrasives and odor absorbers. It’s like the Swiss Army knife of your pantry. For mild burn marks, this is your first line of defense.
How to do it:

- Make a thick paste of baking soda and water. Think of it like toothpaste, but for your pan.
- Spread this paste generously over the burnt areas. Make sure it’s a good, thick layer.
- Let it sit for at least 30 minutes, or even a couple of hours if you’re feeling patient. The longer it sits, the more time it has to work its magic.
- After it’s had its soak, grab a soft cloth or a non-scratch scrubbing pad (this is crucial – we don't want to add scratches to our problems!) and gently scrub the burnt areas.
- Rinse thoroughly. You might be amazed at how much of that gunk comes off!
Pro-tip: If the paste alone isn’t cutting it, add a few drops of dish soap to the paste. That extra grease-cutting power can sometimes make all the difference. And remember, gentle scrubbing is key. Let the baking soda do the heavy lifting.
Vinegar’s Valiant Voyage
Vinegar, with its acidic properties, is another fantastic household cleaner. It can help break down stubborn residues. Just be prepared for the aroma. It’s a small price to pay for a shiny pan, though, right?
How to do it:
- Pour enough white vinegar into the burnt pan to cover the affected area.
- Gently heat the vinegar on the stovetop over low heat. Don’t let it boil vigorously, just a gentle simmer. You want to warm it up to help loosen the burnt bits.
- Let it simmer for about 10-15 minutes. You might see some of the burnt residue start to lift on its own.
- Carefully pour out the hot vinegar (use oven mitts, please!).
- Let the pan cool slightly, then scrub with a non-scratch sponge or cloth.
- Rinse well.
Side note: If you have a particularly stubborn spot, you can try making a paste of baking soda and vinegar. Be aware, this will fizz like a science experiment! Let it fizz itself out, then apply the paste and scrub. It’s a double whammy of cleaning power!
The Heavy Hitters: When the Burn is Bad
Okay, so you’ve tried the gentle approach, and it’s…well, it’s still burnt. Don’t despair! For those more serious, deeply carbonized disasters, we need to bring out the big guns. These methods are a bit more intense but are still generally safe for stainless steel if used correctly.
Cream of Tartar to the Rescue!
This is a lesser-known gem, but trust me, cream of tartar is a powerhouse for cleaning stainless steel. It’s acidic and acts as a mild abrasive. You can usually find it in the baking aisle.

How to do it:
- Make a paste with cream of tartar and a little bit of water. Again, think toothpaste consistency.
- Apply this paste to the burnt areas.
- Let it sit for at least 30 minutes to an hour.
- Scrub with a non-scratch pad or sponge.
- Rinse thoroughly.
Why it works: Cream of tartar is derived from tartaric acid, which is great at breaking down those tough, burnt-on food particles without being too aggressive on the metal.
The Bar Keepers Friend Bonanza
Now we’re talking! Bar Keepers Friend is the holy grail for many stainless steel enthusiasts. It contains oxalic acid, which is fantastic for removing rust, tarnish, and, you guessed it, burnt-on grime. It comes in powder and liquid form. I personally prefer the powder for tougher jobs, but either will do.
How to do it (powder form):
- Wet the burnt area of your pan.
- Sprinkle a generous amount of Bar Keepers Friend powder onto the wet surface.
- Let it sit for a minute or two (don't let it dry out completely!).
- Use a damp, non-scratch sponge or cloth to gently scrub in a circular motion. You’ll start to see the burnt marks disappear.
- Rinse thoroughly. Repeat if necessary.
Important: Always follow the instructions on the Bar Keepers Friend packaging. And always use a non-scratch sponge. This stuff is effective, so you don't need to go at it with brute force. Gentle, consistent scrubbing is the way to go.
Irony alert: Isn't it a bit funny that a product called "Bar Keepers Friend" is what saves your pans from looking like they’ve been through a bar brawl? I crack myself up.
Lemon Power! (For Lighter Burns)
While not as potent as the others for serious burns, a lemon can work wonders on lighter scorching and can leave your stainless steel smelling wonderfully fresh. It’s the most natural option!
How to do it:
- Cut a lemon in half.
- Rub the cut side of the lemon directly onto the burnt areas. The juice will start to work its magic.
- For tougher spots, you can sprinkle some salt onto the lemon half before rubbing. The salt acts as a gentle abrasive.
- Let the lemon juice sit for about 15-20 minutes.
- Scrub gently with a soft cloth.
- Rinse well.
Bonus: This method is fantastic for removing water spots and general dullness too. It’s a good weekly maintenance trick!
The Nuclear Option: When All Else Fails (Use With Caution!)
Okay, you’ve tried everything. The burns are deep, they’re ancient, they’re mocking you. It’s time to consider the more robust methods. These require a bit more care and attention, but they can often save a pan that seems beyond repair.
Boiling with Water and Dish Soap (The Classic)
This is a tried-and-true method that works surprisingly well for a lot of burnt-on messes. It’s essentially giving your pan a good, hot bath.
How to do it:
- Fill the burnt pan with enough water to cover the burnt area.
- Add a generous squirt of your favorite dish soap.
- Place the pan on the stovetop and bring the water to a boil.
- Let it simmer for 10-15 minutes. You should see the burnt bits start to loosen and float to the surface.
- Carefully pour out the hot water.
- Let the pan cool slightly, then use a non-scratch sponge or scraper to remove the loosened residue.
- Wash as usual.
Pro-tip: If the simmer isn't quite enough, try adding a tablespoon or two of baking soda to the simmering water. It’s like a spa treatment for your pan!
The Power of Oven Cleaner (Last Resort - Seriously!)
I am hesitant to even mention this, because oven cleaner is some serious stuff. It’s designed to break down baked-on grease and grime in ovens, which are incredibly high-heat environments. This is your absolute last resort when nothing else works. Please, please, please be careful and follow all safety precautions.
How to do it:
- Ensure you are in a well-ventilated area. Open windows, turn on the fan. Wear gloves and eye protection.
- Spray a small amount of oven cleaner onto a paper towel, NOT directly onto the stainless steel.
- Gently dab the oven cleaner onto the burnt areas.
- Let it sit for only a few minutes (seriously, 5-10 minutes at most). You do NOT want this to sit for long.
- Wipe away the oven cleaner and loosened residue with a damp cloth.
- Rinse the pan EXTREMELY thoroughly. You want to remove every last trace of oven cleaner.
- Wash the pan multiple times with hot, soapy water.
- Dry immediately to prevent water spots.
Disclaimer: This method carries the most risk. It can potentially damage the finish of your stainless steel if left on too long or used too aggressively. Use at your own risk. I’ve heard success stories, but I’ve also heard of people ruining their pans. So, if you’re going down this road, proceed with extreme caution and a prayer.
Preventing Future Burn Disasters
Now that you’ve (hopefully) rescued your beloved stainless steel cookware, let’s talk about how to avoid this whole mess in the future. Because honestly, who has time for this level of scrubbing?
- Stay Present: The number one cause of burnt food is lack of attention. Keep an eye on your cooking, especially when dealing with high heat or sugary ingredients.
- Lower the Heat: Stainless steel conducts heat very well. Often, you don’t need that burner on high. Medium or medium-low heat is usually sufficient.
- Don't Let Pans Get Too Hot: Preheat your pan properly, but don't let it sit empty on a scorching burner for ages. Add your oil or butter when the pan is warm, not smoking hot.
- Use Enough Fat: A little bit of oil or butter can prevent food from sticking and burning.
- Stir and Scrape: If you’re cooking something prone to sticking, like sauces or stews, give it a good stir periodically. Use a wooden spoon or silicone spatula to gently scrape the bottom.
- Clean Promptly: Don't let food residue sit in your pan for days. A quick wash after use will prevent many future problems.
The Takeaway
So there you have it! A comprehensive guide to tackling those unsightly burn marks on your stainless steel. From the humble baking soda to the more robust Bar Keepers Friend, there’s a solution for almost every level of scorching. Remember, the key is to be patient, use the right tools (especially non-scratch ones!), and to treat your stainless steel with a little respect.
My saucepan is now gleaming again, a testament to the power of a little elbow grease and some clever cleaning hacks. It’s a small victory, but in the grand scheme of kitchen chaos, it feels like a triumph. Now, if you’ll excuse me, I think it’s time for another pancake attempt. This time, with my full, undivided attention. Wish me luck!