How To Clean Silver With Aluminum Foil

Okay, let’s talk about something a little bit magical, and surprisingly simple. You know those gleaming pieces of silver in your life? Your grandma’s ornate tea set, that sentimental locket, or maybe even just your favorite shiny cutlery that’s seen better days? We all have them. And let’s be honest, that tarnish? It’s the ultimate buzzkill for shine. It creeps in, dulling your treasures like a grumpy shadow at a beach party. But what if I told you that the secret to bringing back that sparkle might be hiding in your kitchen drawer, right next to the cling film?
Yep, we’re talking about aluminum foil. The unassuming hero of our kitchens, the workhorse of leftovers, and apparently, a veritable superhero for your tarnished silver. Forget those pricey, chemical-laden silver polishes that smell like a mad scientist’s lab. This method is eco-friendly, super affordable, and honestly, a little bit satisfying to watch work its magic. It’s like a DIY spa day for your precious metals!
The Science (But Make It Fun!) Behind the Sparkle
So, how does this kitchen foil wizardry actually happen? It’s all about a little chemical reaction, a gentle exchange of electrons. When silver tarnishes, it’s forming silver sulfide. Think of it as a little layer of “ick” that settles on the surface. Aluminum foil, when submerged in hot water with a base like baking soda, creates an environment where the sulfur atoms are more attracted to the aluminum than the silver. It’s a bit like a tiny, electrochemical eviction notice for tarnish.
The hot water acts as a conductor, and the baking soda provides the alkalinity needed to kickstart the reaction. Essentially, the sulfur ions detach from the silver and bond with the aluminum. And poof! Your silver is left looking brilliantly bright, while the tarnish migrates to the aluminum foil, leaving it looking… well, less than glamorous. It’s a trade-off we’re all too happy to make!
Gather Your Sparkle Squad: What You’ll Need
Before we dive into the nitty-gritty, let’s assemble our crew. This is not an expedition requiring a Sherpa or specialized gear. It’s more like a cozy afternoon project. You’ll need:

- A non-metallic container: Think glass, ceramic, or a plastic tub. Metal containers can interfere with the reaction, so we’re steering clear of those. Your grandma’s old Pyrex baking dish would be perfect here!
- Aluminum foil: Standard kitchen foil will do the trick. You’ll need enough to line the bottom of your container.
- Baking soda (sodium bicarbonate): This is your catalyst. You can find it in any grocery store.
- Hot water: Not boiling, but good and hot.
- Your tarnished silver items: Whatever needs a little love.
- Tongs or a fork (optional, for handling hot items): Safety first, even in DIY magic!
- A soft cloth: For a final polish.
And that’s it! No fancy gadgets, no mysterious ingredients. Just good old kitchen staples. It’s almost poetic, isn’t it? Using the everyday to restore the extraordinary.
The Step-by-Step Sparkle-Off
Alright, ready to get your hands a little… well, not that dirty, but involved? Here’s the magic formula:

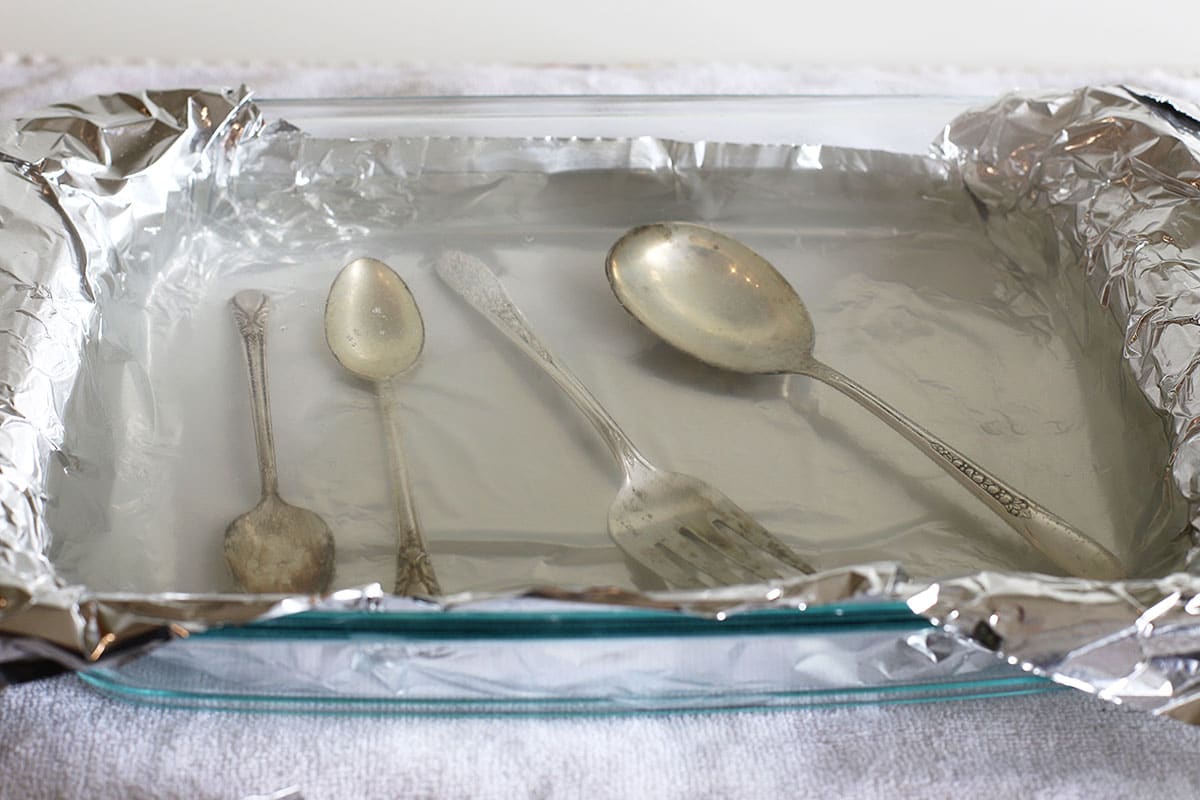
- Line Your Vessel: Take your chosen non-metallic container and generously line the bottom with aluminum foil. Make sure there are no gaps; you want good contact.
- Lay Down the Silver: Arrange your tarnished silver pieces on top of the aluminum foil. Ensure that each piece is touching the foil directly. If you’re cleaning a lot of items, you might need to do this in batches. This isn’t a silver mosh pit; give them a little breathing room.
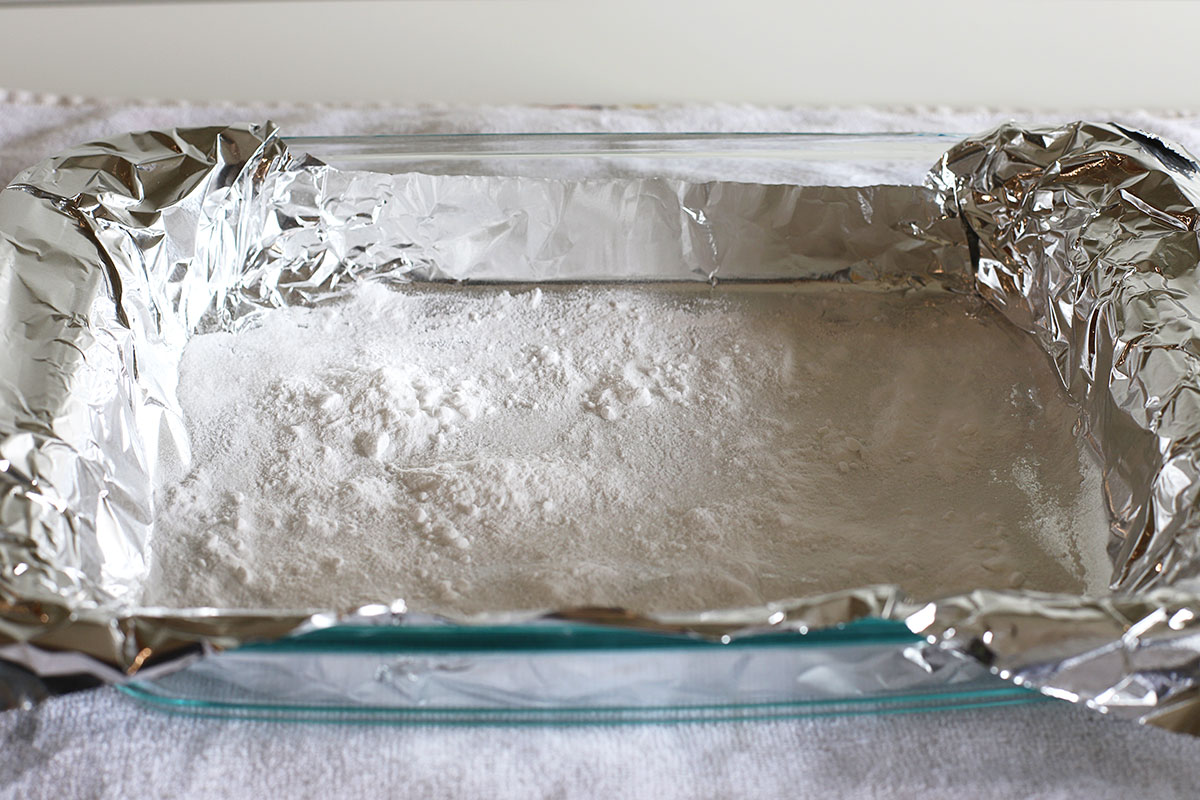
- Sprinkle the Magic Dust: Now, generously sprinkle baking soda over your silver. A good rule of thumb is about a tablespoon of baking soda for every quart of water you plan to use. Don’t be shy; this is where the real magic happens.
- The Hot Bath: Carefully pour the hot water into the container. Pour it slowly and evenly, making sure to cover all the silver items. You’ll start to notice a subtle fizzing and a faint smell – that’s the reaction happening! It’s like a tiny, effervescent jacuzzi for your jewelry.
- The Waiting Game (with a Twist!): Let your silver soak. The time needed can vary depending on the level of tarnish. For lightly tarnished items, 5-10 minutes might be enough. For more heavily tarnished pieces, you might need 30 minutes to an hour. You can gently agitate the water occasionally or even flip the items (carefully!) to ensure even cleaning.
- The Reveal and Rinse: Once you’re happy with the shine, carefully remove the silver items from the bath using tongs or a fork. Rinse them thoroughly under cool, running water. This step is crucial to remove any residual baking soda.
- The Final Polish: Gently dry your silver with a soft, lint-free cloth. A quick buff will bring out that incredible, mirror-like shine. You’ll be amazed at how much brighter and more brilliant your pieces look.
It’s almost like watching a time-lapse video of your silver being reborn! And the best part? The aluminum foil will now be looking pretty grim, a testament to its good deed. You can simply rinse it out, or just wrap it up and toss it. Out of sight, out of mind, but definitely not out of our gratitude!
Pro Tips for Peak Sparkle
While this method is pretty foolproof, a few little tweaks can make your sparkle session even more successful. Think of these as the “insider secrets” to an even more dazzling outcome:
- Don’t Overcrowd the Tub: If you’re cleaning multiple items, especially intricate ones, give them space. Overcrowding can lead to uneven cleaning and a less-than-stellar result.
- Check Your Silver’s History: This method is generally safe for most sterling silver and silver-plated items. However, if your silver has any gemstones, pearls, or oxidized/patinated finishes (that dark, intentionally aged look), this method might not be suitable. The reaction can sometimes affect these delicate elements. Always do a patch test on an inconspicuous area if you’re unsure. Think of it like a skincare routine; you wouldn't use a harsh exfoliant on your most sensitive skin, right?
- For Stubborn Spots: If you have particularly stubborn tarnish that doesn’t come off entirely in the bath, you can use a soft toothbrush with a paste of baking soda and water to gently scrub those areas after the initial soak.
- The Rinse is Key: Don’t skimp on the rinsing! Any leftover baking soda can leave a cloudy residue. A thorough rinse under cool water is your best friend here.
- Drying Matters: Immediately drying your silver after rinsing prevents water spots, which can be a whole new battle you don’t need. A soft, lint-free cloth is your best bet.
- Frequency of Cleaning: How often should you do this? It really depends on your environment and how often you use your silver. If you notice a dulling, it’s probably time for a sparkle session. Over-cleaning can also wear down plated silver over time, so it’s about finding that happy medium.
A Nod to the Past, A Shine for Today
It’s interesting to think about how these simple, almost domestic practices have been passed down through generations. Before the age of specialized cleaning products, people were using what they had – the power of chemistry lurking in their pantry – to keep their belongings looking beautiful. It connects us to our ancestors, to the resourceful women and men who cared for their homes and possessions with ingenuity.
Imagine a Victorian-era household, the lady of the house meticulously polishing her family’s silver for a dinner party, perhaps using a similar, albeit less scientific, approach. It’s a beautiful echo of domesticity and care. And now, we can tap into that same spirit with just a few minutes and a roll of foil. It’s a small act of preservation, a way of honoring the stories held within these metal objects.
We live in a world of instant gratification and disposable everything. But there’s something deeply satisfying about taking an object that’s lost its luster and bringing it back to life with our own hands. It’s a tangible reminder that beauty can be restored, that even something tarnished can shine again.
Connecting the Sparkle to Your Everyday
This whole aluminum foil silver-cleaning trick is more than just a cleaning hack, isn’t it? It’s a little metaphor for life. Sometimes, we all get a bit tarnished. Life throws its challenges, its stresses, its… well, its tarnish, at us. We might feel dull, less vibrant, like our best sparkle is hidden away.
And just like our silver, we might need a little bit of a gentle process to bring back our shine. Maybe it’s not hot water and baking soda, but it could be a quiet morning with a cup of tea, a walk in nature, a heart-to-heart with a friend, or indulging in a hobby that brings you joy. It’s about recognizing that a little bit of focused, gentle care can make a world of difference.
So, the next time you see your silver looking a bit glum, remember this simple trick. And perhaps, let it be a gentle nudge to also consider what your personal “sparkle session” might be. Because just like your favorite silver spoon, you deserve to shine brightly, every single day. Embrace the process, enjoy the reveal, and let your inner brilliance gleam!