
How To Cut Glass Tube Without A Glass Cutter
Ever found yourself staring at a glass tube, maybe a cool old fluorescent bulb you want to repurpose, or perhaps a science experiment gone slightly awry, and thought, "How on Earth am I supposed to cut this without one of those fancy glass cutters?" It's a common little pickle, isn't it? You might be tempted to just grab a saw or a hammer, but let's be honest, that sounds like a recipe for a glitter bomb of broken glass and a trip to the ER. So, what's a curious soul to do when the right tool is nowhere in sight?
Don't fret! It turns out that when it comes to glass tubing, a little bit of science, a dash of patience, and some everyday household items can get the job done surprisingly well. It’s almost like a magic trick, but instead of rabbits and top hats, we’re dealing with silica and controlled breakage. Pretty neat, huh?
The secret, my friends, lies in something called a thermal shock. Sounds intense, right? Like your glass tube is going to have a really bad day. But in reality, it's just about creating a rapid, localized temperature difference. Think about how a hot pan can crack a cold glass, or how quickly a frozen water bottle can burst. It’s that sudden expansion or contraction that does the work.
The Hot String Method: A Classic for a Reason
One of the most popular and effective ways to cut glass tubing without a dedicated cutter involves a simple piece of string and some heat. Yep, just string! It’s a technique that’s been around for ages, proving that sometimes, the simplest solutions are the most ingenious.
So, how does this magic string work its wonders? It’s all about controlled heating and then a swift, cooling shock. Imagine you’re preparing for a very gentle, very precise little explosion. We're aiming for a clean break, not a shrapnel situation.
First things first: gather your supplies. You’ll need your glass tube, of course. Then, grab yourself a piece of cotton string. About a foot or so should be plenty. You also need something to light it – a lighter or a match will do nicely. And finally, the other half of the thermal shock equation: something cold. Ice water is your best friend here. Really cold water, so it makes a nice, frosty little bath for your tube.
Let's Get This Party Started!
The process is actually quite straightforward, and frankly, a little bit thrilling. You want to create a nice, even line where you intend to cut. Think of it like drawing a dotted line on the glass, but instead of a pen, we're using heat to make our mark.
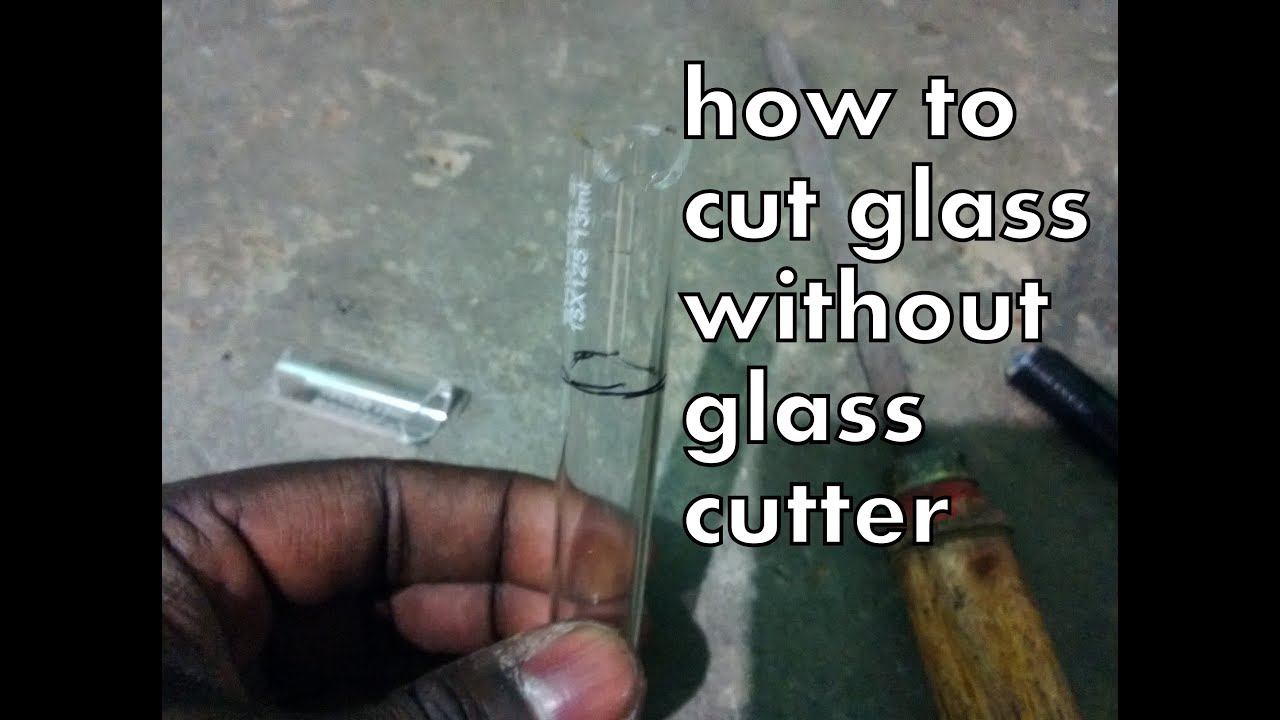
Wrap the cotton string around the glass tube where you want the cut to be. Make sure it's snug and sits flush against the glass. You might want to wrap it around a few times to create a good, concentrated line of heat. Think of it as giving the glass a little warm hug, but only in one specific spot.
Now for the exciting part! Carefully light one end of the string. Let it burn for a bit, allowing the flame to heat up the glass evenly along that line. You’ll see the string start to char and the glass get quite warm. Keep rotating the tube so the heat is distributed as evenly as possible around the circumference. This is crucial for a clean break. You’re essentially creating a weakness, a point where the glass is primed to crack under stress.

Once the string has burned for a good 20-30 seconds, or until you see a nice, even black char mark all the way around, it’s time for the dramatic finale. Quickly plunge the heated section of the glass tube into your ice-cold water. Or, if you prefer, you can quickly pour the cold water over that section. The sudden temperature change – that rapid cooling – is what triggers the break. The glass, having just expanded from the heat, will contract rapidly where it was heated, and the stress will cause it to snap cleanly along the line you created.
And voilà! If you’ve done it right, you should have a nice, clean break. It’s like the glass just decided, "Okay, I’m done here," and politely separated. Pretty cool, right? It’s a satisfying little sound and a very visual demonstration of physics in action.
Tips for a Flawless Fracture (or as close as you can get!)
Now, like any good DIY project, this isn't always 100% foolproof on the first try. But with a few pointers, you can significantly increase your chances of success.
First, patience is key. Don't rush the heating process. Let that string do its job and heat the glass evenly. If you have hot spots or cold spots, your break might be jagged or uneven. Imagine trying to snap a pretzel – you want a clean snap, not a crumbling mess!

Second, use the right kind of string. Cotton is best because it burns and chars effectively, transferring heat well. Synthetic materials might melt or drip in a way that doesn’t create the consistent heat you need.
Third, practice makes perfect. If you have a few pieces of scrap glass tubing lying around, try it out a few times before you tackle that precious piece you really want to salvage. It’s like learning to ride a bike – you might wobble a bit at first, but soon you’ll be gliding.
Fourth, safety first, always! Even though we're not using a glass cutter, we're still dealing with glass. Wear safety glasses. Seriously, this is non-negotiable. And work on a surface that's easy to clean up, in case of any minor mishaps. A little bit of preparedness goes a long way in keeping things fun and accident-free.

Finally, consider the type of glass. Thicker glass tubes might require a bit more heat or a longer heating time. Very thin or delicate glass might be more prone to breaking unevenly. So, gauge the thickness and adjust your approach accordingly. It’s like choosing the right tool for the job, even if that "tool" is just a piece of string and some water.
Why Bother?
So, why go through all this fuss? Well, besides the sheer satisfaction of mastering a clever technique, there are practical reasons. Maybe you're a hobbyist who needs a custom-sized tube for a project. Perhaps you're a student working on a science fair experiment and you need to modify a piece of lab equipment. Or maybe, just maybe, you’ve got a brilliant idea for a DIY lamp or a unique piece of home decor that involves a perfectly cut glass tube.
It’s also about being resourceful and understanding how things work. Instead of being limited by what you have, you learn to improvise. It’s a little bit of DIY ingenuity, a touch of scientific principle, and a whole lot of "aha!" moments. And in a world where we often rely on specialized tools for everything, there’s a special kind of joy in discovering that you can achieve great results with simple, everyday items.
So, the next time you’re faced with a glass tube and a distinct lack of a glass cutter, don't despair. Grab that string, find your ice water, and get ready to perform a little bit of controlled breakage. You might just surprise yourself with what you can create!