How To Drill In Aluminum
Ever found yourself staring at a shiny aluminum object, perhaps a wobbly chair leg, a picture frame that’s seen better days, or maybe you're channeling your inner DIY guru and want to build something awesome from scratch? And then, the inevitable thought pops into your head: “I need to drill a hole in this aluminum.” It sounds simple enough, right? Like buttering toast, but with metal. Well, it’s almost that simple, and that’s what we’re here to chat about today!
Think of aluminum as the friendly neighborhood metal. It’s not as tough and grumpy as steel, but it’s definitely more capable than, say, a piece of plastic that might snap if you look at it funny. It’s light, it doesn’t rust (hooray for less maintenance!), and it’s super common. From your soda can (though we’re not drilling those, probably!) to those sleek kitchen appliances and even parts of your car, aluminum is everywhere.
So, why should you, dear reader, care about drilling in aluminum? Because it opens up a world of possibilities! Imagine finally fixing that wobbly patio furniture so you can enjoy your evening tea without a mini earthquake happening under your mug. Or perhaps you want to hang a new shelf to display your quirky collection of ceramic cats. Maybe you’re building a custom project, like a mini greenhouse for your herbs or a sleek, modern birdhouse that your feathered friends will rave about.
The beauty of aluminum is that it’s quite forgiving. It’s not going to fight back aggressively like some of its metal cousins. It’s more like a polite handshake than a wrestling match. This makes it a fantastic material for beginners dipping their toes into the world of drilling. You can get satisfying results without needing a degree in engineering or a set of industrial-grade tools.
Gathering Your Trusty Sidekicks (Tools and Materials)
Before we dive in, let’s make sure you have your trusty crew assembled. You wouldn’t go on an adventure without your map and compass, right? Same here.
- Your Drill: A standard cordless drill will do the trick perfectly. No need for a fancy, industrial-strength monster.
- Drill Bits: This is where the magic happens! For aluminum, you’ll want sharp drill bits. Think of them as tiny, eager explorers. High-speed steel (HSS) bits are your best bet. They’re like the reliable explorers who always get the job done.
- Center Punch: This little guy is like a tiny, helpful finger that makes a small indentation. It stops your drill bit from skittering around like a confused ant on a polished floor.
- Safety Glasses: Absolutely non-negotiable! Metal shavings can fly, and nobody wants a tiny metallic intruder in their eye. Think of them as your personal force field.
- Gloves: Optional, but can help with grip and keep your hands a bit cleaner.
- Lubricant/Cutting Fluid: This is your secret weapon for smooth sailing. A little bit of oil or specific cutting fluid will keep your drill bit from overheating and make the aluminum slice like a hot knife through butter.
- Clamps: If you’re drilling something thin or unstable, clamps are like helping hands that keep your project from doing a jig while you’re working.
The Grand Plan: Step-by-Step to Success!
Alright, let’s get down to business. It’s not rocket science, but a little preparation goes a long way. Imagine you’re setting up for a perfect picnic – you wouldn’t just plop down anywhere, would you?

Step 1: Mark Your Spot!
Decide exactly where you want your hole. Grab a marker or a pencil and make a clear mark. This is your target. Then, grab your center punch. Give it a firm tap with a hammer right on your mark. You’re not trying to go through the aluminum here, just make a small, neat divot. This is like drawing a tiny bullseye for your drill bit.
Step 2: Safety First, Always!
Put on those safety glasses. Seriously. No exceptions. It’s a small step that makes a huge difference. Imagine you’re a superhero preparing for a mission – the cape is your safety gear!
Step 3: Get Your Lubricant Ready
If you’re using cutting fluid or oil, have it handy. A tiny drop on the spot you’re about to drill is all you need. This stuff is like a lubricant for life, making everything smoother and cooler. It prevents the aluminum from gumming up your drill bit and helps it slide through more easily. Think of it as giving your drill bit a refreshing drink before a long journey.

Step 4: The Gentle Approach: Choosing the Right Speed
This is a common pitfall. People often think “faster is better” with drills. Not so much with aluminum! You want to use a medium to slow speed. If your drill has speed settings, opt for the lower ones. Too fast, and you’ll generate a lot of heat, which can melt the aluminum and clog your bit. It’s like trying to sprint through a crowded room – you’re likely to stumble.
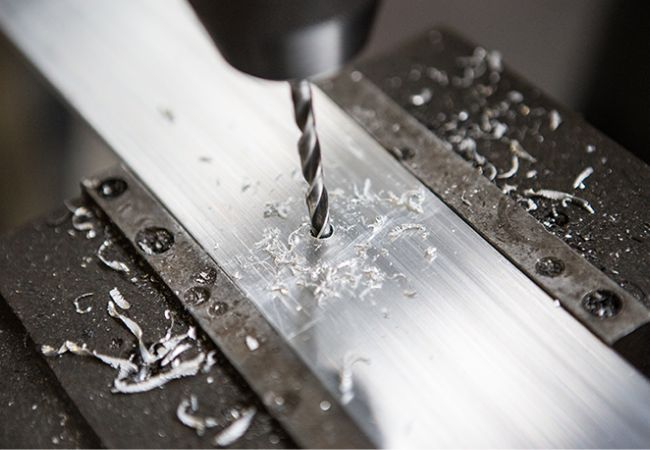
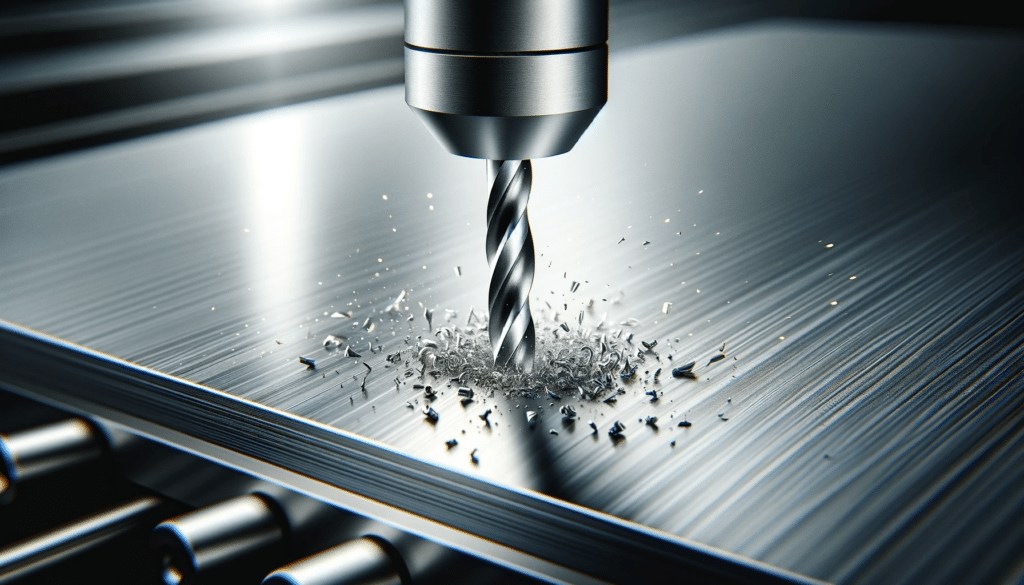
Step 5: Let’s Drill!
Place the tip of your drill bit on the divot you made with the center punch. Start drilling with gentle, steady pressure. Let the drill bit do the work. Don’t force it! If you feel like you’re wrestling with it, ease up. It should feel like you’re guiding it, not overpowering it. Imagine you’re drawing a line with a very sharp pencil – you’re in control, but the pencil does the marking.
As the hole starts to form, you’ll see little shavings of aluminum coming out. These are called chips. If you’re using lubricant, they should be fairly clean. If they’re looking melty or gummy, your speed might be too high, or you might need a bit more lubricant. Periodically, you can pull the drill bit out to clear away the chips and reapply a touch of lubricant. This is like pausing to clear your path on a hike.

Step 6: Finishing Touches
Once you’ve drilled through, gently pull the drill bit out. You’ll have a nice, clean hole! You might want to use a deburring tool or a piece of sandpaper to smooth out any rough edges around the hole. It’s like polishing a gem – a little finishing makes it shine.
A Few Extra Pearls of Wisdom
* Start Small: If you need a larger hole, it’s often best to drill a smaller pilot hole first and then use a larger drill bit. This makes the process easier and more precise. Think of it as making a breadcrumb trail for your bigger drill bit.
* Cool it Down: If you’re drilling a lot of holes or a particularly large one, take breaks to let the aluminum and your drill bit cool down. Overheating is the enemy of a clean aluminum hole.
* The Right Bit for the Job: For really thin aluminum, a bit with a sharper point (a higher point angle) can be beneficial. For thicker stuff, a more standard angle works well.
* Practice Makes Perfect: Don’t be discouraged if your first hole isn’t magazine-perfect. Like learning to ride a bike or bake a cake, practice makes you better. Grab a scrap piece of aluminum and just have a go!
Drilling in aluminum is a genuinely achievable skill that can empower you to tackle a whole host of projects. It’s about being prepared, working smart (not necessarily hard), and taking a few simple precautions. So, the next time you need to drill in aluminum, don’t shy away. Embrace it! You’ve got this. Happy drilling!