
How To Fix Scratches On Stainless Steel Sink

Ah, the stainless steel sink. Our trusty workhorse in the kitchen, where countless culinary adventures unfold. From the frantic morning scramble for cereal bowls to the post-dinner dishwashing marathon, our sinks see it all. They’re the unsung heroes, silently battling grease, grime, and the occasional dropped pan. But let’s be honest, they’re not always the shiny, pristine canvases we’d like them to be. Over time, those little battle scars, the dreaded scratches, start to appear. And suddenly, that gleaming surface looks… well, a bit less gleaming.
Now, before you start sighing dramatically and contemplating a sink replacement (which, trust me, is way more hassle and cash than you need!), let’s chat about those scratches. Think of them like wrinkles on your favorite cozy sweater. They happen, they tell a story, but that doesn't mean the sweater isn't still super comfy and lovable, right? Your sink is the same. It’s earned those marks of service!
So, why should you even bother fixing a few scratches? Well, for starters, a scratch-free sink just feels… nicer. It’s like putting on a freshly ironed shirt versus one that’s been rumpled in a gym bag. Everything just feels a little more put-together, a little more elegant. Plus, those tiny scratches can sometimes become little hangouts for germs or get snagged by sponges, making cleaning a bit trickier. And let’s not forget the aesthetic. Imagine your kitchen looking like a magazine spread – a few well-maintained touches can make a world of difference, turning your everyday workspace into a little slice of culinary heaven.
Don’t worry, this isn't going to be some complicated DIY project that requires a degree in engineering. We’re talking simple, everyday solutions that you can probably tackle with things you already have lurking in your cleaning cupboard or can grab from the local hardware store for a few bucks. Think of it as giving your sink a mini spa treatment. It’s all about gently buffing those imperfections away and bringing back that lovely shine.
The Magic of the Gentle Scrub
The first line of defense against those minor abrasions is usually the simplest: a good old-fashioned scrub. But here’s the trick – you need to go with the grain of the stainless steel. Most sinks have a visible grain, like the wood on your kitchen table. Running your cleaning tool against the grain is like trying to comb tangled hair backwards – it’s just going to make things worse.
So, find that grain! Look closely at your sink. Do you see faint lines running in one direction? Perfect. Grab a soft cloth or a non-abrasive sponge. For everyday cleaning and minor scuffs, a bit of warm water and a mild dish soap is your best friend. Gently wipe in the direction of the grain. It’s like giving your sink a soothing massage. No harsh scrubbing, no aggressive back-and-forth. Just a calm, collected, and directional approach.
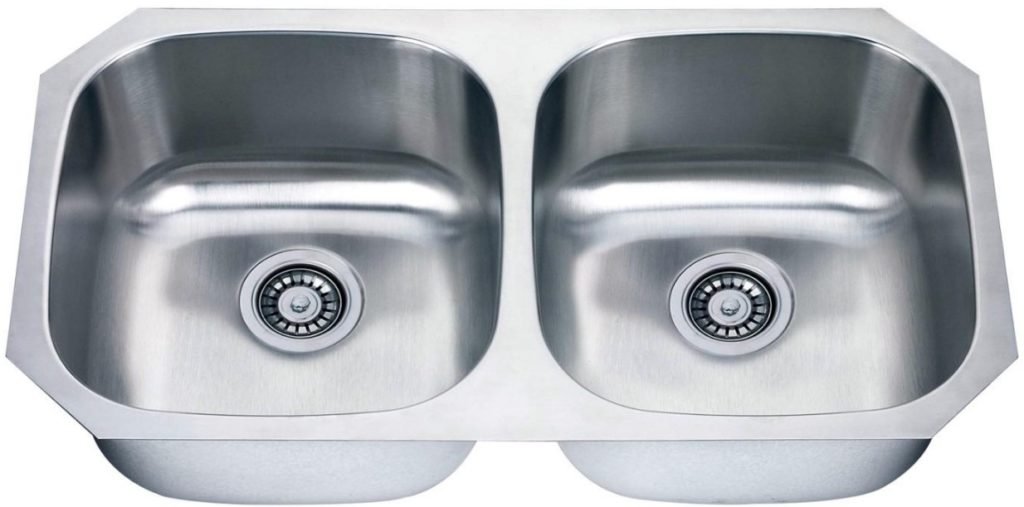
If the soap and water aren’t quite cutting it, you can try a paste made from baking soda and water. Baking soda is like a gentle exfoliator for your sink. Mix it up until it’s the consistency of toothpaste, apply it to the scratched area (again, following the grain!), and let it sit for a few minutes. Then, gently rub it in with your cloth or sponge. Rinse thoroughly and dry. You might be surprised at how much this can buff out those lighter scratches.
Think of baking soda like the tiny little granules in your favorite face scrub. It’s enough to lift away the dullness without being too harsh. And the best part? It’s super affordable and safe to use.
When a Little More Grit is Needed
Sometimes, those scratches are a little deeper, a little more stubborn. They’re the ones that make you wince a little when the light hits them just right. For these, we might need something with a tiny bit more oomph. But and this is a big but – we’re still being gentle.
One of the most effective and surprisingly accessible solutions is using a non-gel toothpaste. Yes, you read that right! The mild abrasives in toothpaste can work wonders on stainless steel. Again, make sure it’s not a gel and ideally, it has a subtle flavor like mint or cinnamon – it’ll make your sink smell nice afterwards!
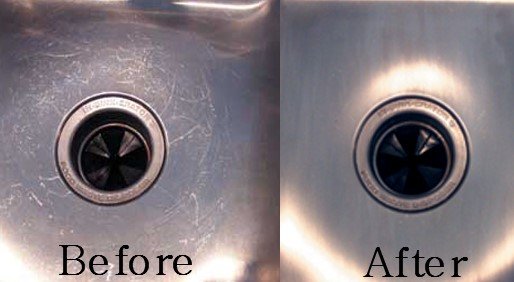
Apply a small dab of toothpaste to a soft cloth. Gently rub it into the scratch, moving in the direction of the grain. You don’t need to press hard; let the toothpaste do the work. You’ll feel a slight resistance as it works its magic. After a minute or two of gentle rubbing, rinse the area thoroughly with water and then dry it completely with a clean, soft cloth.
Imagine you’ve got a tiny snag in your favorite silk scarf. You wouldn’t yank at it, right? You’d carefully try to smooth it out. Toothpaste is that gentle smoothing agent for your sink. It’s a little bit of everyday magic.
The Power of Specialized Cleaners (with Caution!)
If you’ve tried the baking soda and toothpaste and are still seeing those persistent scratches, it might be time to consider a specialized stainless steel cleaner. These are designed specifically for the job and can be very effective. However, it’s crucial to choose wisely and use them according to the product’s instructions.

Look for cleaners that specifically state they are for removing scratches or restoring shine. Always do a patch test first. Find an inconspicuous area of your sink (like the underside of the rim) and apply a small amount of the cleaner. Let it sit for the recommended time, then wipe and rinse. This will show you if it causes any discoloration or unintended effects before you tackle the main event.
When using these cleaners, again, remember the grain! Apply the cleaner to your cloth, not directly to the sink. Gently rub in the direction of the grain. Some cleaners might require a bit of buffing to achieve the desired shine. Think of it like polishing your shoes – a little effort goes a long way to a brilliant finish.
And remember, even these specialized cleaners should be used with a soft cloth. Never, ever use steel wool, abrasive scouring pads, or harsh chemicals like bleach. These are the villains that will cause more scratches and damage your sink’s finish.
The Final Flourish: Protection and Prevention
Once you’ve worked your magic and your sink is looking fabulous again, you’ll want to keep it that way. A little bit of preventative care goes a long way.

The simplest, yet most effective, tip is to dry your sink after each use. Water spots can be a pain, and more importantly, leaving water to sit can sometimes contribute to dullness and make minor scratches more noticeable. Grab that soft cloth you’ve been using for cleaning and give your sink a quick buff. It’s like putting a protective shield on it.
You can also use a stainless steel polish. These are like a moisturizer for your sink. They add a protective layer and enhance the shine. Apply a small amount to a clean cloth and buff it into the sink, again, following the grain. It’s like giving your sink a lovely, protective coating that repels water and fingerprints.
And a little tip from my own kitchen: try to avoid dragging heavy pots and pans across the sink bottom. Lift them! It’s a small change in habit that can prevent a lot of future scratching. Think of your sink as a delicate piece of jewelry – you wouldn’t slide your diamond necklace across a rough surface, would you?
So there you have it! Fixing scratches on your stainless steel sink isn't a monumental task. It’s about understanding your sink, using the right tools (which are probably already in your home!), and treating it with a little bit of kindness. A little effort, a little patience, and your trusty kitchen companion will be gleaming and ready for its next culinary adventure. Happy scrubbing!