
How To Get Rid Of Stainless Steel Scratches

So, there I was, feeling like a culinary superhero. My brand new, gleaming stainless steel frying pan, the one I’d practically taken out a second mortgage for, was finally in my possession. I envisioned perfectly seared scallops, flawless omelets, and general kitchen glory. Then, it happened. A rogue potato. Just one. It slipped from my fingers as I was washing it, a tiny, innocent-looking spud, and BAM! A faint, yet undeniably present, scratch right across the bottom. My heart sank. All that shine, all that potential… marred by a tuber.
Sound familiar? Yeah, I thought so. Stainless steel, bless its shiny heart, is supposed to be durable, right? It’s the go-to for kitchens everywhere. But then you get that little ding or that scrape, and suddenly your beautiful appliance looks… well, less than beautiful. It’s enough to make you want to hide it under a tea towel forever. But fear not, fellow shiny-surface enthusiasts! Today, we’re diving deep into the surprisingly simple world of banishing those pesky stainless steel scratches.
It’s funny, isn’t it? We buy these things for their resilience, and then the slightest bump sends us into a panic. Like that time I accidentally nudged my stainless steel fridge door with the handle of a pizza peel. I swear, the sound it made was a tiny scream. I spent the next hour peering at it under every conceivable light source, convinced I’d ruined the whole kitchen aesthetic. Thankfully, I was being a bit dramatic (aren't we all?).
The Dreaded Scratch: Why Does It Even Happen?
Before we get into the magical fixes, let’s talk about why this happens. Stainless steel, while tough, isn't invincible. It’s a metal alloy, usually containing chromium, which gives it its rust-resistant and shiny properties. However, the surface can still be abraded by harder materials or even by rough scrubbing. Think about it: that little grain of sand you missed in the sink, the abrasive side of a sponge, or even a metal utensil used with too much force. These are the usual culprits.
And let’s not forget the direction of the grain! Most stainless steel has a directional polish, and if you scrub against it, you’re practically asking for trouble. It’s like giving your pan a really aggressive back massage in the wrong direction. Not a good time for anyone involved.
So, the next time you see a scratch, try not to beat yourself up. It’s an occupational hazard of having fabulous stainless steel in your life. The good news is, most of the time, these scratches are superficial and totally fixable. Hallelujah!
Minor Scratches: The Everyday Annoyances
Okay, so you’ve got those faint, hairline scratches. The ones that only appear when the light hits them just so, and you’re suddenly hyper-aware of their existence. These are usually the easiest to tackle. And the best part? You probably already have most of what you need in your kitchen cupboards.
The Power of Baking Soda Paste
Ah, baking soda. My kitchen savior. This stuff is a mild abrasive and a gentle cleaner all rolled into one. It’s like the Swiss Army knife of household cleaning. For minor scratches, a simple baking soda paste is your best friend. Just mix some baking soda with a little bit of water until you have a thick paste. Think peanut butter consistency, but you know, less delicious.
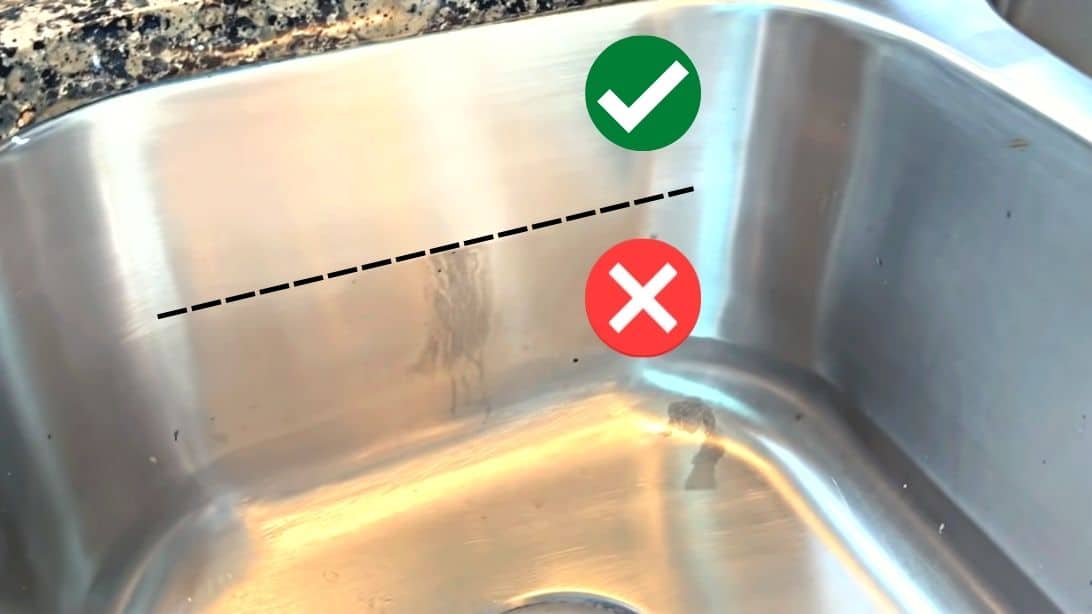
Now, grab a soft cloth or a non-abrasive sponge. Dip it into the paste and gently rub it over the scratch. Remember that grain we talked about? Always rub in the direction of the grain. This is crucial. Imagine you’re gently buffing it, not scrubbing it into oblivion. Work in small circles or short strokes, following the grain.
After you’ve applied the paste for a few minutes, rinse the area with water and dry it with a clean, soft cloth. You might not see a magical disappearance right away, but after a few treatments, those light scratches should become significantly less noticeable, or even disappear altogether. Persistence is key here, my friend!
Toothpaste to the Rescue?
Yes, you read that right! Non-gel, plain white toothpaste can also work wonders on minor scratches. Why? Because it often contains mild abrasives, similar to baking soda. Squeeze a small amount onto a soft cloth and gently rub it into the scratch, again, following the grain. Rinse and dry. It’s a bit of a DIY hack, but I’ve tried it myself, and it can be surprisingly effective for those super fine lines.
Just make sure it’s not the fancy gel kind, okay? We’re going for a gentle polish, not a minty-fresh mouthwash situation on your cookware.
Vinegar for Shine and Mild Abrasion
White vinegar is another kitchen staple that can lend a hand. While it’s more known for its degreasing and disinfecting properties, its mild acidity can also help to buff out minor imperfections. You can use it in a similar way to baking soda: create a paste with a little flour or baking soda, or even just use a diluted solution on a cloth to wipe down the scratched area. Always follow the grain. The shine it leaves behind is an added bonus, making your whole piece look refreshed.

I often use a diluted vinegar spray to clean my stainless steel sink, and I’ve noticed it does seem to make the metal gleam a bit more. So, it stands to reason it could help with minor scratches too.
Medium Scratches: A Little More Effort Required
So, you’ve got a scratch that’s a bit deeper. It catches your fingernail, and you know those baking soda tricks might not cut it. Don't panic yet! We can still save your beloved stainless steel. This is where things get a little more involved, but it’s still totally manageable.
The Magic of Polishing Compounds
This is where you might need to venture out and buy a specific stainless steel polish or cleaner. Brands like Bar Keepers Friend (a cult favorite for a reason!) or specific stainless steel scratch removal kits are your best bet. These products are formulated to be more abrasive than baking soda, but still gentle enough not to cause further damage when used correctly.
Always, and I cannot stress this enough, read the instructions on the product packaging. They’re there for a reason! Generally, you’ll apply a small amount to a soft cloth and rub it into the scratch, working in the direction of the grain. You might need to apply a little more pressure than with baking soda, but avoid going crazy. It’s a marathon, not a sprint. Repeat as needed, cleaning and drying thoroughly between applications.
Bar Keepers Friend, in particular, is a revelation. I used it on a scratched stainless steel kettle, and the difference was astonishing. It’s like it gently sanded down the edges of the scratch, making it practically invisible. Magic.

The Grain-Following Rule: Your New Mantra
Seriously, if you remember anything from this whole article, let it be this: always follow the grain. Stainless steel has a visible grain, usually running in one direction. Scrubbing against the grain will create more scratches and make the problem worse. Think of it like sanding wood; you wouldn’t sand against the grain, would you? Same principle applies here. Take a good look at your item and identify the direction of the polish before you do anything.
Deeper Scratches: The Last Resort
Okay, we’re entering more serious territory now. If you have a deep scratch that you can easily feel with your fingernail, or one that’s significantly impacting the look and function of your item, it's going to be tougher. For very deep gouges, especially on cookware, it might be impossible to completely remove the scratch without affecting the integrity of the metal. But! We can often make it much, much less noticeable.
Fine-Grit Sandpaper: Handle With Extreme Caution!
This is the nuclear option, folks. Use this only as a last resort and with the utmost care. You’ll want very fine-grit sandpaper, like 600-grit or higher. The goal here is to very gently sand down the edges of the scratch to make them less prominent. You’re not trying to remove the scratch entirely, but to blend it in with the surrounding surface.
Start by wetting the sandpaper. Then, using extremely light pressure, sand only in the direction of the grain. Work in short, controlled strokes. You want to be able to see what you’re doing, so don’t just go wild. Periodically wipe the area clean to assess your progress.
After you've "sanded" the scratch, you'll likely need to follow up with a stainless steel polish or a cleaner like Bar Keepers Friend to restore the shine and blend the area. This method requires patience and a steady hand. If you’re not comfortable with it, it might be better to accept the scratch or consult a professional.
I tried this on a very stubborn scratch on the side of my dishwasher, and while it didn’t vanish, it became far less of an eyesore. It definitely requires a “less is more” approach.
Prevention is Better Than Cure (Seriously!)
Now that we’ve armed you with the knowledge to tackle those scratches, let’s talk about preventing them in the first place. Because, honestly, wouldn’t it be great to just not have them?
- Use the Right Utensils: Avoid using metal utensils directly on your stainless steel cookware. Opt for wooden spoons, silicone spatulas, or nylon utensils. They’re much gentler on the surface.
- Gentle Cleaning: Ditch the steel wool and abrasive scrub brushes. Stick to soft cloths, non-abrasive sponges, and mild dish soap.
- Rinse Thoroughly: Make sure there are no lingering food particles or grit before you start cleaning.
- Dry Immediately: After washing, dry your stainless steel items immediately with a soft cloth. This not only prevents water spots but also gives you a chance to inspect for any new, tiny imperfections.
- Protect During Storage: If you’re stacking pots and pans, consider placing a protective cloth or a pan protector between them to prevent scratches.
- Be Mindful of the Grain: This bears repeating. When cleaning or polishing, always go with the flow, not against it!
It’s funny, the more I learn about caring for stainless steel, the more I realize it’s a bit like caring for a pet. You need to be gentle, consistent, and aware of its needs. And when it’s happy and gleaming, it just makes everything look better, doesn’t it?
The Final Polish
So there you have it. From the mild annoyance of a hairline scratch to the more significant challenge of a deeper gouge, there are ways to bring back the shine to your stainless steel. Remember to start with the gentlest method and work your way up if needed. And always, always remember the grain!
It’s not about achieving a factory-perfect finish every time. Sometimes, it’s about making something you love look good again, bringing a little bit of that initial joy back into your kitchen. And hey, if all else fails, you can always embrace the rustic charm. Just tell everyone it’s a designer scratch. They’ll never know.
Happy polishing!