
How To Hang Drywall On Metal Studs

So, you’ve decided to embark on a DIY adventure, and you’ve set your sights on tackling drywall on metal studs. Maybe you're channeling your inner Chip Gaines, or perhaps you're just looking to add a little more personality (and a lot less exposed insulation) to that basement renovation or that cool new loft space you’re creating. Whatever your motivation, hanging drywall on metal studs is definitely a doable project. Think of it as giving your space a fresh, smooth skin, ready for whatever artistic vision you have in mind. And while it might sound a bit intimidating at first, with a few key tips and a laid-back attitude, you’ll be a drywall-hanging pro in no time. Let’s dive in!
First things first, let's talk about those metal studs. Unlike their traditional wood counterparts, metal studs are lighter, straighter, and often more resistant to pests and moisture – bonus points for the eco-conscious DIYer! They have a sleek, industrial vibe that can be really appealing, but they also present a slightly different challenge when it comes to attaching your drywall. The key difference? You can't just hammer a nail into metal and expect it to hold firm. Nope, we’re talking screws here, my friends. Specifically, drywall screws designed for metal studs.
Gathering Your Arsenal: What You'll Need
Before you even think about unfurling that sheet of drywall, let's get our toolkit in order. Think of this as assembling your superhero squad for the day. You’ll want to have everything at your fingertips so you can move seamlessly from one step to the next. This isn't a race, but efficiency is definitely your friend.
The Essential Gear
- Drywall Sheets: Obviously! The standard 4x8 sheets are your go-to. For ceilings, you might consider longer sheets to minimize seams, but for walls, the standard size is usually manageable for a solo mission.
- Drywall Screws (Self-Tapping for Metal): This is crucial. You need screws that are specifically designed to bite into metal. They'll usually have a sharp point and a self-tapping thread. Don't skimp on quality here; good screws make all the difference.
- Drywall T-Square or Straight Edge: For those perfectly straight cuts. Imagine trying to draw a straight line without a ruler – not fun!
- Utility Knife with Extra Blades: Your trusty sidekick for scoring and cutting. Keep those blades sharp for clean cuts. A dull blade is like trying to cut steak with a butter knife – frustrating and ineffective.
- Measuring Tape: Accuracy is key. Measure twice, cut once, as the old adage goes.
- Pencil: For marking your cuts and screw locations.
- Safety Glasses: Protect those peepers! Metal shavings and drywall dust can be a nuisance, and nobody wants a little debris in their eye.
- Dust Mask: Drywall dust can get everywhere. A mask will make your life a lot more comfortable, especially during the cutting and sanding phases.
- Cordless Drill/Driver: Your main weapon. Make sure it’s fully charged!
- Drywall Screw Gun (Optional but Recommended): If you're doing a large area, a drywall screw gun is a game-changer. It has a depth-setting nose that ensures you don't over-drive your screws, which is a common mistake.
- Step Ladder or Sturdy Platform: For reaching those higher spots. Safety first, always.
- Work Gloves: To protect your hands from any rough edges.
- A Buddy (Optional but Highly Recommended): Seriously, two heads (and four hands) are better than one, especially when maneuvering those large sheets. Think of it as your own personal construction crew, like the dynamic duos we see in movies.
Prep Work: The Foundation of Success
Before you can start attaching drywall, you need to make sure your metal stud framework is ready. This is where you lay the groundwork, literally. Think of it like preparing a canvas before you start painting a masterpiece. A smooth, well-planned surface will lead to a much better end result.
Ensuring a Solid Frame
Take a moment to inspect your metal studs. Are they plumb and level? Are they securely fastened? Any kinks or bends can create an uneven surface, making your drywall installation a real headache. If you notice any issues, now’s the time to address them. You want a nice, flat plane to work with.
Also, check for any exposed sharp edges on the metal studs. Sometimes, especially if they’ve been cut, there can be burrs. A quick pass with a metal file can smooth these out. It’s a small step, but it can prevent little nicks and cuts on your drywall sheets, and more importantly, on your hands.

Measuring and Cutting: Precision is Key
Now for the fun part – transforming those giant sheets into pieces that fit perfectly. This is where your measuring tape and pencil become your best friends. Don't rush this. A little extra time spent measuring and marking will save you a lot of frustration later.
The Art of the Cut
Lay your drywall sheet flat on a clean, sturdy surface. Use your measuring tape to mark the dimensions you need. For straight cuts, it’s usually easiest to place your T-square or straight edge along your marked line.
Now, take your utility knife and score along the line. Apply firm, consistent pressure. You’re not trying to cut all the way through the paper on the back, just the front paper and the gypsum core. A single, strong pass is often better than multiple shallow ones. Once scored, you can usually snap the board along the line by applying pressure. Then, flip the board over and cut through the back paper with your utility knife.
For more complex cuts, like around windows or doors, you might need a jigsaw or a drywall saw. Just remember to take your time and follow your marked lines carefully. Think of yourself as an architect, meticulously planning each piece to fit the grand design.

Hanging Time: The Moment of Truth
Alright, the moment you’ve been waiting for! Time to get those sheets up on the wall. This is where your superhero muscles (or your buddy’s) come into play.
Getting Those Sheets in Place
Start with a corner. Lift the drywall sheet into place, making sure it’s snug against the ceiling and the adjacent wall. For a beginner, it’s often easiest to start at the bottom and work your way up, or vice versa, depending on your setup. If you’re working solo, you might use a drywall jack or prop the board up with scraps of wood to hold it in place while you start screwing.
Once the sheet is in position, start driving your screws. You’ll want to place screws approximately every 12 to 16 inches along the studs. Don’t be afraid to use plenty of screws; they’re what’s holding everything together! The key here is to drive the screws just deep enough so that the head is slightly below the surface of the drywall paper, creating a small dimple. You don’t want to rip through the paper or break the gypsum core. If you’re using a standard drill, you might need to be a bit more mindful of depth, while a drywall screw gun with its depth-setting nose is fantastic for consistency.
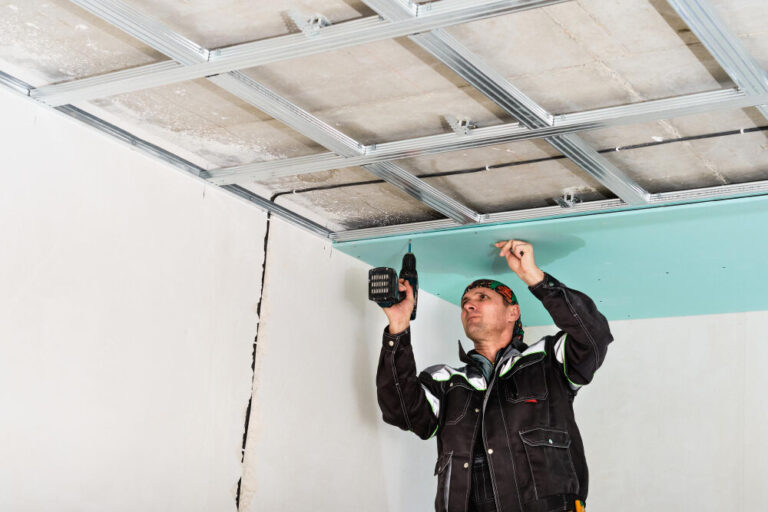
When you get to the end of a sheet, make sure the edge of the next sheet butts up nicely against it. The goal is to minimize gaps. It’s kind of like putting together a giant jigsaw puzzle, but with way more dust and a much more satisfying, solid result.
Tips for a Smoother Ride
- Work in sections: Don’t try to hang an entire wall at once. Focus on getting one sheet perfectly placed and screwed before moving to the next.
- Vertical or Horizontal? For walls, you can hang drywall vertically or horizontally. Hanging horizontally means fewer seams to tape, but it can be harder to lift the sheets. Hanging vertically means more seams but is generally easier to manage for a solo installer. For ceilings, it’s generally best to hang them perpendicular to the joists or studs, and often horizontally to minimize seams.
- Listen to your drill: If the screw is going in too hard, you might be hitting something you shouldn’t, or your screw might be too long. If it’s spinning freely, it’s not biting into the metal stud.
- Don’t over-tighten: We mentioned this, but it bears repeating. A stripped screw head is no good, and neither is a damaged drywall surface.
Dealing with Obstacles: Around the Corners and Through the Obstructions
Not every wall is a blank canvas. You’ll inevitably run into doors, windows, electrical boxes, and those ever-present metal studs that seem to pop up exactly where you don’t want them to.
Navigating the Nooks and Crannies
Corners: For inside corners, you'll simply butt two sheets of drywall together. For outside corners, you might have a metal corner bead that you'll attach to the stud first, and then hang the drywall up to meet it. This creates a clean, protected edge. Think of it as the architectural equivalent of a well-placed exclamation point!
Electrical Boxes: For electrical outlets or switches, you'll need to cut holes. Measure carefully from the top and side of the box, transfer those measurements to your drywall sheet, and then cut out the opening. A drywall saw or a sharp utility knife can work here. It’s always better to cut a slightly smaller hole and then enlarge it than to cut too big a chunk out.
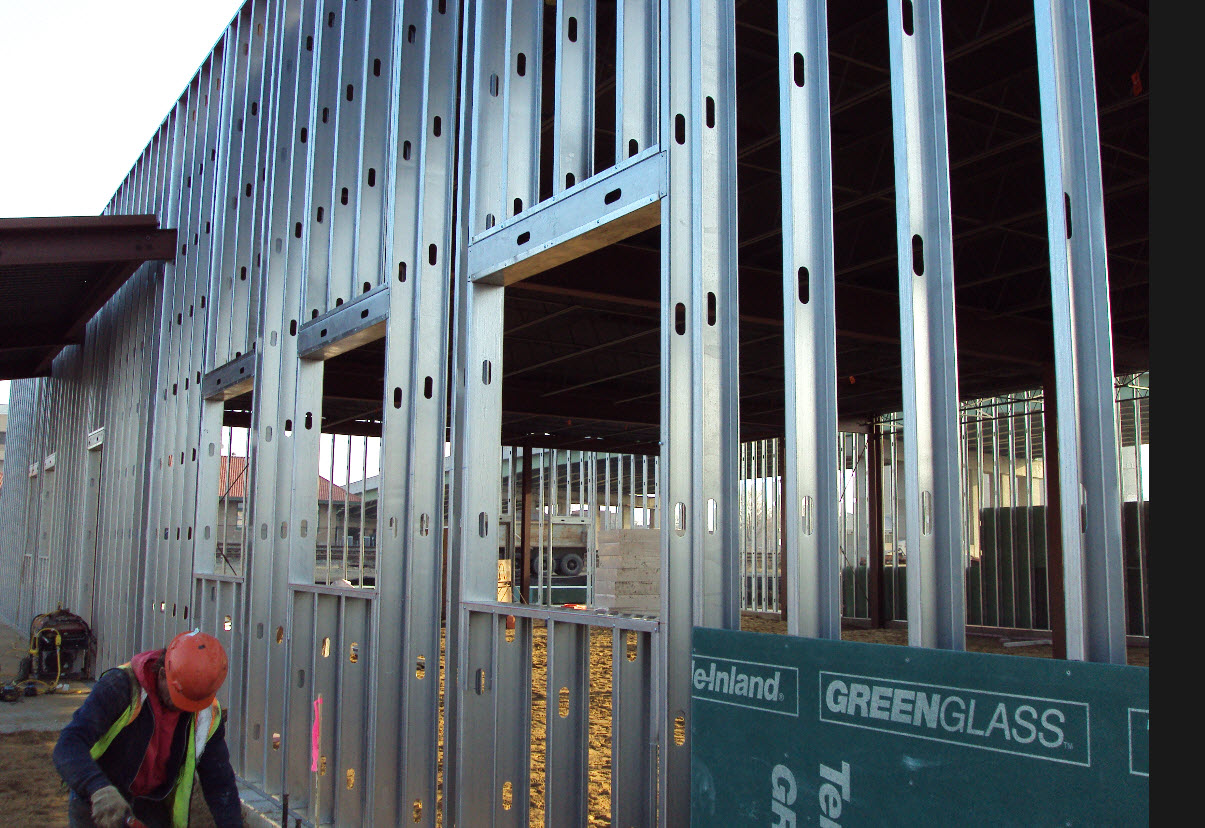
Obstinate Studs: If you find that your screws aren’t hitting a stud where you expect them to, double-check your measurements. Metal studs are typically spaced 16 or 24 inches on center. If you’re really off, you might have a stud you didn’t account for, or the stud might not be where the framing plan indicated. You might need to get a bit creative with screw placement, or even add a furring strip if necessary, but ideally, your framing is solid.
The Aftermath: Enjoying Your Handiwork
Once all the drywall is hung, take a step back and admire your work. You’ve just covered those bare metal studs with a smooth, ready-to-finish surface. The next steps, of course, will involve taping, mudding, and sanding, but the heavy lifting is done!
Think about it: you’ve taken a raw, utilitarian space and given it the potential for warmth, color, and personality. It’s a bit like taking a rough draft and polishing it into a final manuscript. This transformation is what DIY is all about – the satisfaction of creating something with your own two hands.
This process, from measuring to screwing, mirrors so many aspects of our daily lives. We often start with a basic structure, a plan, and then we have to meticulously fit the pieces together, smoothing out the rough edges, and dealing with the unexpected challenges that pop up. Whether it's organizing your living space, tackling a new recipe, or even navigating a complex project at work, the principles are the same: preparation, precision, patience, and a willingness to adapt. So the next time you’re faced with a blank wall (or a blank slate in life), remember the satisfaction of a well-hung sheet of drywall – a testament to the power of thoughtful execution and a little bit of elbow grease.