How To Install Drip Edge For Metal Roof
Hey there, DIY enthusiasts and roof-curious folks! Ever looked up at a sleek metal roof and wondered, "How do they do that?" Well, buckle up, because we're diving into a little secret that makes those metal roofs look so sharp and work so well. It’s all about the drip edge, and let me tell you, it’s more exciting than it sounds!
Think of drip edge as the superhero cape for your roof's edges. It’s a small, often overlooked detail, but it plays a huge role in keeping your home happy and dry. And guess what? Installing it is totally doable. You might even find yourself getting a little thrill out of it.
The Undercover Agent: Drip Edge's Secret Life
So, what's the big deal with this drip edge? It’s basically a strip of metal that gets tucked right under your roofing material along the edges. Sounds simple, right? But this little guy is working overtime behind the scenes.
Its main job is to direct water away from your roof and into your gutters, or just off the side of your house. No more sneaky water trying to sneak under your shingles or into your fascia board. That’s a big win in my book!
Without proper drip edge, water can get into all sorts of places it shouldn’t be. This can lead to wood rot, mold, and all sorts of unhappy surprises. So, this tiny piece of metal is actually a guardian of your home's health. Pretty cool, huh?
Why Metal Roofs Love Drip Edge (And So Will You!)
Metal roofs, with their smooth surfaces, can sometimes let water run down them really quickly. This is usually a good thing, but the edges are where things can get tricky. The drip edge is the perfect partner for a metal roof, ensuring that water doesn't just flow off but flows where it's supposed to.
Imagine a race. Water is the speedy runner, and the metal roof is the track. The drip edge is the finish line, guiding the runner perfectly into the waiting arms of the gutter. It’s a beautiful coordination!
And for those of you who appreciate a neat, clean look, the drip edge adds to that polished finish. It gives your roof edges that crisp, professional appearance that makes you stand a little taller when you look at your house.
Getting Your Hands Dirty: The Drip Edge Installation Adventure
Now, for the fun part – the installation! Don't worry, we're not talking about complicated engineering here. This is more like a grown-up Lego project, but with way more satisfying results.
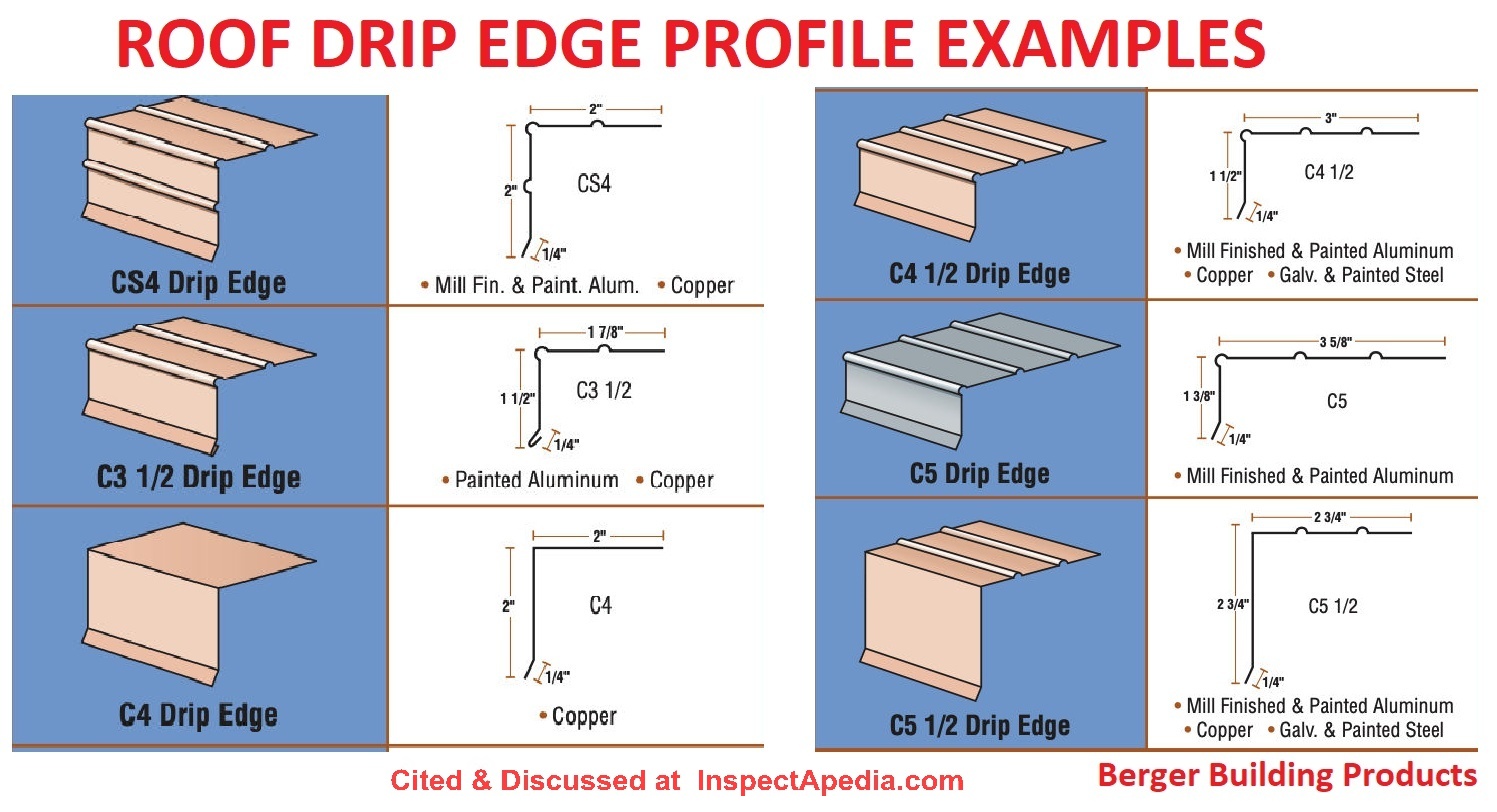
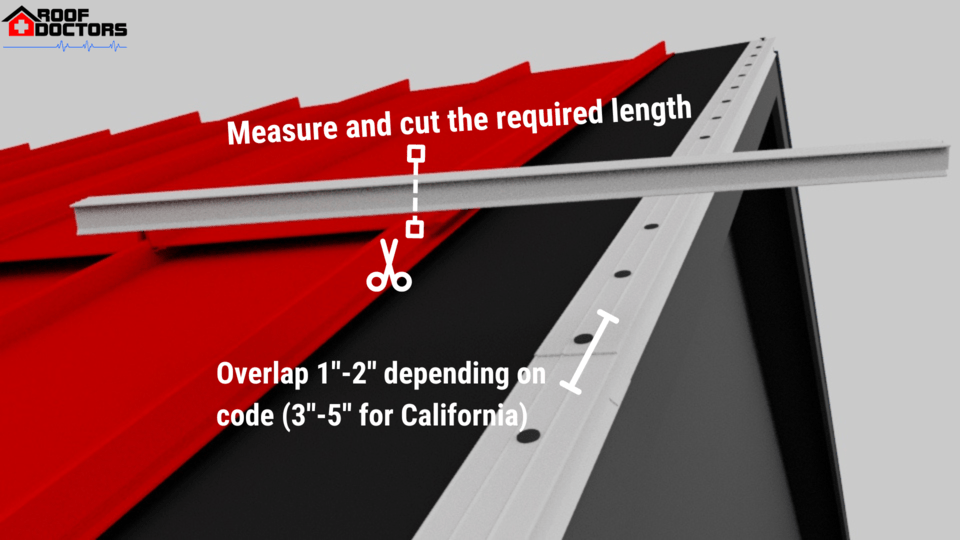
First things first, you'll need some tools and materials. Think of this as gathering your trusty sidekicks for the mission. You'll want drip edge pieces, of course. They usually come in 10-foot lengths.
You'll also need some roofing nails. These are special nails designed to hold tight. And don't forget a hammer (your trusty tool!) and a tape measure to make sure everything is just right. Safety first, so maybe a pair of work gloves and some sturdy shoes are in order!
The Edge-y Details: Step-by-Step Fun
Let's get down to the nitty-gritty, the real action! We’ll focus on the eaves first, the very bottom edges of your roof. This is where the drip edge does its most critical work.
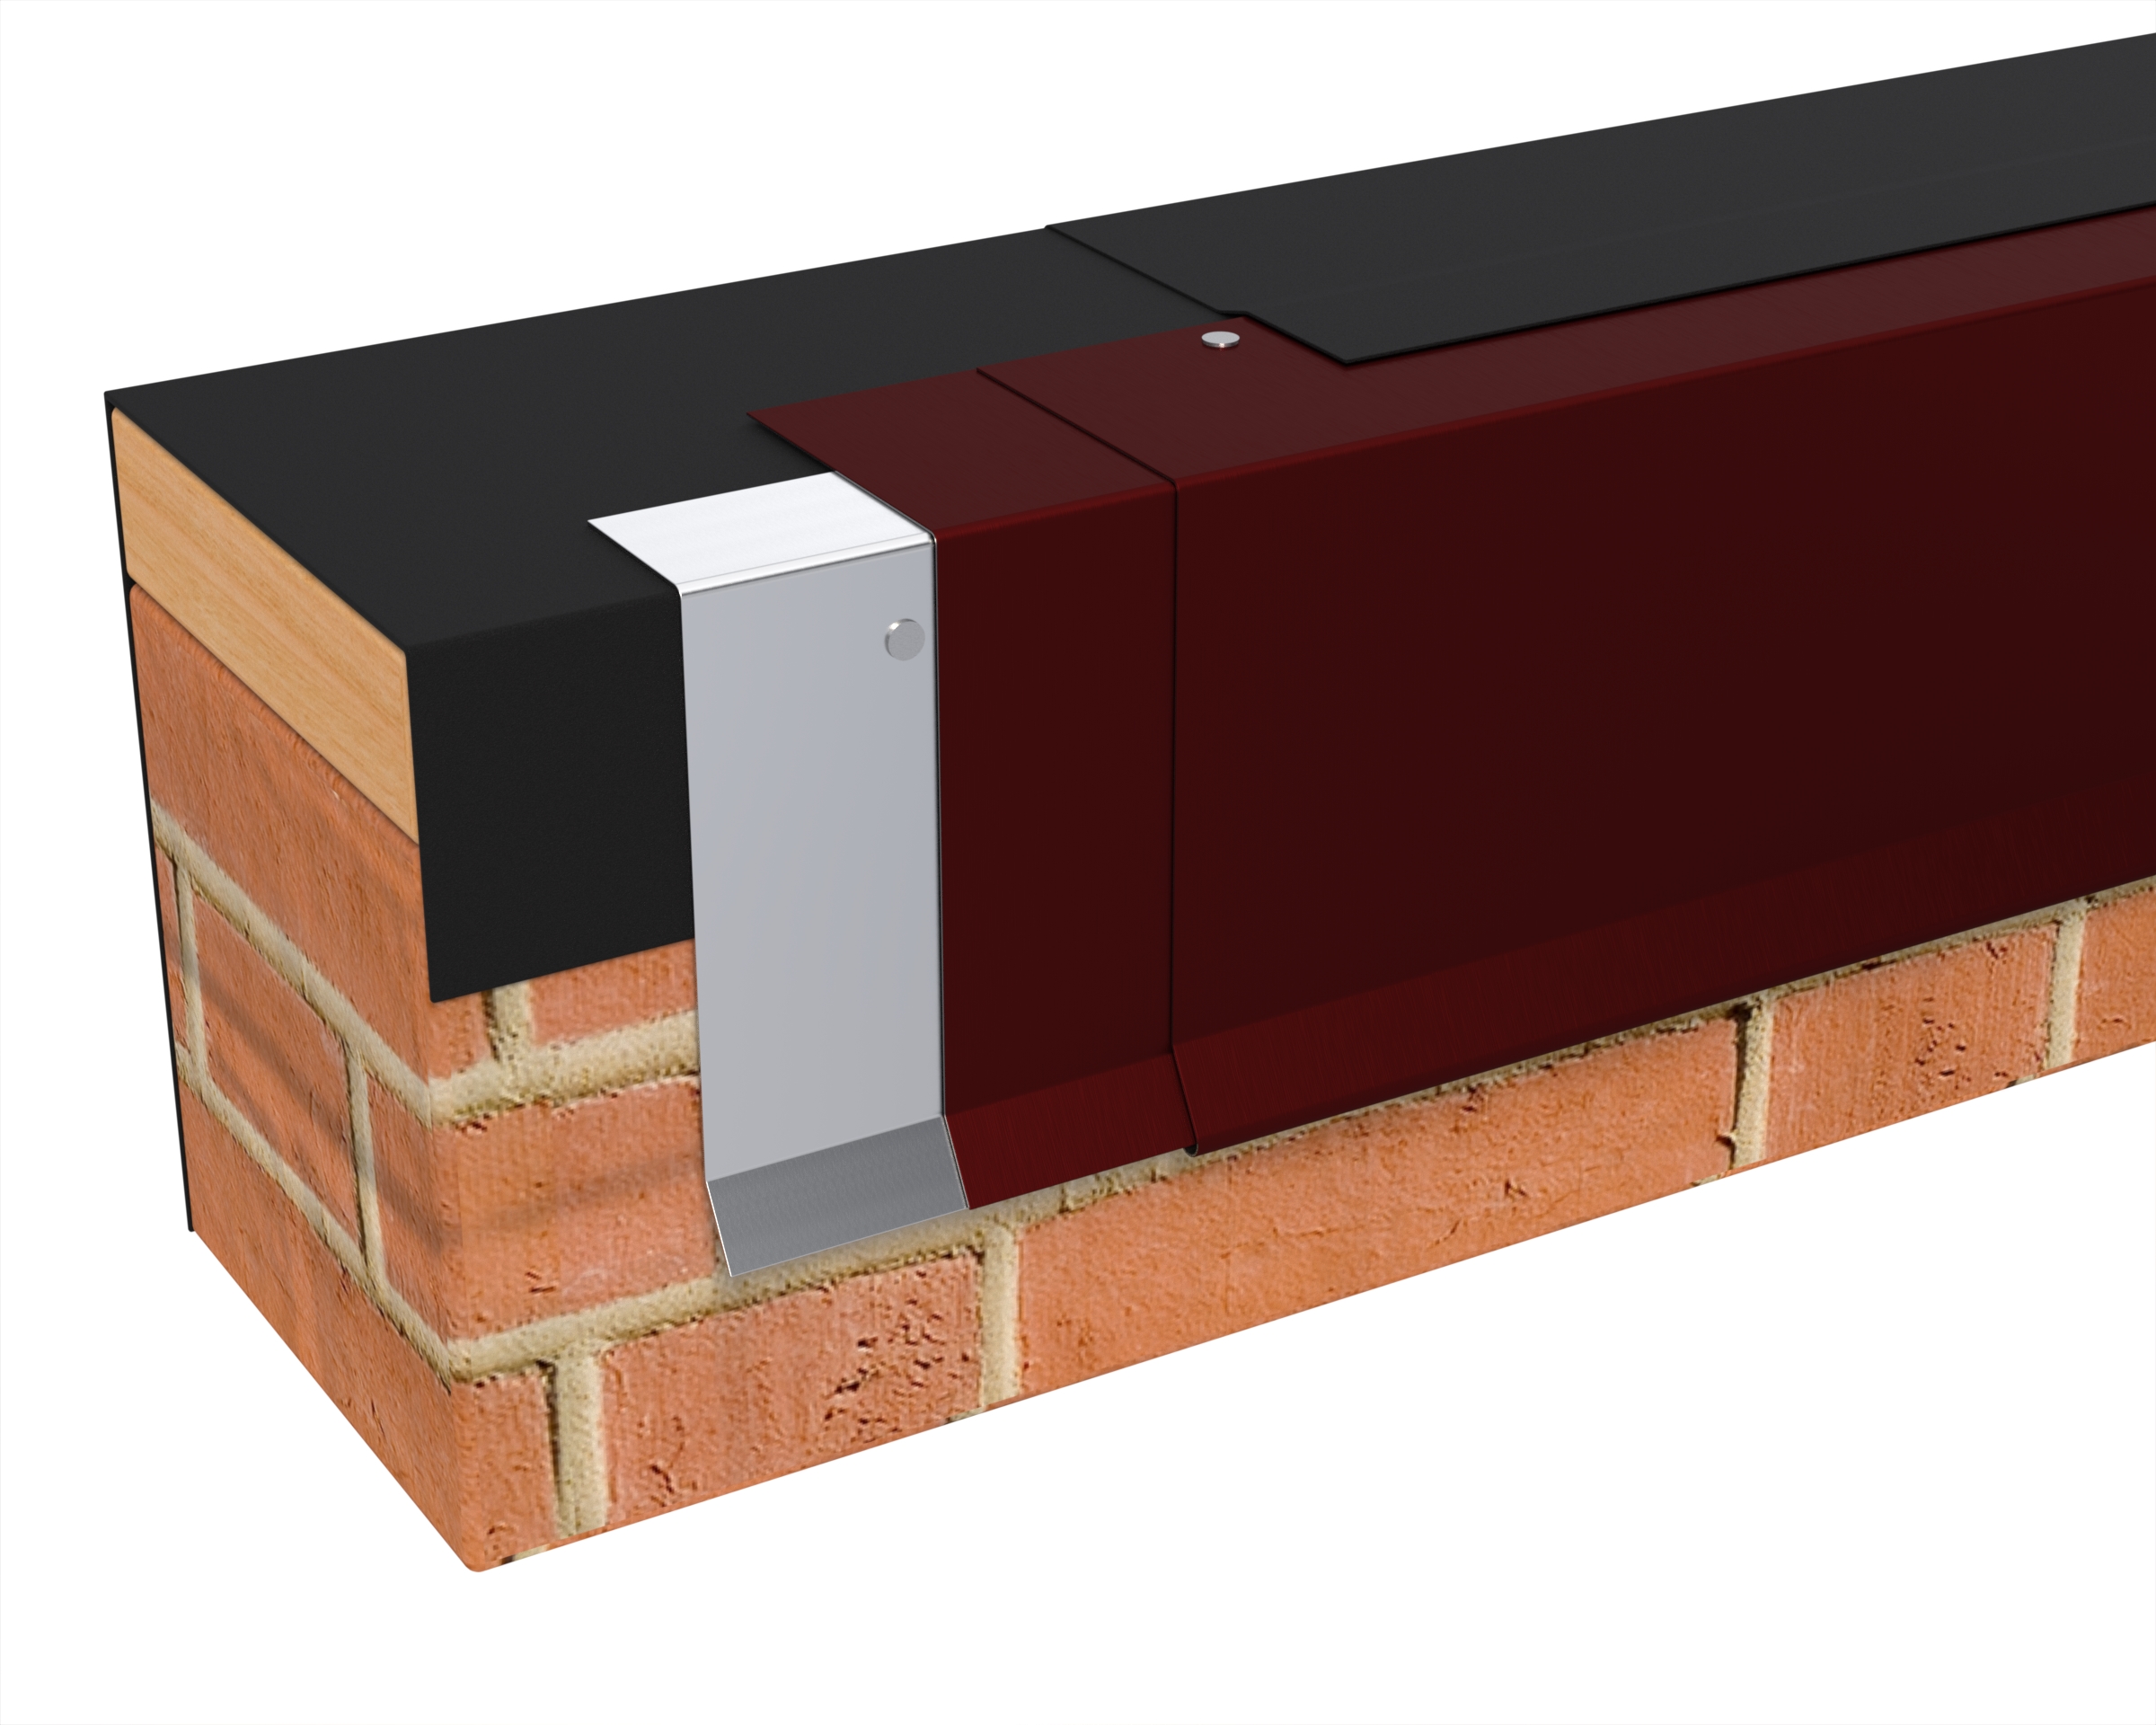
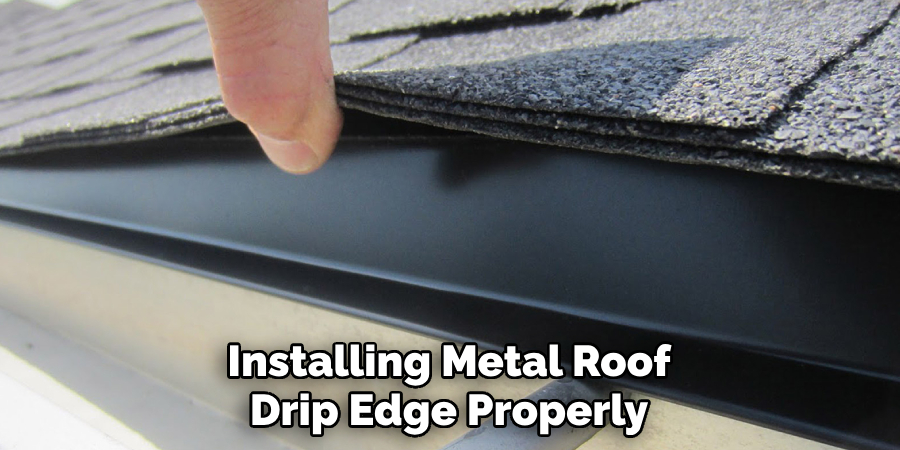
You'll start by laying the drip edge over the edge of your roof deck, making sure the angled part hangs down. This is the part that will create that "drip." You want it to extend past the fascia board, creating a clean break for water.

Now comes the nailing. You’ll want to place your roofing nails every 12 to 16 inches. Make sure they go through the drip edge and into the roof deck. It’s like giving your new superhero cape some firm anchors.
Pro Tip: Overlap the drip edge pieces by about 2-4 inches. This ensures there are no gaps for water to sneak through. Think of it as giving your superhero a layered armor!
Next up are the rakes. These are the sloped edges on the sides of your roof. The drip edge installation here is a little different, but just as important.
For the rake edge, you'll place the drip edge so that the flange goes under the roofing material and the angled edge extends past the rake. This way, water is guided down the slope and away from the underlying structure. It’s all about redirection!
You’ll nail this in place just like you did on the eaves, ensuring a secure fit. Imagine each nail as a little handshake between the drip edge and your roof, saying, "We've got this!"
The Grand Finale: The Ridge Cap and Beyond
Sometimes, you'll also install drip edge along the ridge cap, the very peak of your roof. This isn't always required for every metal roof, but it can add an extra layer of protection.
The drip edge here helps to seal the very top of your roof, preventing wind-driven rain from getting under the ridge cap. It’s like the final flourish on a perfectly composed piece of art.
Once all your drip edge pieces are installed and securely nailed, you've basically completed a major step in creating a robust and beautiful metal roof. You’ve added that crucial element that ensures longevity and keeps water at bay.
The Satisfaction Factor: Why This is Cooler Than You Think
Why is installing drip edge so… fun? It’s about transformation. You start with raw materials, and bit by bit, you’re building something that protects and enhances. It’s incredibly rewarding.
There’s a tactile satisfaction in working with your hands, in seeing a project come together piece by piece. It’s a small victory, a tangible achievement that you can see every time you look up.
Plus, you’re learning something new! You’re demystifying a part of your home that might have seemed complex. You’re gaining a new appreciation for the details that make a house a home.
The Metal Roof Magic: Drip Edge's Role
Metal roofs are fantastic for their durability and modern look. They can last for decades and handle all sorts of weather. But even the toughest materials need a little help around the edges.
The drip edge is that essential helper. It's the unsung hero that works in tandem with the metal panels to create a truly waterproof and resilient system. It’s like the bassline in a great song – you might not always notice it, but the music wouldn't be the same without it.
When you see a metal roof, and it looks perfectly installed, with clean lines and no visible issues, you can bet that the drip edge is doing its job flawlessly. It’s a testament to good design and careful installation.
Ready to Be Inspired?
So, the next time you see a metal roof, take a moment to appreciate the subtle genius of the drip edge. It’s more than just a strip of metal; it’s a guardian, a beautifier, and a key player in keeping your home safe.
And who knows? Maybe reading about it has sparked a little curiosity. Perhaps you’ve started to see how satisfying it could be to tackle a project like this yourself. It's a great way to connect with your home and gain some valuable skills.
The world of home improvement is full of these little gems, these seemingly small details that make a huge difference. The drip edge is definitely one of them. So go ahead, look up, and appreciate the engineering!