
How To Install Drip Edge For Metal Roofing

So, you've got your eye on a metal roof, huh? Awesome choice! They look super sleek, last forever, and are way more eco-friendly than you might think. But have you ever stopped to wonder what keeps all that rain and snow from creeping under the edges? That’s where the unsung hero of the roofing world comes in: drip edge.
Think of drip edge like the tiny, yet mighty, bouncer at the club for your roof’s perimeter. Its job is to make sure water knows exactly where to go – away from your house. Pretty neat, right? And the best part? Installing it isn't some super-secret, contractor-only handshake. It’s totally doable for us regular folks with a bit of patience and the right tools. Let’s dive in and see how this little piece of metal works its magic.
Why Bother With Drip Edge Anyway? It Sounds Kind Of Obvious!
You’d think it would be obvious, wouldn’t you? Just put the metal sheets down and call it a day. But the sneaky thing about water is its ability to find even the tiniest gaps. And believe me, roofs have plenty of edges where water loves to play hide-and-seek.
Without drip edge, water can wick up under your roofing material, especially during heavy rain or when snow melts. This can lead to some seriously unhappy consequences. We’re talking about rotting fascia boards (that's the wood trim behind your gutters), potential damage to your roof decking, and even mold growth in your attic. Yikes! Drip edge acts as a crucial first line of defense, literally directing water away from these vulnerable spots and into your gutters.
It’s like having a tiny, perfectly angled ramp for every raindrop. Instead of letting them pool and explore, we’re giving them a clear exit strategy. And for a metal roof, which can be pretty slick, this is even more important. You want that water to just slide off, not hang around and cause trouble.
So, What Exactly IS Drip Edge? Let's Get Acquainted.
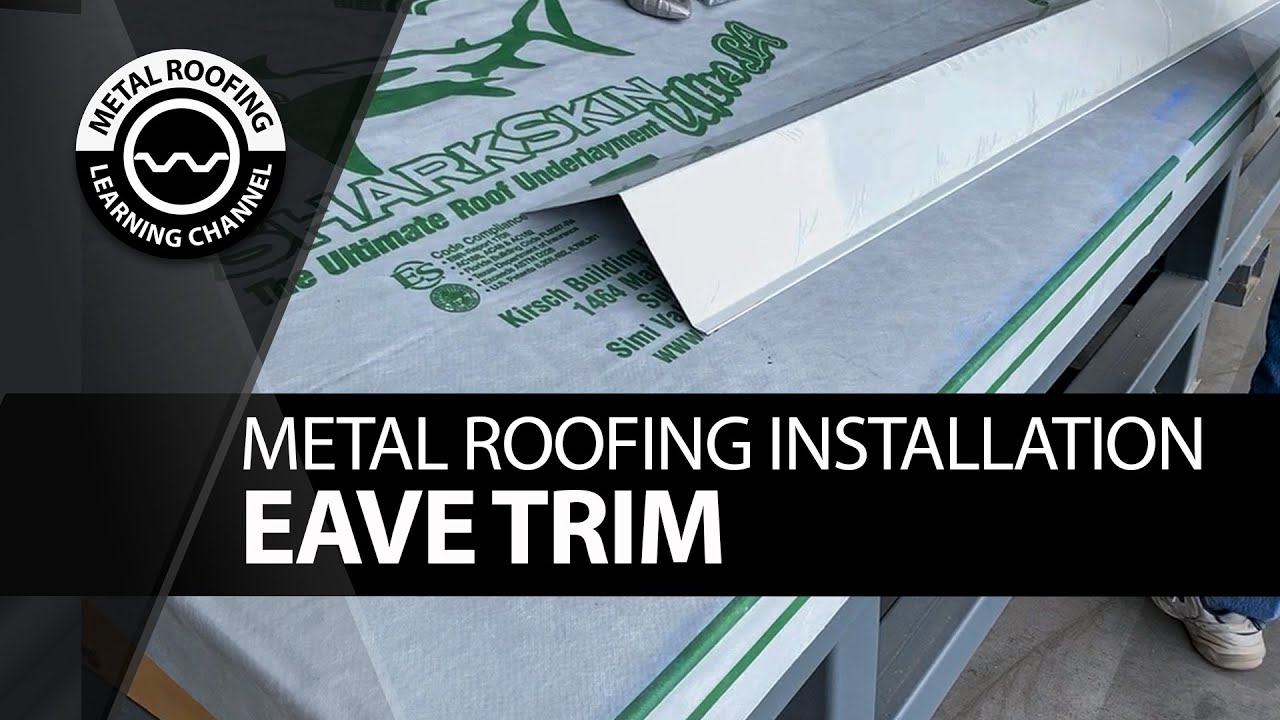
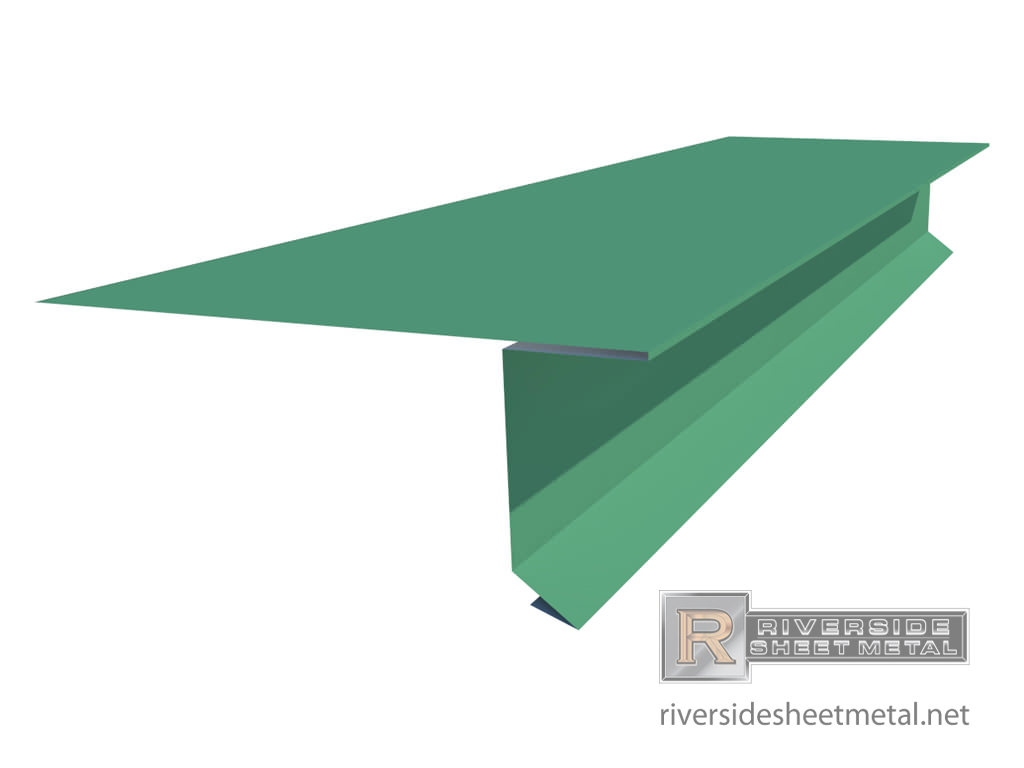
Drip edge is essentially a piece of metal flashing, usually aluminum or galvanized steel, bent into a specific shape. It’s typically L-shaped, with one leg designed to sit under the roofing material and the other leg extending downwards over the fascia.
Imagine a tiny, metal shelf. The top part tucks under your shingles or metal panels, and the bottom part sticks out, creating that "drip" edge. This outward flange is the key. It prevents water from flowing back up towards your roof deck and instead directs it to drip off into the gutter or onto the ground. Simple, elegant, and incredibly effective. It’s like the roof's version of a perfectly designed raincoat hem!
Different Flavors of Drip Edge
While the basic L-shape is the most common, you might see a few variations depending on the specific application. Some have a slightly different angle on the drip flange, and others might be designed for specific roof types. For a metal roof, you’ll typically be looking for a drip edge that’s designed to work seamlessly with your chosen metal roofing system. Your roofing supplier can be a great resource here, helping you pick the perfect match.
Okay, I'm Sold! What Tools Do I Need for This Drip Edge Adventure?
Alright, now for the fun part – gearing up! You don't need a whole workshop for this, but a few key items will make your life a whole lot easier.
- Safety Gear: We’re talking gloves, safety glasses, and sturdy shoes. Roofing can be a bit… elevated, so safety first, always!
- Measuring Tape: Obviously, we need to measure!
- Caulking Gun and Exterior Grade Sealant: This is for sealing any gaps and ensuring a watertight seal.
- Metal Snips or Aviation Snips: You’ll need to cut the drip edge to size. Aviation snips are great because they make clean cuts.
- Hammer and Roofing Nails: These are your primary fasteners. Make sure you’re using the right kind of nails for metal roofing.
- Utility Knife: Handy for trimming any underlayment.
- Pry Bar or Flat Bar: Might be needed for lifting shingles or adjusting things.
- Ladder: Make sure it’s stable and you know how to use it safely!
- Possibly a helper: Having an extra pair of hands can be a lifesaver, especially when maneuvering longer pieces.
Don't forget your trusty metal roofing panels and any underlayment you'll be using. Think of these tools as your roofing superhero utility belt!
Let's Get This Drip Edge Party Started! The Installation Lowdown.
Alright, deep breaths. We're going to break this down into manageable steps. The general idea is to install the drip edge before you lay down your main roofing material. This way, the roofing material sits neatly on top of the drip edge, creating that seamless water-repelling barrier.
Step 1: Prep Work is Key (Don't Skip This!)
First things first, make sure your roof edges are clean and ready. Remove any old roofing materials, debris, or nails. You want a nice, smooth surface to work with. Imagine you’re prepping a canvas before painting; a clean slate makes for a better final product.
You'll also want to check your fascia boards. If they look a bit sad and rotted, now's the time to fix them. The drip edge can't work wonders on a compromised base!
Step 2: Laying Down the Underlayment
Most modern metal roofs will have an underlayment – think of it as a waterproof blanket for your roof. You’ll typically lay this down first, extending it over the edges of your roof deck.
Now, here’s a crucial part: you’ll often cut a slit in the underlayment where the drip edge will go, or peel it back slightly. This allows the drip edge to sit directly on the roof deck, which is the best way to ensure a watertight seal.
Step 3: Installing the Drip Edge – The Moment of Truth!
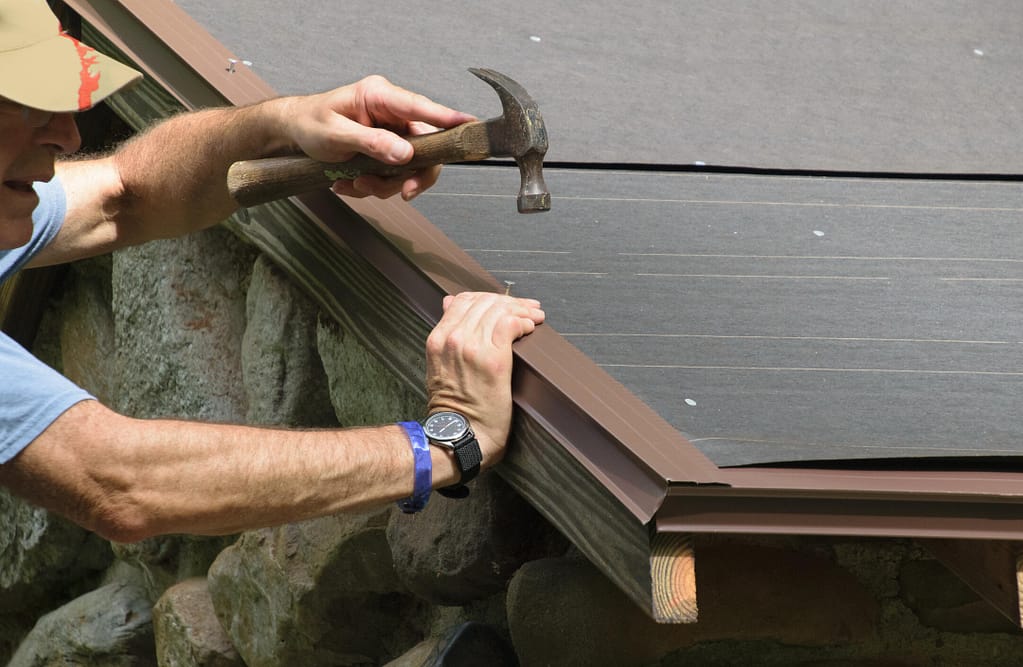
Okay, here we go. You’ll start with the drip edge along the eaves (the lower edges of your roof). Lay the drip edge over the underlayment, with the longer leg of the "L" sitting on the roof deck and the shorter leg extending downwards over the fascia.

Now, you’ll nail it down. Here’s a pro tip: place your nails about 6 to 8 inches apart. Make sure you’re nailing through the flange that sits on the roof deck. You don't want nails going through the part that hangs over the fascia – that’s a potential leak point!
Overlap the pieces of drip edge by at least 2 to 4 inches. Think of it like shingles on a house; you want that overlap to shed water effectively. Always overlap so the water flows away from the seam, not into it.
Step 4: Don't Forget the Rake Edges!
After the eaves, you’ll move on to the rake edges – the sloped edges of your roof. For these, the drip edge is usually installed over the underlayment. It’s a similar process, but the orientation is slightly different because of the slope.
Again, overlap your pieces and nail them securely, making sure those nails are going into the roof deck and not the exposed flange. This is where those metal snips really come in handy for getting clean cuts around corners or openings.
Step 5: Sealing the Deal
Once your drip edge is all in place, it’s time for a little extra insurance. Apply a bead of exterior-grade sealant along any seams or at the corners where pieces of drip edge meet. This fills any tiny gaps and adds an extra layer of protection.
This is like giving your drip edge a sealant hug, ensuring no little water tricksters can sneak through. It’s a small step, but it makes a big difference in the long run.
And Voilà! You’ve Conquered Drip Edge!
See? Not so scary, right? By taking the time to properly install drip edge, you’re investing in the long-term health and integrity of your metal roof. You’re protecting your home from the elements in a really smart, proactive way.
It's a bit like wearing a raincoat on a drizzly day. You could just rely on your shirt, but a raincoat offers that extra layer of protection, keeping you dry and comfortable. Drip edge does the same for your roof.
So next time you see a sleek metal roof, give a little nod to the humble drip edge. It’s out there, doing its important job, keeping things dry and your home sound. And who knows, maybe you’ll be inspired to tackle your own roof project soon. Happy building!