
How To Make A Metal Stamp
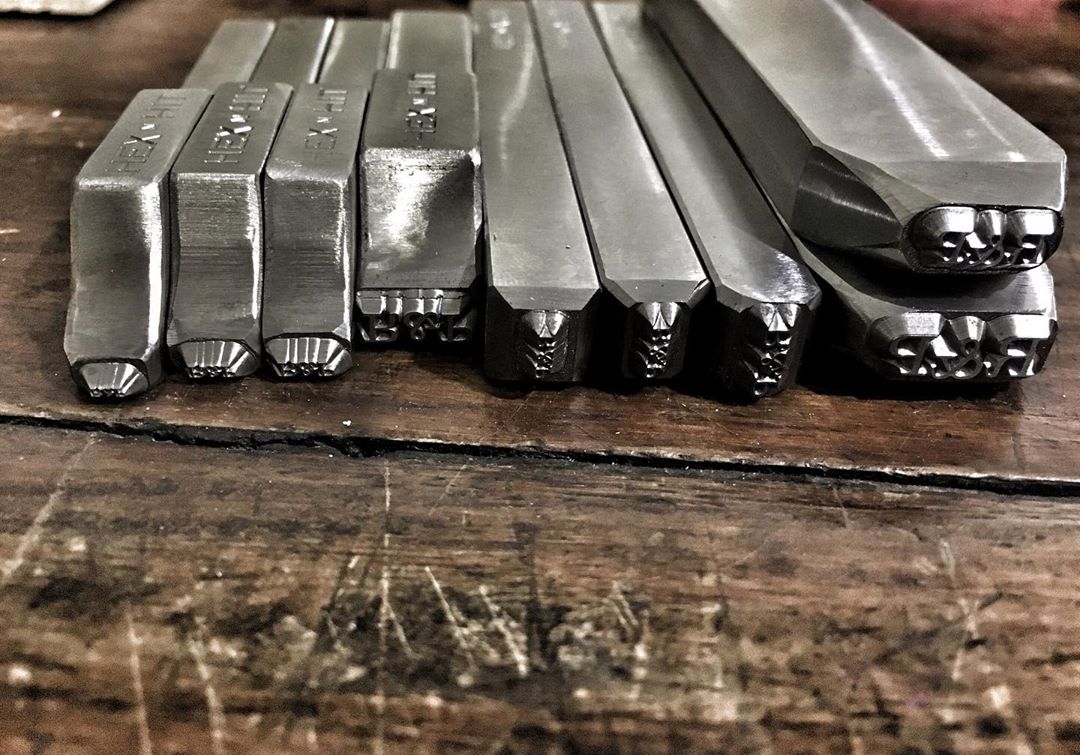
Ever looked at a beautifully crafted piece of jewelry, a personalized leather journal, or even a simple metal tag on a dog's collar and thought, "Wow, that's neat!"? Of course you have! It’s those little touches, those unique identifiers, that really make something special, right? Well, guess what? You can be the magician behind those magical marks! Today, we’re diving headfirst into the wonderfully satisfying world of making your own metal stamps. No, seriously, it’s way easier than you think, and it’s about to inject a whole lot of fun and personal flair into your life.
Think about it: a personalized gift that screams "I thought of you!" A quirky little mark on your handmade creations that says, "Yep, I made this!" Or even just a way to playfully label your favorite toolbox so no one accidentally walks off with it. The possibilities are as endless as your imagination. And the best part? You’re not just making a stamp; you’re crafting a little piece of your personality, a tiny signature for the world to see.
So, What Exactly ARE We Talking About Here?
We're talking about creating a tool, a metal stamp, that you can use to impress a design, letter, or symbol into softer metals, leather, clay, and more. It’s like a tiny, powerful cookie cutter for your ideas! Instead of a sweet treat, though, you’re getting a permanent, tactile mark. Pretty cool, huh?
Now, before you picture yourself wrestling with a blacksmith’s forge, let’s clarify. We’re not talking about industrial-grade, super-hardened steel here for your first foray. We’re looking at materials that are accessible and manageable for us DIY enthusiasts. Think of it as dipping your toes in the creative waters, not jumping off a cliff!
The Superstar Materials You'll Need
Alright, let’s get down to brass tacks… or rather, whatever metal you decide to work with! The most common and beginner-friendly material for making your own stamps is often something like brass or nickel silver. These are relatively soft, easy to engrave, and hold detail beautifully. You can find them at your local craft store or online jewelry supply shops. They usually come in rods or small sheets, which is perfect for our purposes.
You'll also need something to etch your design onto the metal. This is where the real magic happens! The most popular method for home stamp-making involves using a ferric chloride solution. Don't let the fancy name scare you! It's a chemical that eats away at the metal, creating your etched design. You can find this at electronics supply stores or online. Just remember, safety first, folks! We’ll talk more about that in a bit.

Beyond the metal and the etching solution, you’ll need a few other bits and bobs: some fine-grit sandpaper (to smooth things out), a marker to draw your design, some clear nail polish or a resist pen (this is crucial for protecting the areas you don't want etched), a container for your etching solution (something glass or plastic is best, not metal!), tweezers (for handling things safely), and of course, something to strike your stamp with – a small hammer will do the trick!
Let’s Get Creative: The Step-by-Step Shenanigans!
Ready to roll up your sleeves and get a little artsy? Here's the general game plan:
Step 1: Dream It Up!
This is arguably the most fun part, right? What do you want your stamp to say or look like? A single initial? Your pet's paw print (how adorable would that be!)? A tiny, whimsical doodle? Sketch it out on paper first. Keep it simple for your first go. Think bold lines and clear shapes. Tiny, intricate details can be a challenge for your first stamp, so let’s start with something manageable and build from there.

Step 2: Transfer Your Masterpiece
Once you have your design, you need to get it onto your metal blank. You can do this by drawing it directly onto the metal with a fine-tip permanent marker. Or, if you’re feeling fancy, you can print your design, cut it out, and trace it onto the metal. Some people even use transfer paper, but for a simple design, a marker is usually your best friend.
Step 3: The Art of Resist!
Now for the super-duper important part: protecting the areas you want to remain raised. This is where your clear nail polish or resist pen comes in. Carefully paint over all the parts of your design that you want to be the raised part of your stamp. Think of it as putting a shield on your chosen features. If you’re doing letters, you’ll paint over the inside of the letters, leaving the outline exposed to the etching solution. Make sure the coating is nice and thick – we don’t want any sneaky etching happening where we don’t want it!
Let that resist dry completely. This is a crucial step, so be patient! A good, solid layer of resist is the difference between a crisp, clear stamp and a blobby mess. And nobody wants a blobby mess, right?
Step 4: The Ferric Chloride Bath (The Etching Adventure!)
Now, safety first, people! Put on your gloves and eye protection. Work in a well-ventilated area. This stuff is potent! Carefully pour a small amount of ferric chloride solution into your non-metal container. Gently place your metal blank into the solution, making sure it’s fully submerged. You should start to see it fizzing and bubbling a bit – that’s the ferric chloride doing its thing, eating away at the exposed metal.
How long do you leave it in? This is where the experimentation begins! It depends on the thickness of your metal, the concentration of your solution, and the depth of the etch you want. Start checking after about 15-20 minutes. You can carefully lift it out with your tweezers and rinse it under running water ( Dispose of the used solution responsibly according to local guidelines!). You want to see a nice, clear impression of your design where the metal has been etched away. If it’s not deep enough, pop it back in for a bit longer. It’s a bit of a dance, finding that sweet spot.
Step 5: Clean Up and Polish!
Once you're happy with the depth of your etch, rinse the metal blank thoroughly under running water to remove all traces of the ferric chloride. Then, gently remove the nail polish or resist with a cotton swab or an old toothbrush. You should now have your raised design visible! Now, use your fine-grit sandpaper to smooth down any rough edges and give your stamp a nice, polished finish. You want the part you strike to be smooth, so it makes a clean impression.
Step 6: The Grand Finale – Testing Your Creation!
This is the moment of truth! Grab a scrap piece of metal (or leather, or clay – whatever you want to stamp!) and place your new stamp on top. Give it a good, firm whack with your hammer. Lift it up… and ta-da! You’ve just made your own metal stamp! Isn’t that incredibly satisfying? That little personal mark, created by you!

It might not be perfect on the first try, and that’s totally okay! Each stamp you make will teach you something new. Maybe you needed a bit more resist, or a longer etching time, or a gentler hammer strike. Embrace the learning curve, because it’s all part of the fun!
Why Bother? Because Life Needs More You!
Making your own metal stamps isn’t just a craft; it’s a way to infuse your life with a little extra sparkle, a touch of individuality, and a whole lot of personal pride. Imagine the joy on someone’s face when they receive a gift with your unique mark on it. Think about the professional touch it adds to your handmade items. It’s a small thing, but it makes a big difference.
This skill opens up a world of personalized possibilities. You can create custom jewelry for yourself or as gifts, add a signature to your artwork, personalize tools, or even create unique embellishments for scrapbooking and journaling. It’s a fantastic way to express your creativity and leave your mark on the world, quite literally!
So, are you intrigued? Excited? A little bit ready to grab some metal and get your hands dirty (in a safe, controlled way, of course!)? Don’t be intimidated! The journey of creating something with your own hands is incredibly rewarding. And with metal stamping, you’re not just making an object; you’re crafting a piece of your story. So go ahead, experiment, explore, and let your creativity shine. Who knows what amazing things you'll create?