How To Melt And Cast Aluminum

Hey there, you! Yeah, you, with the curious glint in your eye. So, you're wondering about melting and casting aluminum, huh? Like, the real deal? Not just some fancy kitchen experiment. Well, pull up a chair, grab a coffee (or whatever your poison), and let's chat about this cool, literally cool, hobby. It’s not rocket science, but it’s definitely more exciting than sorting socks. Trust me.
Ever seen those awesome metal sculptures? Or maybe a perfectly cast engine part that just looks amazing? That’s often aluminum doing its thing. And guess what? You can totally get in on that action. It’s like being a modern-day alchemist, but instead of turning lead into gold (good luck with that!), we’re turning scrap metal into… well, more awesome metal stuff.
So, why aluminum, you ask? It's a pretty forgiving metal to start with. It melts at a relatively low temperature compared to, say, steel. Think of it as the entry-level metal for your home foundry. It’s lighter too, which is a bonus when you’re lugging crucibles around. Plus, there’s tons of it! Old cans, bits of bike frames, even some old cookware can be your raw material. Waste not, want not, right? It’s practically eco-friendly… in a very hot, smoky sort of way.
First Things First: Safety is Your New Best Friend
Okay, before we get all giddy about molten metal, we have to talk safety. This isn't a game of make-believe. We're dealing with something that can seriously mess you up if you're not careful. So, consider this your official "don't be an idiot" lecture. Think of me as your slightly older, much wiser (and probably singed) friend.
First off, you’ll need some serious eye protection. We're talking a full face shield, not just some flimsy sunglasses. Molten metal can splash, and even tiny droplets can cause permanent damage. Your eyeballs are pretty important, so let’s keep them in the ‘seeing’ business.
Next up: skin protection. Forget your cute t-shirts and shorts. You need thick, flame-resistant clothing. Leather is your friend here. Think heavy-duty work gloves, a leather apron, and sturdy boots. No open-toed shoes. Ever. Unless you want to experience a whole new level of painful footwear.
Ventilation, ventilation, ventilation! When aluminum melts, it releases fumes. Some of them are… not great for you. So, you need a well-ventilated area. Outdoors is best, or a workshop with a really good exhaust system. Don’t be doing this in your cozy living room, unless you really want to redecorate with a smoky, metallic aroma.
And finally, and this is a biggie: have a fire extinguisher handy. And know how to use it! Metal fires are different from regular fires. Don't throw water on them. Seriously. Water and molten metal are a recipe for a spectacular, and dangerous, explosion. Just… don't.
Your Melting Setup: The Heart of the Operation
Alright, now for the fun part: how do we actually melt this stuff? You’ve got a few options, depending on your budget and your commitment to this newfound metal-bending addiction.
The DIY Foundry: For the Dedicated (and Slightly Crazy)
So, you want to go full-on DIY? I like your spirit! This usually involves building your own furnace. The most common type is a "thermic lance" furnace, which basically uses a blast of air to superheat charcoal. It sounds intense, and it is. You’ll need some refractory cement (that’s the stuff that can handle extreme heat), some bricks, a propane torch to get it going, and a blower (like a shop vac set to blow). There are tons of tutorials online, so do your research. It’s a bit of a project, but incredibly rewarding when you see it glowing red hot.

You’ll also need a crucible. This is the pot that holds your molten metal. For aluminum, you'll want a graphite or clay-graphite crucible. They're designed to withstand those high temperatures. Think of it as the metal’s cozy little bath. Make sure it’s the right size for your furnace and what you want to melt.
And the tools! You'll need tongs to safely lift and move the hot crucible. Never, ever try to pick it up with your bare hands, no matter how tough you think you are. A long-handled ladle is also essential for scooping out that glorious molten goodness. Oh, and a stirring rod – usually made of graphite too – to skim off impurities. Think of it as giving your metal a spa treatment.
The Propane Burner Setup: A Step Up
If building a whole furnace from scratch sounds like a bit much, you can also go with a pre-made propane foundry. These are basically insulated boxes with a burner that heats up your crucible. They're a bit more expensive, but often more convenient and controllable. You can find them from various metalcasting suppliers. They're like the plug-and-play version of home foundries. Still requires all the safety gear, of course!
The Mini-Melter: For Small Projects
Got a small project in mind? Maybe just casting a few small charms or fishing lures? There are even smaller, more portable melters available. They still use propane but are designed for smaller crucibles and less metal. Perfect for dipping your toes into the molten metal world without committing to a full-blown furnace. It’s like the appetizer before the main course of metalcasting.
Gathering Your Aluminum Treasure
So, you've got your safety gear and your melting setup sorted. Now, what are we melting? Aluminum! Where do you find it? Everywhere!
Aluminum cans are the classic choice. They’re easy to find and plentiful. Just make sure they’re clean. No sugary residue, please. That’s just… sticky. And it can mess with your melt. You'll want to crush them down to save space. Think of it as a pre-melting workout for your aluminum.
Scrap aluminum from old appliances, bike parts, or even discarded window frames is also great. Just be sure you know what it is. You don't want to accidentally throw in something that's not pure aluminum, as it can ruin your melt or even be dangerous. If it sticks to a magnet, it's probably not aluminum. Simple test, right? It's like a metal detective game.
Aluminum ingots are also an option. You can buy these pre-made from metal suppliers. They're a good way to ensure you're working with pure aluminum and to get a consistent melt. Think of them as the pre-packaged, easy-to-digest meals of the aluminum world.
Important note: Don't melt painted or coated aluminum unless you're absolutely certain the coating is safe to burn off. Many paints and coatings release toxic fumes. Better safe than sorry, right? We're aiming for awesome metal, not a trip to the ER.
The Melting Process: Where the Magic Happens
Okay, time for the main event! You've got your clean aluminum, your crucible, your furnace fired up, and your safety gear firmly in place. Let's do this!
First, preheat your crucible. Stick it in the furnace and let it get nice and hot. This helps prevent thermal shock when you add the cold aluminum. Think of it as getting the crucible ready for its hot bath.
Now, carefully add your aluminum to the preheated crucible. Don't overfill it! Leave some room for the metal to melt and move around. You don't want a metal volcano erupting in your furnace. That's a disaster movie waiting to happen.
Gradually increase the heat. You'll start to see the aluminum soften and then begin to melt. It'll look like a very shiny, very hot liquid. It’s mesmerizing, honestly. You might even find yourself staring at it for a bit too long. Happens to the best of us.
As it melts, you'll likely see some impurities rise to the surface. This is called dross. Use your stirring rod to carefully skim this off. It's like giving your molten aluminum a facial. You want a clean melt for a good casting.
The melting temperature for aluminum is around 1220°F (660°C). But you'll want to get it a bit hotter, usually around 1300-1400°F (700-760°C), to ensure it's fluid enough for casting. Overheating can degrade the aluminum, so keep an eye on your thermometer. Precision is key, my friend, even in the fiery chaos.
Your Casting Mold: The Shape of Things to Come
So, you've got your beautiful, molten aluminum. What do you do with it? You cast it into something! And for that, you need a mold. This is where your creativity really shines.
Sand Casting: The Classic Choice
Sand casting is probably the most accessible method for beginners. You can buy special casting sand, or even make your own. You'll need a two-part flask (basically two metal boxes that fit together) and your pattern (the object you want to replicate). You pack the sand tightly around your pattern, remove the pattern, and then pour your molten metal into the cavity you've created.
It's a bit of an art form. You have to get the sand packed just right, and the gating system (the channels you pour the metal through) needs to be designed so the metal fills the mold cleanly. There are tons of great tutorials on sand casting. It's like playing with really, really hot Play-Doh.
Plaster Casting: For Finer Details
Plaster casting is great for more intricate details. You create a mold by pouring a special type of plaster over your pattern. Once it sets, you bake the mold to remove moisture, and then pour in your molten aluminum. This method can give you very smooth surfaces and fine details, but the molds are generally more fragile than sand molds.
Lost-Wax Casting: For the Ambitious
Lost-wax casting is a more complex but incredibly versatile method. You create a wax model of your desired object, invest it in a ceramic shell, melt out the wax (hence "lost-wax"), and then pour molten metal into the shell. This is how many intricate jewelry pieces and sculptures are made. It's definitely a step up in complexity, but the results can be stunning. Think of it as the haute couture of metal casting.
Simple Molds: For Quick Projects
For very simple projects, you can even use things like graphite blocks or carved soapstone as molds. Just make sure whatever material you use can withstand the heat of molten aluminum. You can find specialized graphite molds for things like ingots, which are super handy.
Remember to preheat your molds! This is crucial to prevent moisture from turning into steam and causing blowholes or cracks in your casting. It also helps the metal flow better. Think of it as giving your mold a warm welcome for the molten metal.

Pouring and Cooling: The Grand Finale
This is it. The moment of truth. You’ve got your glowing crucible of molten aluminum, your preheated mold ready and waiting. This is where you earn your stripes.
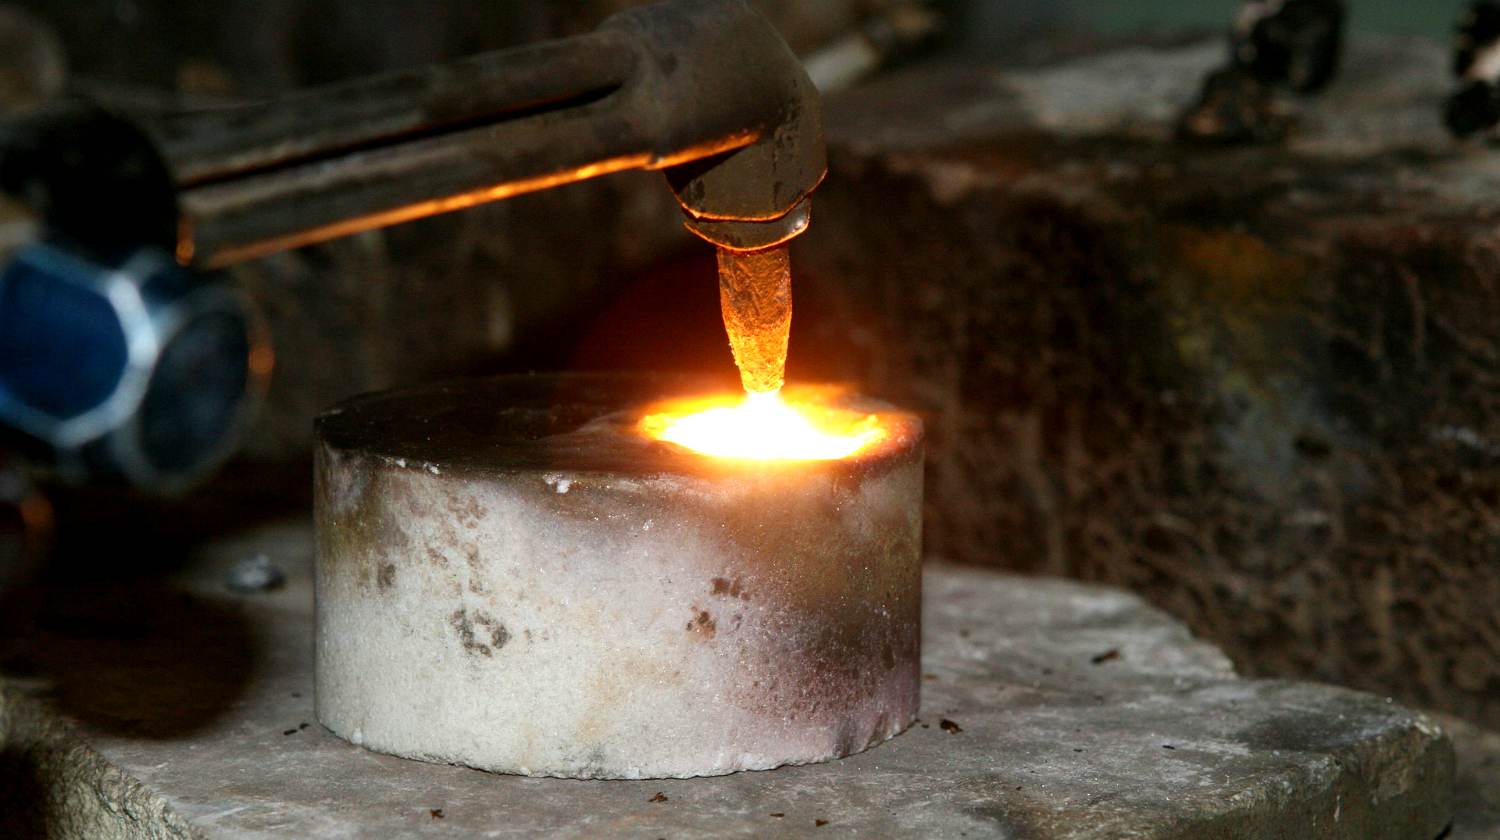
Carefully and smoothly, pour the molten aluminum into your mold. Try to pour in one continuous stream, filling the mold from the lowest point up. Avoid splashing, as this can introduce air bubbles and create weak spots in your casting. It’s like a perfectly poured glass of wine, but with molten metal. Aim for fluidity and grace.
Once the mold is full, let the metal cool completely. This can take anywhere from a few minutes for small pieces to much longer for larger castings. Do not rush this process. Trying to pull your casting out too early is a recipe for disaster. Patience is a virtue, especially when dealing with red-hot metal.
You'll see the molten aluminum solidify and change color. It’ll go from that bright, fiery red to a duller gray. Once it’s cool to the touch – and I mean really cool, not just warm – you can carefully remove it from the mold.
Finishing Touches: Making It Shine
So, you've got your raw casting. It might have some rough edges, some sprue (the leftover metal in the pouring channel), and maybe a few imperfections. That’s where the finishing comes in.
You'll likely need to remove the sprue and any gates or risers. A hacksaw, a file, or even a grinding tool can be used for this. Be careful and wear your safety glasses, as metal dust can fly!
Then comes the shaping and smoothing. Files, sandpaper, and polishing wheels can transform your rough casting into something smooth and beautiful. You can get it as shiny as a mirror or leave it with a more matte finish, depending on your preference.
And there you have it! You’ve gone from scrap metal to a tangible object, all through the magic of melting and casting aluminum. It’s a journey, for sure. It takes practice, patience, and a healthy respect for the heat. But the satisfaction of creating something with your own two (safely protected) hands is absolutely priceless. So, what are you waiting for? Go get inspired and get melting!