
How To Over Winter Dahlia Tubers

Alright, fellow garden enthusiasts, or maybe you're just someone who stumbled across this page while contemplating if those weird, lumpy things in your shed are indeed the remnants of your summer's floral triumphs. Let's talk about dahlias. You know, those flamboyant divas of the flower world? The ones that strutted their stuff all summer long, showing off their vibrant colours and fancy ruffled heads like they were attending a garden party hosted by royalty. Well, now that the party's over and the last leaf has crisped up like a forgotten chip, we're left with their underground secret: the tubers. And if you're anything like me, the thought of keeping these precious little potato-looking things alive through the cold, dark months can feel a bit like trying to herd cats. But fear not! Overwintering dahlia tubers is totally doable, and honestly, it’s not as scary as it sounds. Think of it as giving them a nice, long winter nap before they wake up and start their fabulous show all over again.
So, where do we even begin with these fleshy root fellows? First things first, we need to do a little bit of digging. And I mean that literally. Once your dahlias have been zapped by the first proper frost – you know, the kind that makes you want to wear socks indoors – it’s time to get them out of the ground. Don't be tempted to rush this. Let that frost do its work. It's like a signal to the dahlia that says, "Okay, buddy, time to pack it in for the year and go into hibernation." Trying to dig them up too early is like trying to put a toddler to bed before they’ve even had their juice box; it's just not going to end well.
When you do get to digging, be gentle. These tubers can be surprisingly delicate, like a newborn baby’s everything. You don't want to be hacking away with a shovel like you're trying to unearth pirate treasure. Use a garden fork, and try to get a good amount of soil around the clump. You’re aiming to lift the whole dahlia plant, roots and all, out of the ground without too much damage. Imagine you're scooping up a giant, muddy potato with a very tender heart.
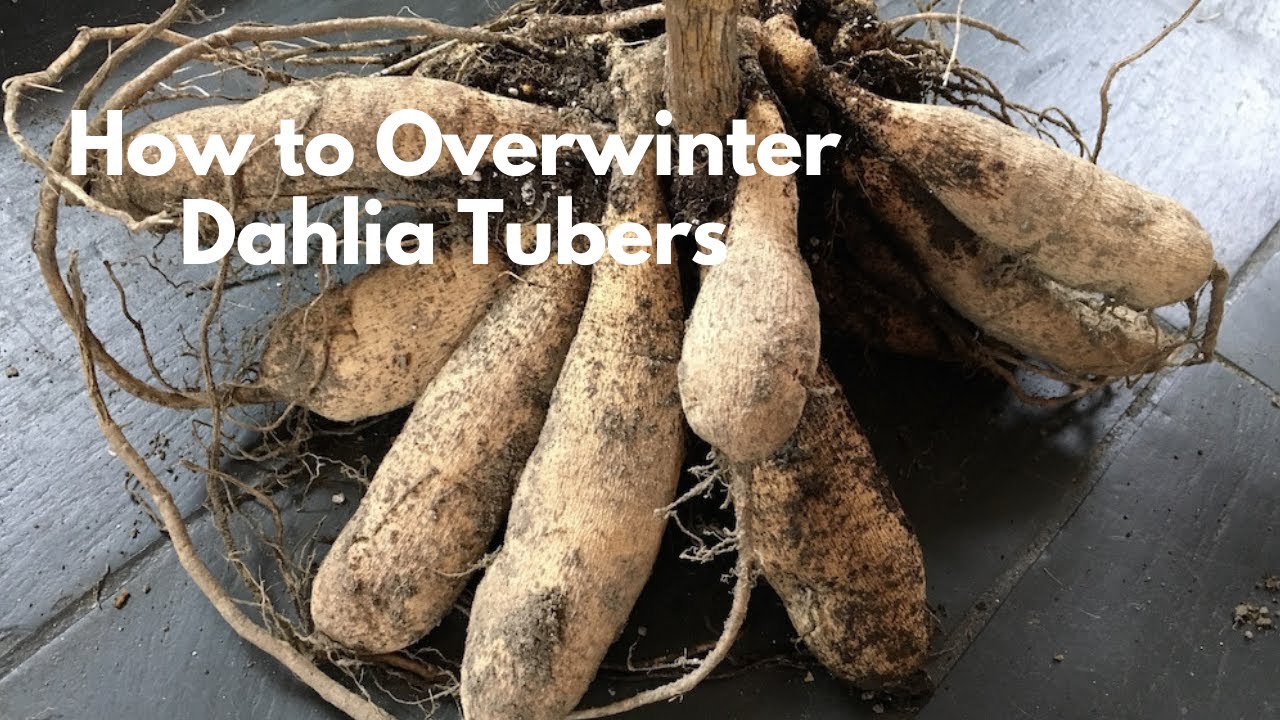
Once they're out, you'll want to brush off the excess soil. Again, gently! No need to scrub them like you’re getting ready for a spa day. Just a good shake and a gentle brush should do the trick. You'll see these clusters of tubers, sometimes connected by a bit of a woody stem. These are the guys we're saving. They look a bit like a collection of skinny, pale fingers, or maybe some weird alien pods. Whatever they remind you of, treat them with respect, because they hold the magic for next year’s blooms.
Now comes a crucial step, and it’s one that can cause a bit of anxiety: letting them dry. You need to let those tubers dry out a bit. This is super important for preventing rot. Think of it as letting them air out after a particularly vigorous dance session. Lay them out in a cool, dry, well-ventilated place. A garage, a shed, or even a spare room that’s not too warm and humid will work. You’re looking for them to feel a bit firm and leathery, not wet and mushy. This usually takes a few days, maybe up to a week, depending on how damp they are and the conditions. Don't leave them in direct sunlight, though; that's a big no-no. We're not trying to sunbathe them into oblivion, just give them a good airing.
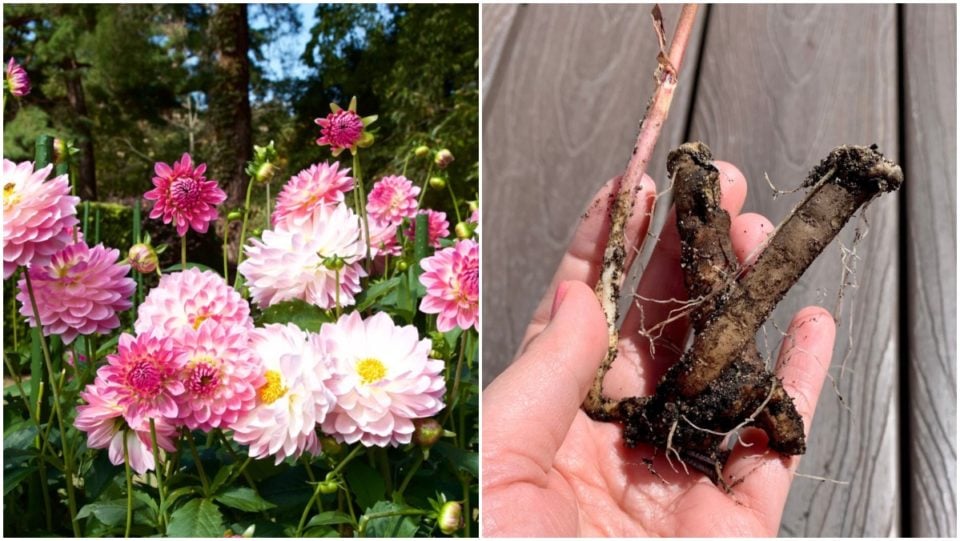
After they've dried off nicely, it's time to divide them. This is where you can really start to feel like a master gardener. You'll notice that the tubers grow in clumps. You want to separate these clumps into smaller divisions, making sure each division has at least one good eye. What's an eye, you ask? It's like the sprout's little wake-up call. It’s usually a little bump or a reddish-brown spot on the tuber where the new growth will emerge. If you have a really big clump, you can break it into several smaller ones. If you have a teeny-tiny one, you might want to save it and see if it grows, or perhaps combine it with another, but generally, aim for divisions that look like they have some promise. You can use your hands for this if the tubers are pliable enough, or a clean, sharp knife if you need to be a bit more precise. It’s a bit like breaking apart a bunch of slightly stubborn carrots.
Once you’ve got your nice, divided tubers, it’s storage time. And this is where the magic happens, or where the potential for disaster looms, depending on your perspective. The key is to keep them from drying out completely, but also to prevent them from getting too damp and rotting. It's a delicate balance, like trying to walk a tightrope while juggling flaming torches – okay, maybe not that dramatic, but you get the idea. The most common and easiest method involves packing them in a medium that will buffer them from drastic changes in humidity and temperature. My personal favourite, and the one that seems to work for most folks, is using peat moss or vermiculite. Some people swear by sawdust or shredded newspaper, which can also work. The goal is to create a cozy, dark, and slightly humid environment for their winter slumber.
So, grab a clean plastic bin, a cardboard box, or even a paper bag. You want something that isn't completely airtight. If you seal them up tight, you risk them sweating and rotting. You can put a layer of your chosen packing material at the bottom, then lay your dahlia tubers on top. Don’t pack them in too tightly; give them a bit of breathing room. Then, cover them with another layer of the material. You want them to be completely covered but not crushed. It’s like tucking them into a little earthy bed. Imagine them snuggled up, dreaming of sunshine and pollinators.
Now, find a cool, dark place to store them. A basement is often ideal, as it tends to have a more stable temperature and is usually dark. An unheated garage can work, but you need to be careful about extreme cold. If your garage gets well below freezing, you might need to insulate the storage bin a bit more or choose a different spot. The ideal temperature is generally between 40 and 50 degrees Fahrenheit (4 to 10 degrees Celsius). Too warm, and they might try to sprout too early. Too cold, and they could freeze and die. It’s like Goldilocks’ porridge – just right!
Throughout the winter, you’ll want to check on them periodically. Maybe once a month. This is where you’ll see if they’re doing okay. Are they shrivelling up like a raisin left out in the sun? If so, they might be drying out too much. You can lightly mist them with water or add a little more damp (not wet!) packing material. Are they looking a bit slimy or moldy? That’s a sign of too much moisture, and you might need to remove any affected tubers and let them air out a bit more. It’s like a winter check-up for your underground flower friends. A quick peek to make sure they’re not getting into too much mischief.
Don't panic if you see a little bit of mold. It happens. Just gently brush it off. If a tuber is completely mushy or rotten, it’s best to discard it to prevent it from affecting the others. Think of it as a sacrificial lamb for the good of the flock. You’re looking for tubers that are still firm and plump, even if they have a bit of age to them. They might not look as vibrant as they did when you dug them up, but that’s normal. They’re in their deep sleep, after all.
Another method some people use is storing them in bags with a bit of damp material. A simple paper bag filled with peat moss or vermiculite, with the tubers nestled inside and the bag loosely closed, can also work. Again, the key is to avoid a completely airtight seal. The idea is to create a microclimate where the tubers can stay hydrated but not soggy. Some gardeners even use old grocery bags, just making sure they aren't completely sealed.
And what about those tiny, almost insignificant-looking tubers? You know, the ones that look like they might have a hard time making it through the winter. Well, these are often the ones that surprise you the most! Sometimes, the smallest ones are the most vigorous growers. So, don’t toss them out just because they're little. Give them a chance. They're like the underdogs of the dahlia world, and who doesn't love an underdog story? Plant them with the same care as the bigger ones, and you might be rewarded with some stunning blooms.

Come spring, when the last danger of frost has passed and the soil is warming up, it’s time to wake your dahlia tubers from their slumber. You’ll start to see those little eyes looking a bit more enthusiastic, maybe even sporting tiny pink or red shoots. It’s like a yawn and a stretch after a long nap. You can then plant them directly into the ground, or, if you’re like me and want a head start, you can pot them up indoors first. This “chitting” process, as it’s sometimes called, involves planting them in pots with good potting soil, just deep enough so the tubers are covered and the sprouts are pointing upwards. Keep them in a warm, bright spot, and water them gently. It’s like giving them a warm breakfast before their big debut.
When you plant them out in the garden, remember they need plenty of sun and good drainage. Dahlias are hungry plants, so a bit of compost or well-rotted manure mixed into the soil will make them very happy. Space them according to the variety; some can get quite large and bushy, while others stay more compact. And then, you wait. You wait for those first tentative leaves to unfurl, for the stems to grow strong and tall, and finally, for those glorious blooms to emerge. It’s a process, but it’s one that’s incredibly rewarding. It’s like watching a talented artist meticulously create their masterpiece, one brushstroke at a time.
So, don't let those lumpy, bumpy dahlia tubers intimidate you. They're not some mystical gardening secret that only the initiated can master. With a little bit of care, a dash of patience, and a healthy dose of optimism, you can successfully overwinter your dahlia tubers and enjoy their spectacular show year after year. Think of it as an investment in future beauty. You’re basically a plant-preservation superhero, saving these colourful characters from the harsh realities of winter. And when those first buds appear in the spring, you’ll know that all your efforts were totally worth it. Happy overwintering!