How To Paint Metal Outdoor Furniture
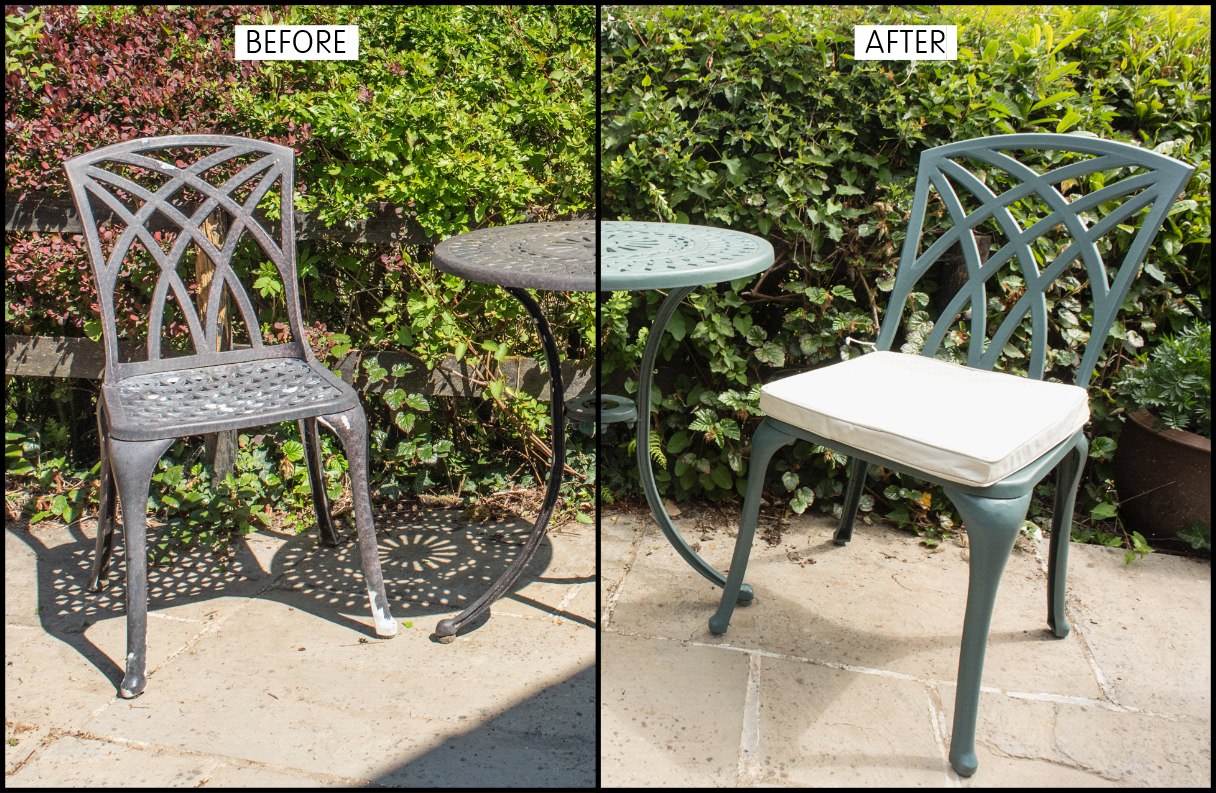
Hey there, coffee-clutching comrade! So, you’ve got some metal outdoor furniture looking a little… well, let’s just say “distressed”? You know, the kind that’s seen better days, maybe a little rust creeping in, or the paint chipping off like a bad manicure? Don’t you worry your pretty little head about it. We’ve all been there. That gorgeous patio set you snagged last summer is starting to resemble something unearthed from an ancient tomb. A total bummer, right?
But guess what? You don’t have to toss it out and spend a fortune on new stuff. Nope! We can totally give it a makeover. Think of it as a spa day for your patio. A little elbow grease, a dash of paint, and bam! Your furniture will be looking so good, your neighbors will be green with envy. Seriously, they’ll be asking for your secrets. And you can just wink and say, “Oh, this old thing? Just a little TLC.”
So, grab your favorite mug, settle in, and let’s chat about how to paint your metal outdoor furniture. It’s not rocket science, I promise. More like… patio science. Way more fun.
First Things First: The Prep Work (Don't Skip This Part!)
Okay, so this is where the magic really happens. You can’t just slap paint on rusty old metal and expect miracles. That would be like trying to build a house without a foundation. Disaster waiting to happen. So, let’s get down and dirty. Metaphorically, of course. Unless you’re really committed.
Gather Your Supplies. You'll need a few things. Think of it as your superhero toolkit for furniture resurrection. We're talking sandpaper (various grits, more on that later), a wire brush, some degreaser or soapy water, clean rags, a primer, and of course, your fabulous outdoor metal paint. Oh, and maybe some gloves. Nobody likes perpetually paint-stained hands, unless you’re going for a certain avant-garde look, which, hey, I support.
Clean Like a Pro (Or at Least Like You Mean It). This is crucial. Your furniture is probably covered in dirt, grime, maybe even some bird droppings. Ew. You gotta get all that off. A good scrub with soapy water and a sponge or cloth will do wonders. For tougher spots, you might need a stiff brush. Get into all those nooks and crannies. Think of it as a deep-tissue massage for your furniture. It’s going to feel so much better afterwards.
Tackle That Pesky Rust. Ah, rust. The arch-nemesis of metal furniture. If you’ve got any, you have to deal with it. If you just paint over it, it’ll just keep spreading. It’s like a bad zit; you can’t just put concealer on it and pretend it’s gone. Nope, gotta pop it! (Kidding! Don’t pop rust.)
Use a wire brush to scrub away as much of the rust as you can. Really get in there. Don’t be shy. You want to expose the bare metal underneath. Then, follow up with sandpaper. Start with a coarser grit (like 80 or 100) to really get rid of the stubborn bits, and then move to a finer grit (like 150 or 220) to smooth everything out. You’re aiming for a surface that’s smooth, not rough. Imagine you’re trying to win a ‘smoothest metal’ competition. You’ve got this!
Sand It Down (Even If There’s No Rust). Wait, what? Yes, even if your furniture isn't rusty, you still need to sand it. Why, you ask? Great question! Sanding creates a slightly rough surface, a little “tooth,” if you will. This helps the primer and paint stick better. It’s like giving the paint tiny little handholds to grab onto. Without this, your paint could peel off faster than you can say “summer soirée.” So, grab that finer grit sandpaper (around 220 is good) and give the whole piece a good scuff. Don’t go crazy, just a light sanding is all you need. Think of it as giving your furniture a little exfoliating treatment. Glow up incoming!
Wipe It Down. Again. And Again. After all that sanding and scrubbing, your furniture is probably coated in dust. You must wipe it all down with a clean, damp cloth. And then, wipe it down with a dry cloth. You want a perfectly clean, dry surface. Any dust or residue will prevent the paint from adhering properly. Seriously, this step is so important. Imagine trying to apply eyeliner with a dusty eyelid. Not pretty. Same principle applies here.
Priming for Perfection
Now that your furniture is squeaky clean and ready for its close-up, it’s time for primer. Think of primer as the unsung hero of the painting world. It’s the foundation, the wingman, the… well, you get the idea. It’s super important!
Why Bother With Primer?
You might be tempted to skip this step. I get it. You’re excited to start painting! But trust me, a good primer is your best friend here. It helps the paint adhere better, especially to slick metal surfaces. It also helps block rust from reappearing. How amazing is that? It’s like a bodyguard for your paint job. Plus, it can help cover up any imperfections you might have missed during the prep work. It’s like a little paint magic before the real magic begins.
Choose the Right Primer. For metal outdoor furniture, you want a good quality, rust-inhibiting metal primer. Look for something that says it’s suitable for exterior use and specifically for metal. Some primers are also specifically designed to bond to tricky surfaces like galvanized metal. If you’re unsure, ask someone at the hardware store. They’re usually pretty knowledgeable, and they’ve probably seen worse furniture than yours. Probably.

Apply It Evenly. Shake the primer can really well. Seriously, shake it like you’re trying to win a maraca competition. Then, apply a thin, even coat. You don’t want drips or sags. If you’re using a spray primer, keep the can moving in a steady, sweeping motion. Overlap your strokes slightly. If you’re using a brush-on primer, work in smooth, even strokes. Don’t try to cover everything in one thick coat. It’s better to do two thin coats than one thick, gloppy one. Patience, my friend, patience.
Let It Dry Completely. This is another one of those “don’t rush it” moments. Read the instructions on your primer can. Most will tell you how long to wait between coats and before painting. Don’t try to speed this up by blasting it with a hairdryer. Just let it do its thing. Letting it dry properly ensures a strong bond for your topcoat. It’s like letting a cake cool before frosting it. Nobody wants a melted frosting disaster.
Time to Paint! Let the Fun Begin
Alright, the moment you’ve been waiting for! The color! Now we get to have some fun.
Choosing Your Color Palette
This is where you can really let your personality shine. What vibe are you going for? Chic and sophisticated with a metallic silver? Bold and bright with a sunshine yellow? Or maybe a classic black or white? The possibilities are endless!
Consider the rest of your outdoor space. Does it have a particular color scheme? Do you want your furniture to blend in or stand out? Think about how the color will look in different lighting conditions. Sometimes a color looks amazing in the store but totally different on your patio. It’s a good idea to get a few sample pots if you’re really unsure. A little investment now can save you from a paint-job regret later.
Pick the Right Paint. You need outdoor metal paint, specifically. Regular interior paint won’t cut it. It’ll chip, fade, and generally make a mess of itself when exposed to the elements. Look for paints that are formulated to withstand UV rays, moisture, and temperature fluctuations. Many come with built-in primers, which is a bonus, but we’ve already done our separate primer step, so we’re extra covered!

You’ll likely find options like spray paints and brush-on paints. Spray paints are fantastic for getting into nooks and crannies and for achieving a super smooth finish. They’re also generally faster. Brush-on paints give you more control, and you might find it easier to get thicker, more opaque coverage. If you’re painting intricate details, a brush might be your best bet. If you’re painting a large, flat surface, a spray can could be your new best friend. Whatever you choose, make sure it's good quality. Cheap paint is rarely a good investment, especially for outdoor projects.
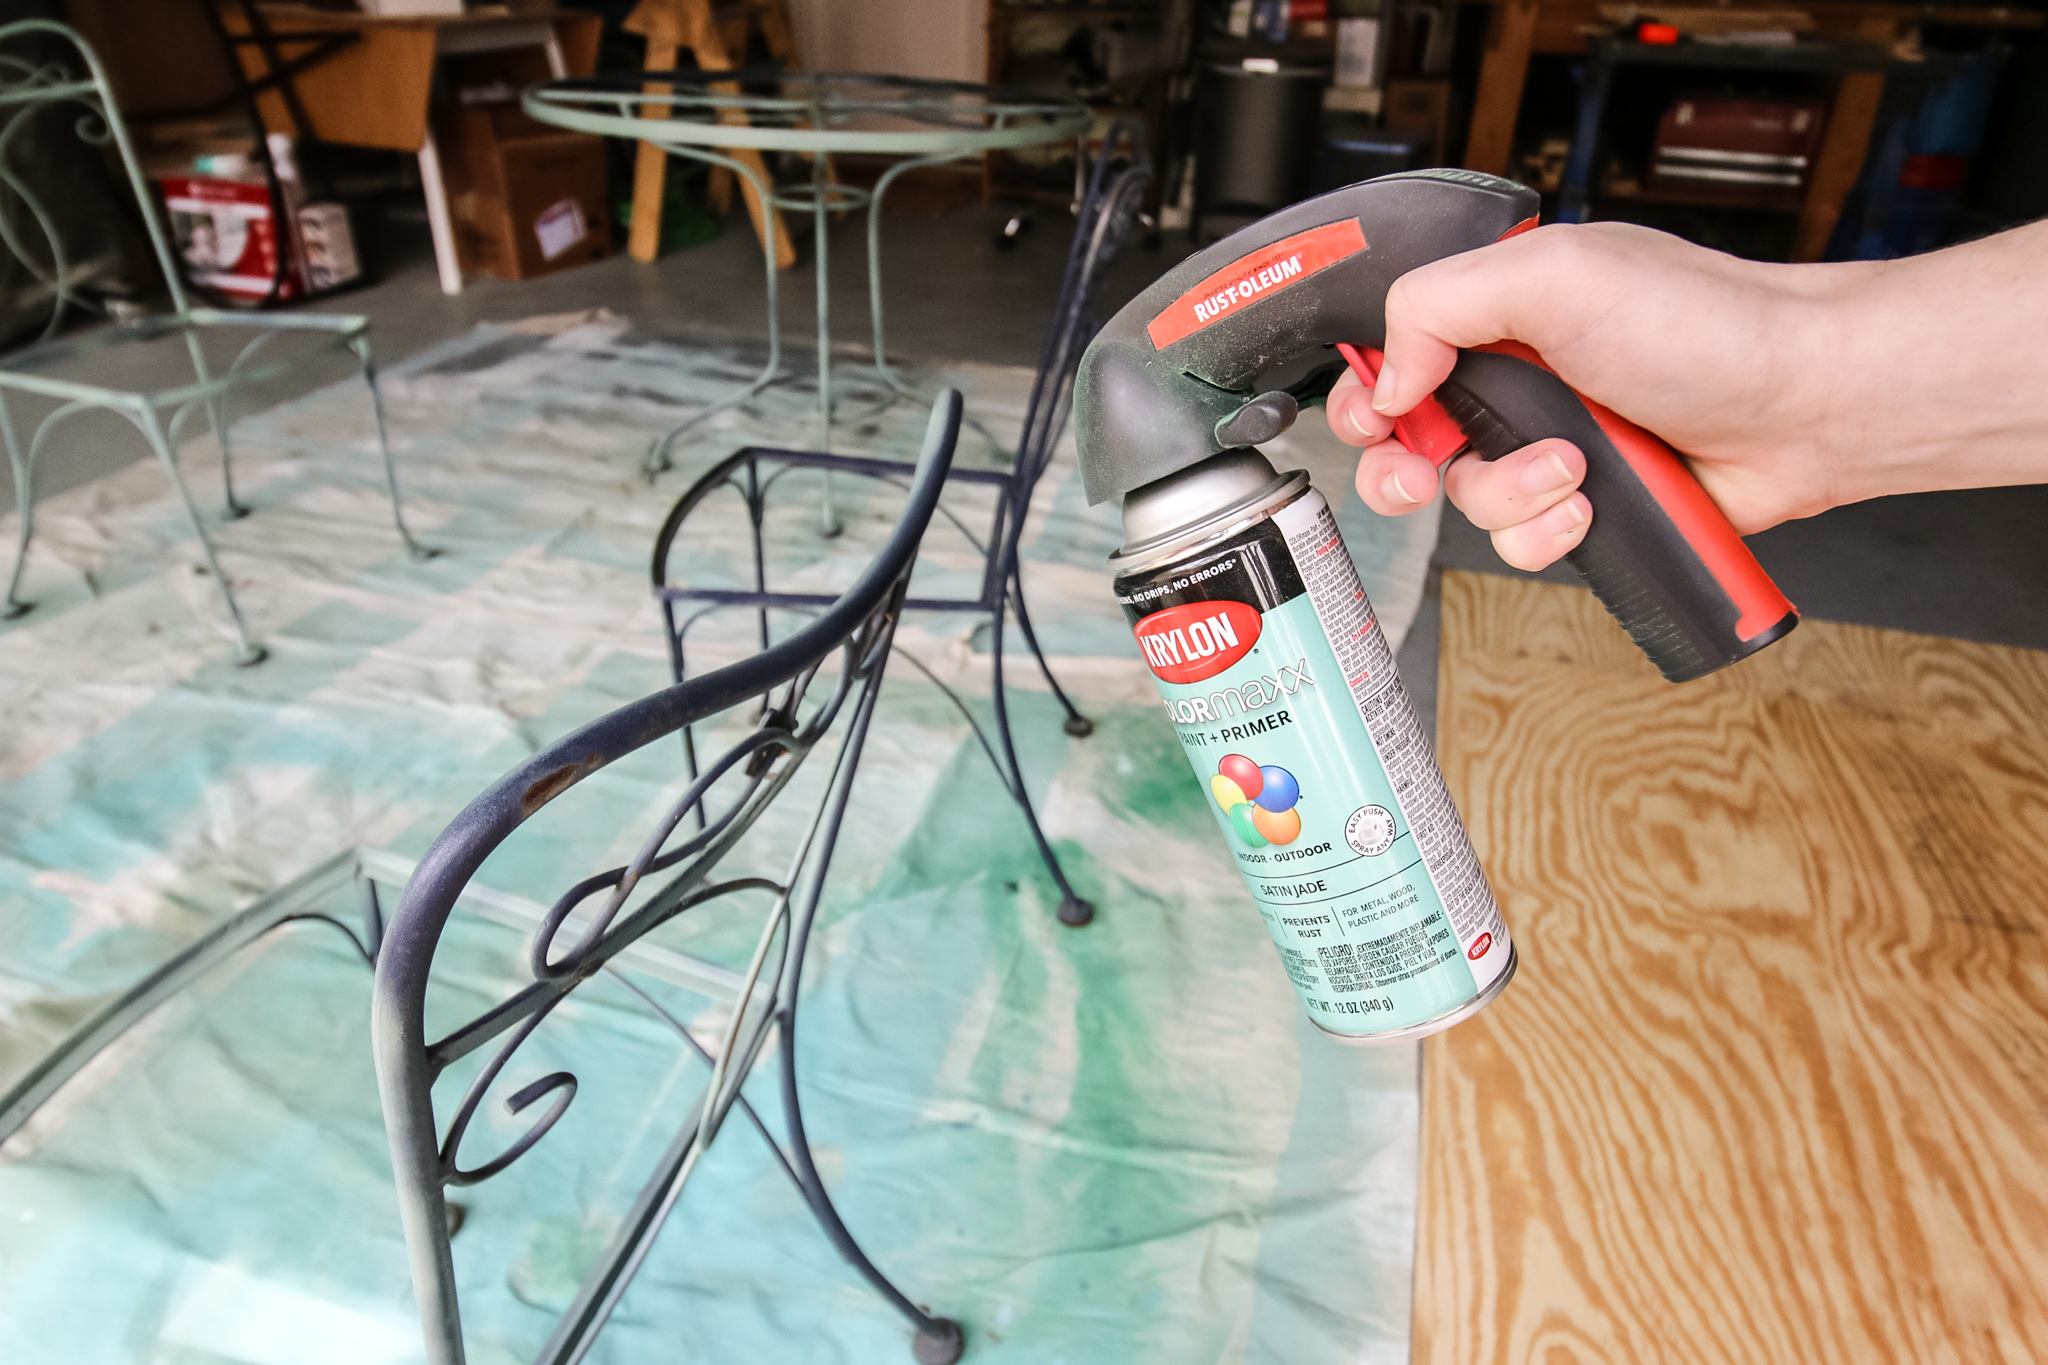
Application Time! Again, shake those spray cans really well. If you’re using a brush, make sure it’s a good quality brush that won’t shed bristles all over your masterpiece. Apply thin, even coats. Don’t glob it on. Multiple thin coats are always better than one thick one. Seriously, I can’t stress this enough. It’s the secret to a professional-looking finish that actually lasts.
Spray paint Tip: Stand back about 10-12 inches from the surface and move the can in a consistent, sweeping motion. Overlap each pass slightly. Don’t just hold the can in one spot! That’s how you get drips. Nobody wants drips. Unless they’re made of delicious chocolate and falling into your mouth.
Brush-on Tip: Work in long, smooth strokes. Try to avoid brush marks. If you do get a few, you can often lightly sand them down once the paint is dry (between coats, of course!).
Allow Drying Time Between Coats. Seriously, this is where patience really pays off. Check the paint can for drying times. Most paints need at least a few hours between coats, and some even need overnight. Resist the urge to touch it or speed it up. Let it cure properly.
How Many Coats? This depends on the paint and the color. Lighter colors might need more coats to achieve full coverage, especially if you’re painting over a dark surface. Darker colors might cover better. You’re looking for an even, opaque finish. Once you can no longer see the primer or the original color of the furniture showing through, you’re probably good. Two to three coats is usually a good starting point for most paints.
The Final Flourish: Curing and Care
You’ve painted! Woohoo! You’ve transformed your tired old furniture into something fabulous. But we’re not quite done yet. There’s a little more to consider.
Let It Cure
Even after the paint is dry to the touch, it’s still curing. This is the process where the paint hardens completely. It can take several days, sometimes even a week or more, for the paint to reach its full durability. So, while you can technically start using your furniture after it’s dry to the touch, it’s best to treat it gently for the first week or so. Avoid heavy scrubbing or placing anything that might scratch it. Think of it as giving your new paint job its own little recovery period. It’s earned it!
Ongoing Maintenance
To keep your beautifully painted furniture looking its best, a little regular maintenance goes a long way. Give it a gentle clean every now and then with mild soap and water. Wipe away any spills or debris promptly. If you notice any minor chips or scratches forming down the line, you can always do a quick touch-up. It’s much easier to fix a small spot than to repaint the whole piece.
And if you live in an area with really harsh weather, consider bringing cushions indoors during extreme heat or storms. While your paint job is tough, some things are just too much for even the most resilient furniture. Think of it as giving your furniture a cozy break.
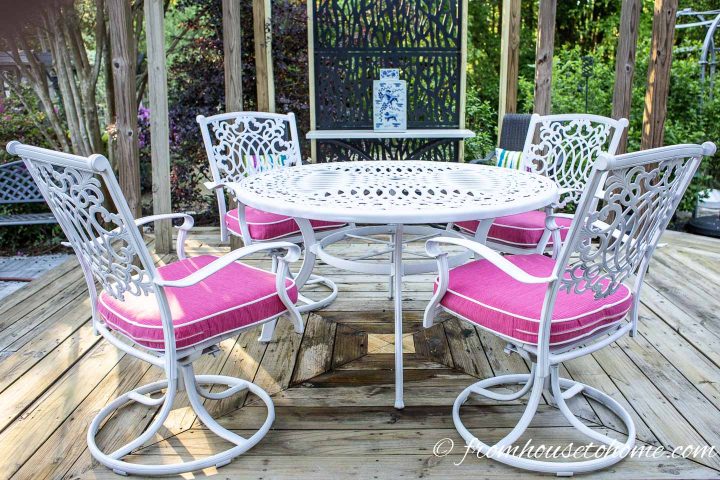
Enjoy Your Hard Work!
And there you have it! You’ve successfully revived your metal outdoor furniture. Now, the best part: actually using it! Curl up with a good book, host a barbecue, or just enjoy a quiet cup of coffee on your newly spruced-up patio. You deserve it! You basically performed a furniture miracle, and that deserves some serious relaxation. So go on, put your feet up. You’ve earned it. Now, who wants a refill?