How To Put A Deadbolt In A Metal Door
Okay, confession time. A few years back, I was convinced my house was about to be invaded by a rogue band of squirrels. No, seriously. It was a particularly windy night, and I heard this rhythmic thump-thump-thump against my back door. My imagination, bless its overactive little heart, went straight to tiny, masked bandits trying to rappel down my oak tree. Turns out, it was just a rogue branch. But that night, the image of my flimsy old doorknob practically weeping in terror, I realized something: my back door was about as secure as a chocolate teapot in a sauna. And that’s when I decided it was time to get serious about security, specifically, about putting a decent deadbolt on a metal door. Because apparently, even if it's not squirrels, you never know what or who might be trying to get in.
Now, you might be thinking, "A deadbolt? On a metal door? Isn't that, like, super complicated and something only a locksmith with a PhD in metallurgy should attempt?" And to that, I say, "Well, maybe a little complicated, but not impossibly so!" I’m no master craftsman, trust me. My DIY skills usually involve me staring blankly at a tool, wondering if it’s supposed to do something other than gather dust. But this? This felt achievable. And let me tell you, the satisfaction of knowing you’ve upgraded your home security yourself is pretty darn epic. So, buckle up, buttercup, because we’re about to dive into the wonderful world of making your metal door a fortress. Or at least, a slightly more robust one.
So, You Wanna Bolt Down That Metal Door? Let's Talk Gear.
Before we start hacking away at your door like it owes us money, we need to gather our arsenal. Think of this as your pre-mission briefing. You wouldn't go into battle without your trusty… well, whatever it is you'd take into battle. For us, it's tools and a new deadbolt. And yes, you need to make sure the deadbolt you buy is specifically designed for metal doors. They're a bit different, you see. They often have a thicker bolt and a sturdier mechanism because, you know, metal is, well, metal. It’s not going to warp like wood if you look at it funny.
What you'll likely need:
- A brand new deadbolt kit: Make sure it’s for metal doors! Check the specs. Don't just grab the first shiny thing you see.
- A drill: This is your best friend. You’ll be drilling holes, so a good, powerful drill is key. cordless is usually easier to maneuver.
- Drill bits: You’ll need a few sizes. Start with a smaller one for pilot holes and then go up to the size recommended by your deadbolt instructions. Sometimes a hole saw is helpful for the larger lockset holes.
- A measuring tape: Precision is your friend here. No eyeballing it!
- A pencil or marker: For marking where you’re going to drill. Try to use something that won't scratch your nice new door.
- A screwdriver set: Phillips head and flathead, just in case.
- A hammer: Sometimes a gentle tap is needed to persuade things.
- Safety glasses: Seriously, don't skip these. Metal shavings are no joke. They fly. Everywhere.
- Gloves: To protect your hands and get a better grip.
- A file or sandpaper: To smooth out any rough edges after drilling.
- A helper (optional, but highly recommended!): An extra pair of hands can be a lifesaver, especially when you’re trying to hold things in place. Plus, they can hand you the right tool when you inevitably yell, "Where's the… thingy?!"
Take a moment to lay all this out. Admire your collection of potential security boosters. Feel the power. Or at least, the mild sense of preparedness. This is the first step, and it's a good one.
Step 1: The Grand Decision – Where Does This Bad Boy Go?
This is where we get a bit strategic. You can't just slap a deadbolt anywhere. Well, you could, but it wouldn't be very effective, would it? Think about where an intruder would try to force their way in. Usually, it's near the existing doorknob and lock. So, you want your deadbolt to be a bit of a backup and a deterrent in that general area, but not too close that it compromises the structural integrity of the door.
Generally, you want the deadbolt to be positioned about 4 to 6 inches above or below your existing doorknob. Why this range? It’s high enough to be a separate point of leverage if someone tries to kick the door in near the handle, but not so high that it’s awkward to use or weakens the door too much. Measure twice, drill once, remember?

Pro tip from your friendly neighborhood DIYer: If you have a metal door with a hollow core (most metal doors are!), drilling too close to the edge or too close to the existing lock can make things… wobbly. So, find that sweet spot in the middle of the door’s solid part. Sometimes, especially on older metal doors, there might be a reinforcing bar inside. You don't want to drill into that unless you have the right bit for it. A quick tap with a hammer in different spots might give you a clue if it's solid or hollow in certain areas.
Mark your spot lightly with your pencil. This is your target. Make it clear. Give it a little X. You are the captain of this DIY ship.
Step 2: Let the Drilling Commence! (Don't Be Scared, It's Just Holes)
Okay, deep breaths. This is the part where things get noisy and you might get a little dusty. First, we need to drill the hole for the actual deadbolt mechanism to pass through the door. Your deadbolt kit will have instructions, and they’ll tell you the exact diameter of the hole you need. This is where your measuring tape and the drill bit that matches the instructions come in.
Important, like, really important: If you’re drilling a large hole (often around 2 1/4 inches for the lockset), a standard drill bit might struggle. This is where a hole saw attachment for your drill is a lifesaver. It’s basically a circular saw blade that attaches to your drill and cuts out perfect circles. It makes a world of difference, especially on metal. If you don't have one, you might need to make several smaller, overlapping holes and then clean it up with a file, but honestly, a hole saw is worth the investment if you plan on doing more DIY projects.

Start with a smaller pilot hole first, using a bit that’s significantly smaller than your final hole size. This helps guide the larger bit and prevents it from wandering. Drill slowly and steadily. Let the drill do the work. Don't force it. On metal, it’s easy to overheat the bit, so take breaks if you need to. You might want to put a piece of scrap wood on the other side of the door where you’re drilling to prevent tear-out on the metal.
Once you’ve got the main hole drilled, you'll need to drill a hole on the edge of the door for the bolt itself to extend into. Again, your instructions will tell you the size and depth. This one is usually a bit smaller than the main hole. Then, you’ll need to drill a larger, shallow hole for the faceplate of the deadbolt on the edge of the door. This is where your file or sandpaper will come in handy to make sure everything sits flush.
Side note for the slightly nervous DIYer: If you’re drilling into painted metal, the paint might chip or peel. Don’t freak out! This is normal. You can touch it up later. The main goal here is a clean, functional hole. And remember those safety glasses? They’re earning their keep right about now. Metal shavings have a way of finding the tiniest cracks.
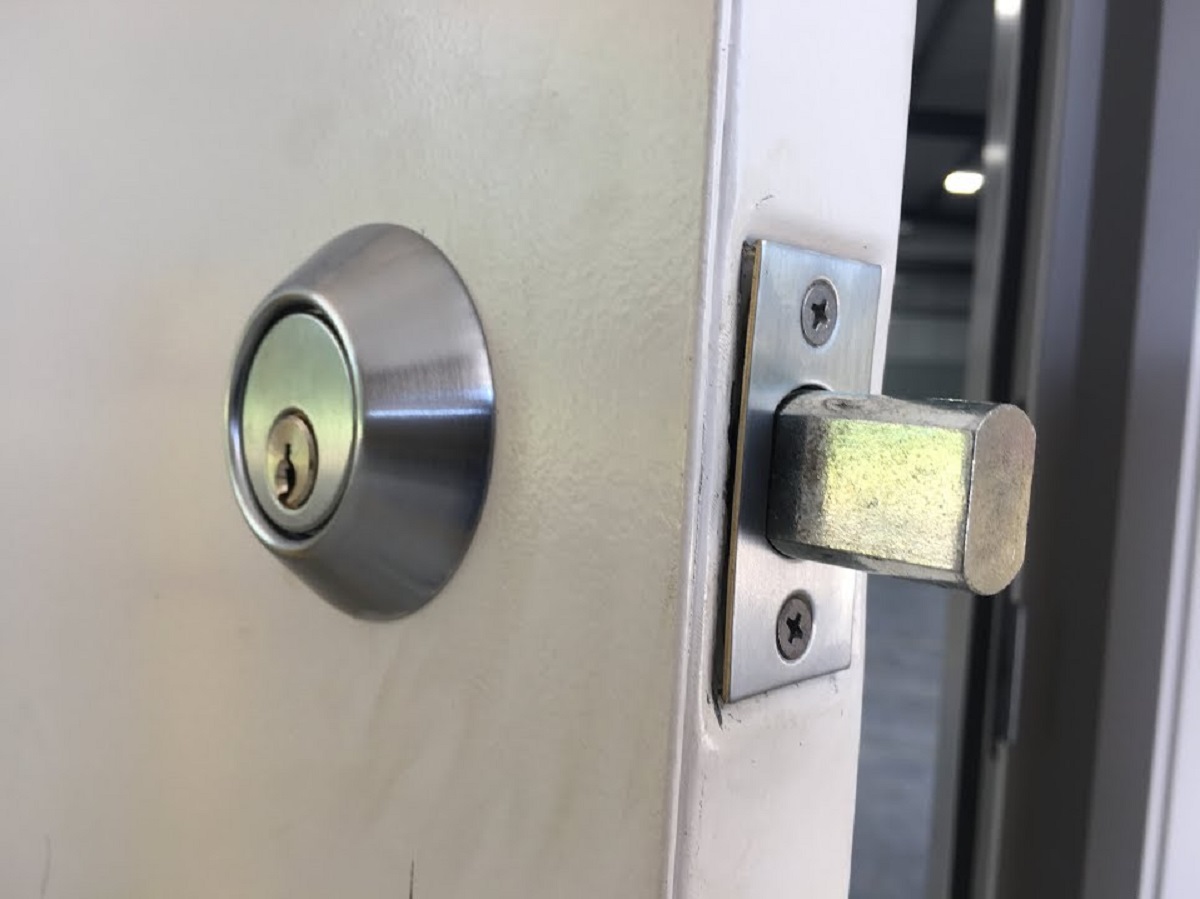
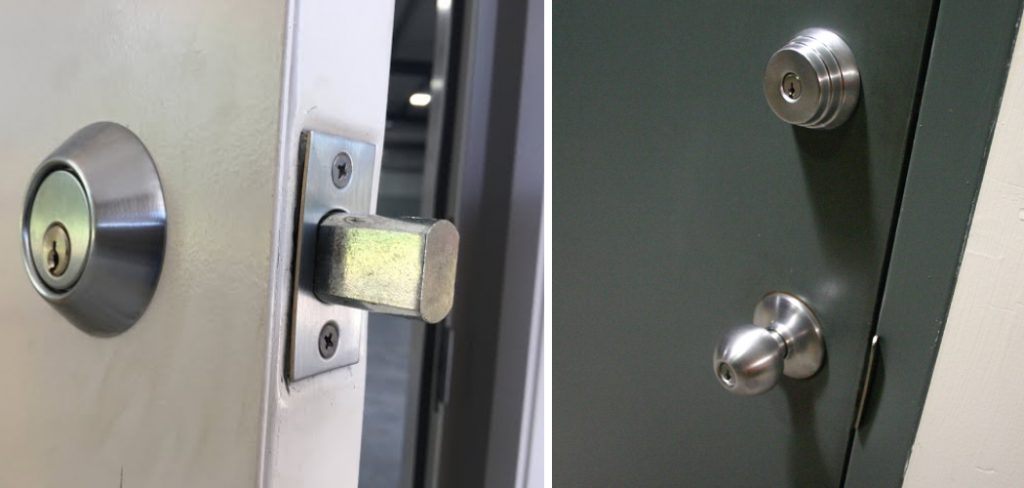
Step 3: Meet the Strike Plate – The Unsung Hero
Now, this is crucial. You've drilled holes in your door, which is great. But where does that lovely deadbolt bolt into? That’s where the strike plate comes in. This is the metal plate that gets mounted on your door frame. Without a solid strike plate, your deadbolt is just… pointing at empty air, which is not very secure.
Your door frame likely already has a strike plate for your doorknob. You’ll probably need to remove that. Then, you need to mark the position for your new, beefier deadbolt strike plate. This is also where measuring is key. The deadbolt’s bolt needs to line up perfectly with the hole in the strike plate so it can slide in smoothly.
The trick with metal doors, and often metal frames: Sometimes the door frame is also metal. This means you’ll be drilling into metal there too. Again, pilot holes are your friend. For a really secure installation, especially if you're drilling into a metal frame, you might need to use some self-tapping metal screws. These are designed to cut their own threads as you screw them in. They make a huge difference in how secure the strike plate is.
Your deadbolt kit should come with a strike plate and screws. If you're drilling into a wooden frame, the standard screws might be fine. If it's a metal frame, you might need to upgrade to specialized metal screws. Don't be afraid to ask at your local hardware store. They're usually happy to point you in the right direction. And yes, you’ll be drilling more holes. Embrace the hole!
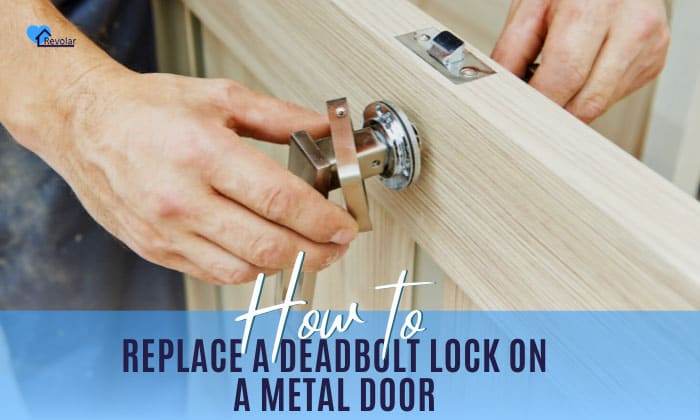
Step 4: The Moment of Truth – Assembly Time!
Alright, the drilling is done. The frame is prepped. It’s time to bring it all together. Your deadbolt kit will have two main parts: the part that goes on the outside of the door (with the keyhole) and the part that goes on the inside (with the thumb turn).
Start by feeding the spindle (the long metal rod that connects the two handles) through the hole you drilled in the door. Then, attach the exterior and interior lock cylinders to this spindle, making sure they are facing the right way (obviously!). You’ll likely have a couple of screws that hold these two pieces together, sandwiching the door. Tighten these screws firmly, but don’t overtighten them. You don’t want to strip the threads or bend the metal.
A quick word of encouragement: This part can feel a bit fiddly, especially if you have a helper trying to hold one side while you attach the other. Just take your time. Read the instructions that came with your deadbolt. They are your sacred texts at this point. Sometimes, the internal mechanism needs to be aligned in a specific way before you can get the screws in. Patience is key!
Once the main lock mechanism is secured to the door, it’s time to test it. Insert the key and turn it. Try the thumb turn. Does it slide in and out smoothly? Does it lock and unlock properly? If it feels stiff or catches, something might not be perfectly aligned. You might need to loosen the screws a bit, adjust the position, and retighten. This is the trial-and-error phase, and it’s totally normal. Don't get discouraged.
Step 5: The Final Flourish – Making it Look Pretty (and Secure)
You’ve done it! The deadbolt is installed. Now, it’s time for the finishing touches. If you’ve got any rough edges from drilling, now’s the time to file them down or sand them smooth. You can also use touch-up paint to cover any scratches or chipped paint. Make it look like you meant to do that, not like you just fought a metal beast.
The last, most important test: Close your door. Engage the deadbolt. Does it slide into the strike plate smoothly? Does it feel solid when locked? Now, try to jiggle the door. Does it feel significantly more secure than before? You should notice a big difference.
And there you have it. You’ve successfully installed a deadbolt in a metal door. You’ve enhanced your home security, saved yourself some money, and probably learned a few new swear words along the way (just kidding… mostly). Go ahead, give yourself a pat on the back. You’ve earned it. Now, if you’ll excuse me, I’m off to see if I can hear any more suspicious thumping. Just kidding. Mostly.