
How To Remove A Graphics Card From A Computer

So, you're looking to yank that glorious graphics card out of your PC, huh? Maybe you're upgrading to something even more beastly, or perhaps it's time for a little tech spa treatment for your rig. Whatever the reason, it's not as scary as it sounds! Think of it like this: we're just giving your computer a little wardrobe change. Easy peasy.
First things first, let's get you prepped. You wouldn't go in for surgery without your tools, right? Same goes here. We need a few things to make this a smooth operation. Grab a Phillips head screwdriver. You know, the one with the cross shape? Yeah, that guy. Also, an antistatic wrist strap is a super smart idea. Static electricity? Total killer of delicate computer bits. Don't be a hero and skip this. Trust me, your GPU will thank you.
And before we even think about touching anything inside, what's the absolute most crucial step?
Once it's powered down and unplugged, you gotta give it a little rest. Let it sit for a few minutes. Why? Well, some components can hold a residual charge. You don't want to be zapping anything unexpectedly. Patience, my friend. Good things come to those who wait... and don't fry their expensive hardware.
Now, for the fun part: opening up the case. This is where your trusty screwdriver comes in handy. Most PC cases have screws on the back that hold the side panel on. Just a few twists, and voila! Your innards are exposed. Be gentle, though. No need to manhandle your machine. It's a delicate ecosystem in there, a miniature metropolis of silicon and circuits.
Got the side panel off? Awesome! Now, take a good look inside. See that big, beautiful, likely colorful card plugged into one of the long slots on the motherboard? That's your graphics card. It's probably got fans on it, and maybe even some fancy RGB lighting if you're living that gamer life. It's the visual powerhouse, the pixel pusher extraordinaire.
Before you go yanking on it, we need to find where it's actually connected. Most graphics cards are plugged into what we call a

So, locate that clip. It might be a lever, or just a little tab you need to push down. You might have to press it with your finger, or sometimes a small screwdriver if it's being a bit stubborn. Don't be afraid to give it a little nudge. Just remember to be gentle. We're not trying to break it off, just disengage it.
Got the clip unlatched? You're practically a pro already! Now, you'll also notice that your graphics card is probably screwed into the back of the case. This is to give it extra support, which is smart because these things can be a bit hefty. You'll see a few screws, usually two or three, holding the metal bracket of the card to the chassis.
Time for the screwdriver again! Unscrew those. Keep them safe, maybe in a little bowl or a magnetic tray. You'll want these later, unless you're replacing it with something that uses different mounting hardware, which is a whole other adventure. For now, let's assume you're keeping the same mounting style.
Once those screws are out, the card should be free from the back of the case. Now comes the moment of truth: pulling it out of the PCIe slot. You want to pull it straight up. No wiggling side-to-side too much, as that can stress the slot on the motherboard. Just a steady, even pull.
If it's not budging, don't force it! Go back and double-check that clip. Did you press it all the way down? Is there anything else holding it? Sometimes there are other little plastic clips or tabs. Just take another peek.
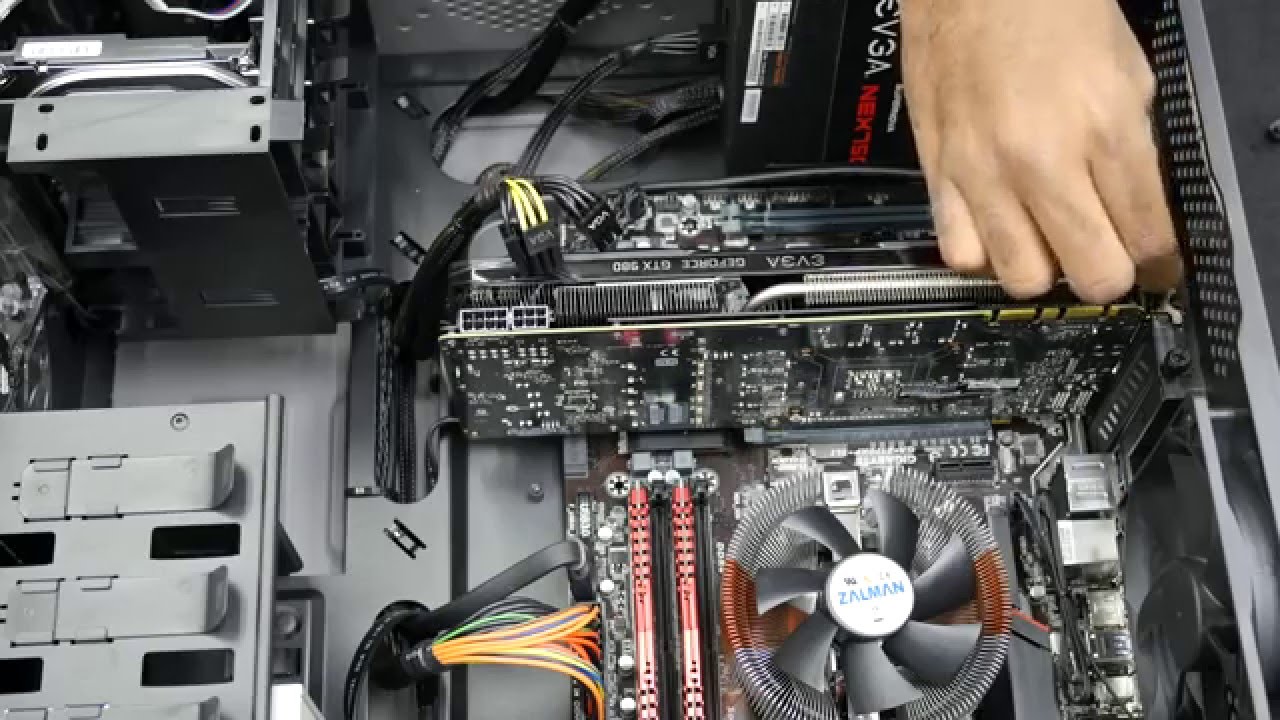
And what about the power cables? Ah yes, the power! Most modern graphics cards need their own juice, separate from what the motherboard provides. You'll see chunky cables coming from your power supply, plugged into the top or side of the graphics card. These are usually 6-pin or 8-pin connectors. They have little clips on them that you need to press to release them.
So, before you try to pull the card out, make sure you've disconnected those power cables. Find the clip on each connector, press it firmly, and then gently pull the cable away. Don't just yank the wires! You want to pull on the plastic connector itself. Think of it as a little handshake to say goodbye to the power.
Okay, so, recap: screws out from the back, power cables disconnected, and that little clip on the PCIe slot unlatched. Now, with a steady hand, gently pull the graphics card straight up and out of the slot. It might feel a little stiff at first, as if it’s really settled in there. That's normal. Just keep that even pressure.
And there you have it! Your graphics card, free from its digital nest. Give yourself a pat on the back. You just performed a minor surgery on your PC. High five! You can now marvel at its glory, inspect it for dust bunnies, or carefully put it aside to await its new home.
What if it's a really big card? Some of those high-end GPUs are absolute monsters. They can be quite heavy and long. When you're pulling them out, support their weight as you disengage them. You don't want them to sag and potentially damage the motherboard slot on the way out. Think of it as lifting a baby – support its back!

And what about those little standoffs or brackets that might be attached to the card and the case? You'll want to remove those too if you're planning to put in a new card that uses the same mounting. Just a couple more screws, usually. Easy peasy, lemon squeezy.
Now, what if you're not upgrading, but just cleaning? This is a great opportunity! You can gently dust off the card and the fans. A can of compressed air is your best friend here. Just a few short bursts, and you'll be amazed at how much dust can accumulate. Remember to hold the can upright, and don't get too close, or you might end up with some weird frosty bits!
And while you've got the case open, it's a prime time to give the rest of your components a little love too. Dust off those fans on your CPU cooler, vacuum out the general dust bunnies that have taken up residence. Your whole PC will run cooler and happier for it. Think of it as a spring cleaning for your rig.
Now, let's talk about reinstallation. It's pretty much the reverse process, but with a few extra things to keep in mind. Make sure the PCIe slot is clear. No stray screws or debris should be lurking in there. We don't want any unwelcome guests.
Align the card with the slot. You’ll see the gold connectors on the bottom of the card need to match up with the slot on the motherboard. Gently, but firmly, push down on both ends of the card until it’s seated properly and you hear or feel a click from the retention clip. That click is music to a techie's ears!
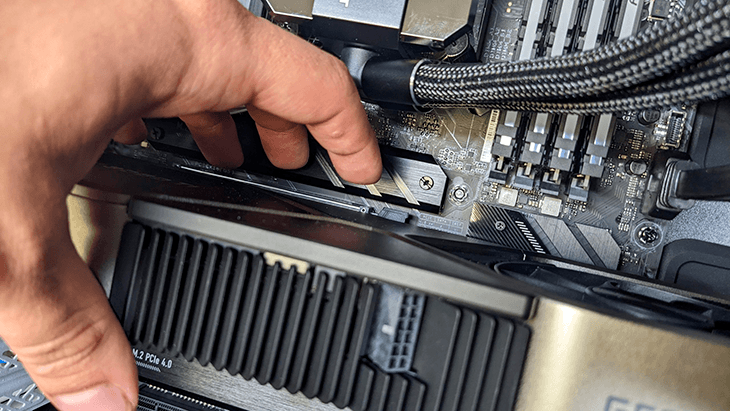
Once it's seated, reattach the screws to the back of the case. And, crucially, don't forget to plug those power cables back in. Make sure they're fully seated and the clips are engaged. A graphics card that's not getting enough power will cause all sorts of weird issues, like crashing or not booting at all. Nobody wants that headache.
Then, put the side panel back on, screw it in, and plug everything back in. Turn it on, and hold your breath... no, don't hold your breath! It should boot up just fine. You might need to install drivers for your new card, or if you're just cleaning, the old ones should still work perfectly. But it’s always a good idea to check for the latest drivers from the manufacturer's website.
So, there you have it. Removing a graphics card isn't some arcane ritual. It's a straightforward process if you take your time and are a little bit careful. It's empowering, really. You're not just a user of technology; you're becoming a steward of it. You're getting to know your machine on a deeper level. Pretty cool, right?
And remember, if you ever get stuck, there are tons of videos online showing this exact process. A quick search for "how to remove graphics card" will bring up a plethora of helpful visual guides. Sometimes seeing it done is the easiest way to learn. Plus, you get to watch someone else do the scary part first!
So go forth, be brave, and conquer that computer case. You've got this! Your graphics card is ready for its close-up, or its departure. Happy tinkering!