How To Remove Adhesive From Shower Wall Without Damaging
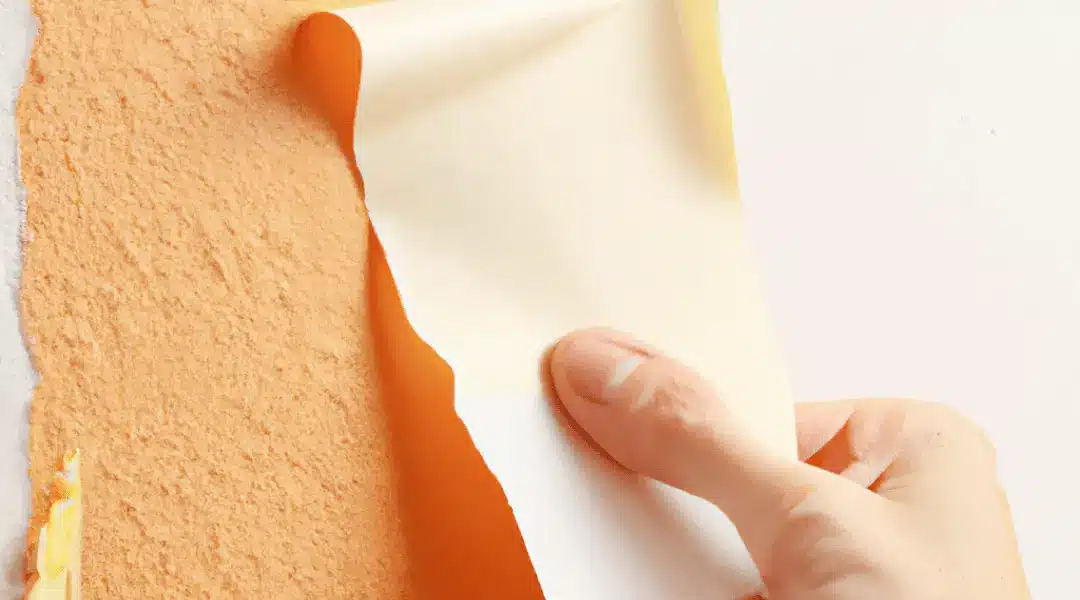
Okay, so you've got that stubborn piece of… something… stuck to your shower wall. Maybe it’s a leftover sticker from a new shower caddy you’ve grown to hate, or perhaps it’s that one rogue piece of tape that survived a previous renovation. Whatever it is, it's just there, staring you down, a tiny adhesive nemesis in your otherwise pristine sanctuary of suds. Don't you just hate when that happens?
It’s a common shower struggle, right? We want our bathrooms to be a place of calm and cleanliness, not a battleground against sticky situations. And the thought of scrubbing and scraping and potentially damaging that nice shower wall? Ugh, no thank you. But what if I told you there’s a way to tackle these little adhesive monsters without resorting to extreme measures or turning your beautiful tiles into a scraped-up mess? Stick around, because we're about to dive into the wonderfully chill world of safe adhesive removal.
The Mystery of the Stubborn Sticker
Ever wonder why some adhesives are so incredibly tenacious? It’s like they’re glued down with the strength of a thousand tiny, determined ants. They cling on, mocking your attempts to pry them off, leaving behind that dreaded sticky residue that attracts all sorts of… well, bathroom gunk. It’s a microscopic crime scene, and you're the detective trying to clean it up.
Think of it like trying to peel a really, really old sticker off a brand new, perfectly smooth surface. You pull, and a little bit comes off, but the rest just tears, leaving behind those infuriating, thin wisps of goo. It's a test of patience, and sometimes, it feels like we fail that test spectacularly, ending up with a wall that looks worse than before we started.
Why Gentle is the Name of the Game
Our primary goal here is to keep your shower walls looking as good as new. Whether you have tile, acrylic, fiberglass, or even painted surfaces, a little too much elbow grease or the wrong kind of cleaner can cause some serious oopsies. We're talking about scratches, dulling of finishes, or even stripping away protective coatings. Nobody wants a shower that looks like it went a round with a cheese grater, right?
It's all about finding that sweet spot: enough power to dissolve or lift the adhesive, but gentle enough not to harm the surface underneath. It's like being a ninja – you want to be effective without leaving any trace of your forceful presence, except for that perfectly clean spot where the adhesive used to be. Pretty cool, huh?
Your Arsenal of Adhesive-Busting Heroes (The Gentle Kind!)
So, what are these magical, gentle solutions? Glad you asked! We've got a few trusty sidekicks ready to help you win this sticky battle. You probably already have most of them lurking in your cleaning cabinet, or you can grab them easily at your local store. No need for industrial-strength solvents here, folks!
The Warm Hug: Hot Water and Soap
Sometimes, the simplest solutions are the most effective. For less stubborn adhesives, a good old-fashioned warm water soak can work wonders. Grab a sponge or a washcloth, soak it in hot, soapy water, and let it sit on the adhesive for a few minutes. The warmth helps to soften the glue, and the soap can help break it down.
Think of this like giving the adhesive a warm, relaxing bath. It’s less about attacking it and more about persuading it to let go. After a good soak, try gently wiping or peeling the residue away. You might be surprised at how well this works for those fresh, less tenacious sticky bits.
The Oily Persuader: Cooking Oil or Baby Oil
This might sound a bit counterintuitive – adding oil to clean things? But trust me, oil is an amazing solvent for many types of adhesives. It works by breaking down the sticky polymers, making them less… well, sticky. Think of it like dissolving sugar in water; the oil helps to surround and break apart the glue molecules.

Grab some vegetable oil, olive oil, or even baby oil. Apply a generous amount directly to the adhesive residue. Let it sit for a good 15-30 minutes, or even longer for really tough spots. Then, use a soft cloth or a plastic scraper (like a credit card or a plastic putty knife – never metal!) to gently scrape away the softened goo. Rinse the area thoroughly with soap and water afterwards to remove any oily film.
The Rubbing Alcohol Revelation: Isopropyl Alcohol
Isopropyl alcohol, that stuff you usually find in the first-aid kit, is another fantastic adhesive remover. It’s a bit more potent than oil but still generally safe for most shower surfaces. It evaporates quickly and is great at dissolving sticky residue without leaving a greasy film.
Dampen a cotton ball, a soft cloth, or a paper towel with rubbing alcohol. Dab it onto the adhesive and let it sit for a minute or two. You should start to see the residue loosen up. Then, gently rub it away. You might need to reapply and rub a few times for really persistent stickers. Just make sure your shower walls are well-ventilated when using alcohol, and test it on an inconspicuous spot first if you’re nervous.

The Vinegar Victory: White Vinegar
White vinegar is a cleaning powerhouse, and it can also come to the rescue of your sticky shower walls. Its mild acidity can help break down the adhesive. Like the oil method, you’ll want to let it soak in for a bit.
Soak a cloth or paper towel in white vinegar and place it over the adhesive. Let it sit for about 10-15 minutes. Then, gently scrape and wipe away. Again, rinse the area well with water afterwards. Be aware that vinegar has a… distinctive smell, so ensure good ventilation!
The Commercial Champions (Choose Wisely!)
If you're looking for a dedicated adhesive remover, there are plenty of products on the market designed specifically for this. However, it's crucial to read the labels carefully. Look for products that are specifically labeled as safe for your shower wall material. Some common and effective options include Goo Gone or WD-40 (yes, that lubricant can work wonders on sticky stuff too!).
Always, always follow the product instructions and test in an inconspicuous area first. These are often a bit more potent, so a little goes a long way, and you want to avoid any nasty surprises. Think of these as your high-powered tools, to be used with respect and a little bit of caution.

The Gentle Scraping Technique
Once the adhesive has been softened, the next step is removal. This is where you need to be extra careful. Your best friends here are soft cloths and plastic scrapers. Think old credit cards, plastic putty knives, or even the edge of a plastic spatula.
Avoid using metal blades, knives, or abrasive scrubbers at all costs. These are the surefire way to turn your smooth, beautiful shower wall into a scratched-up disaster. Gently work from the edges of the adhesive residue, trying to lift it. Be patient! It might take a few passes and a bit of reapplication of your chosen cleaning agent.
The Final Rinse and Shine
After you’ve successfully banished the adhesive to the sticky-residue graveyard, it’s time for a final clean-up. Rinse the area thoroughly with plain water to remove any cleaning solution residue. Then, wash the area with your regular bathroom cleaner or a mild soap and water solution.
Give it a good wipe down with a clean, soft cloth. Admire your work! You’ve conquered the adhesive, kept your shower wall pristine, and probably learned a thing or two about the hidden power of household items. Pretty neat, right? Now, go enjoy your squeaky-clean, adhesive-free shower!