
How To Repair Tubeless Tire

Okay, so picture this. It was a glorious Saturday morning. The sun was doing its best impression of a giant, happy highlighter in the sky, and I had a fresh batch of coffee brewing. My trusty steed, my bicycle, was leaning against the wall, begging for an adventure. We’d planned a route through some gnarly trails, the kind that make your quads sing and your spirit soar. I strapped on my helmet, grabbed my water bottle, and… phhhttt… That’s the sound of my dreams deflating faster than a cheap pool float. A flat. A big, fat, tubeless flat, right on the eve of glory.
At first, I’ll admit, there was a moment of existential dread. You know, that feeling when your carefully laid plans crumble like a week-old biscuit? My mind raced. What now? Do I call for a rescue? Do I have to walk miles in my fancy cycling gear, looking like a sad, lycra-clad hermit? But then, I remembered. This wasn’t just any flat. This was a tubeless tire. And while it felt like a betrayal at that moment, it also meant I probably wasn't completely screwed. This, my friends, is where the magic (and a bit of elbow grease) comes in.
So, the next time your two-wheeled companion decides to have a little nap with a puncture, don't despair! We're going to dive headfirst into the wonderful, sometimes messy, world of fixing a tubeless tire. Think of me as your friendly neighborhood bike mechanic, minus the greasy overalls and the questionable smell.
The Tubeless Tire: A Love-Hate Relationship
Let’s be honest, tubeless tires are a game-changer. No more fiddly inner tubes to wrestle with, no more pinch flats ruining your downhill run. They offer a smoother ride, the ability to run lower pressures for better grip, and the joy of… well, fewer flats! Mostly.
But, like any relationship, it has its quirks. Sometimes, that magical sealant just doesn't do its job, or the puncture is a bit too enthusiastic for it to handle. And that’s when you find yourself in a similar situation to me, staring at a sad, limp tire and wondering what on earth to do.
The good news? Repairing them isn't rocket science. It’s more like… slightly more advanced Lego building. You’ll need a few specific tools and a bit of patience. And maybe a willingness to get a little sealant on your hands. It’s practically a rite of passage, really.
When Sealant Just Isn't Enough
So, your tire has gone flat. You’ve checked for obvious thorns or gashes, and you’ve given it a good shake, hoping the sealant will magically reanimate it. If it’s still stubbornly flat, it’s time to get serious. This is where we move beyond the basic “sealant magic” and into actual repair territory.
There are generally two types of punctures that tubeless sealant struggles with: larger cuts (think more than a quarter-inch) and sidewall damage. If you’ve got something looking like a tiny, angry bite taken out of your tire, sealant might just give up the ghost.
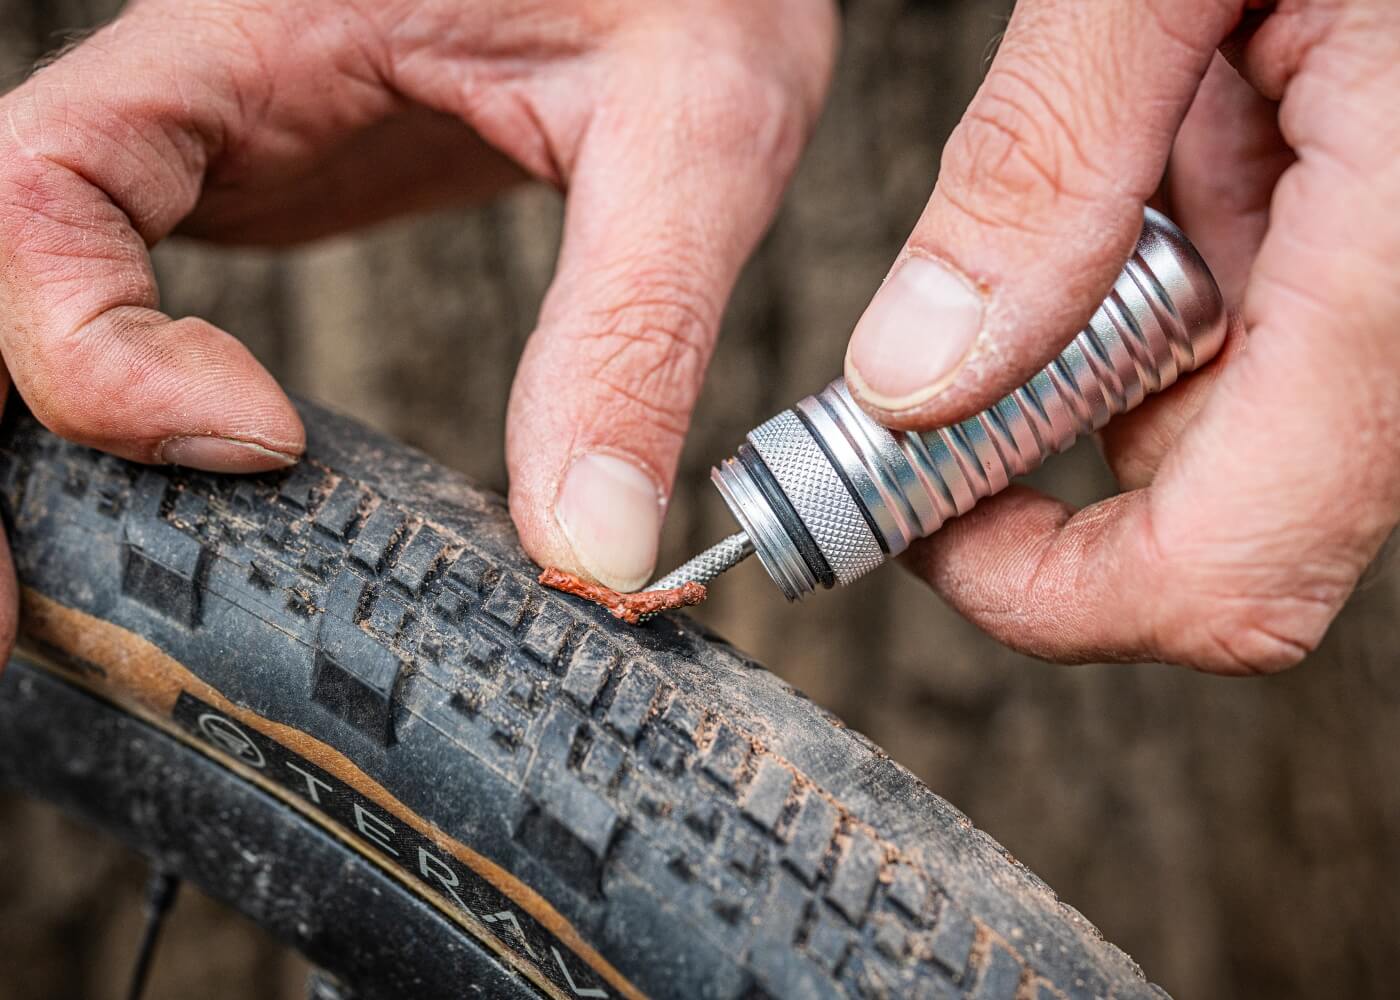
The most common and effective repair method for these more stubborn holes is using a tire plug kit, often referred to as a “bacon strip” kit. Don’t worry, no actual bacon is involved. Unless you’re craving a snack, in which case, maybe wait until you’re done. The name comes from the appearance of the plug material once it’s in.
Your Toolkit for Tubeless Triumph
Before we get our hands dirty, let’s gather our arsenal. You don't need a professional workshop, but a few key items will make your life significantly easier.
- Tubeless Tire Plug Kit: This is your MVP. They usually come with a reamer tool (to clean and widen the hole) and an insertion tool to push the plug in.
- Tire Levers: You'll likely need these to get the tire off the rim, especially if it’s been sitting deflated for a while. Go for sturdy ones, not the flimsy plastic kind that snap under pressure.
- Pump: A floor pump is ideal for seating the bead of the tire, but a good hand pump can work in a pinch. An air compressor is even better if you have access to one.
- Tire Sealant: Always good to have a fresh bottle handy. You’ll be adding more after the repair.
- Rag or Paper Towels: Because, well, sealant. It has a mind of its own.
- Gloves (optional but recommended): Unless you enjoy the sticky, black, slightly-smelly residue of tire sealant on your hands for the next 48 hours.
- Water Bucket (optional): For checking if the tire holds air after the repair.
It’s worth noting that different plug kits have slightly different components, but the core idea remains the same: clean the hole, insert a sticky plug, and hope for the best. And usually, it works like a charm!
Step-by-Step: The Art of Plugging
Alright, deep breaths. Let’s get this done. Imagine you’re defusing a very small, rubber bomb. But way less stressful, probably.
1. Remove the Wheel and Deflate Completely: This might seem obvious, but ensure all the air is out. If there’s still a bit of pressure, it’ll make removing the tire harder.
2. Locate the Puncture: This is crucial. You need to find the exact spot. If you can’t see it, sometimes spinning the wheel with a little bit of air in it can reveal a tiny stream of escaping air. Alternatively, listen closely. A hissing sound is your cue.
3. Prepare the Hole: This is where the reamer tool comes in. You’ll insert it into the hole and work it back and forth a few times. This cleans out any debris (like bits of the offending thorn or glass) and slightly roughens the edges, giving the plug something to grip onto. Don't be shy here; you want a clean, slightly enlarged opening.
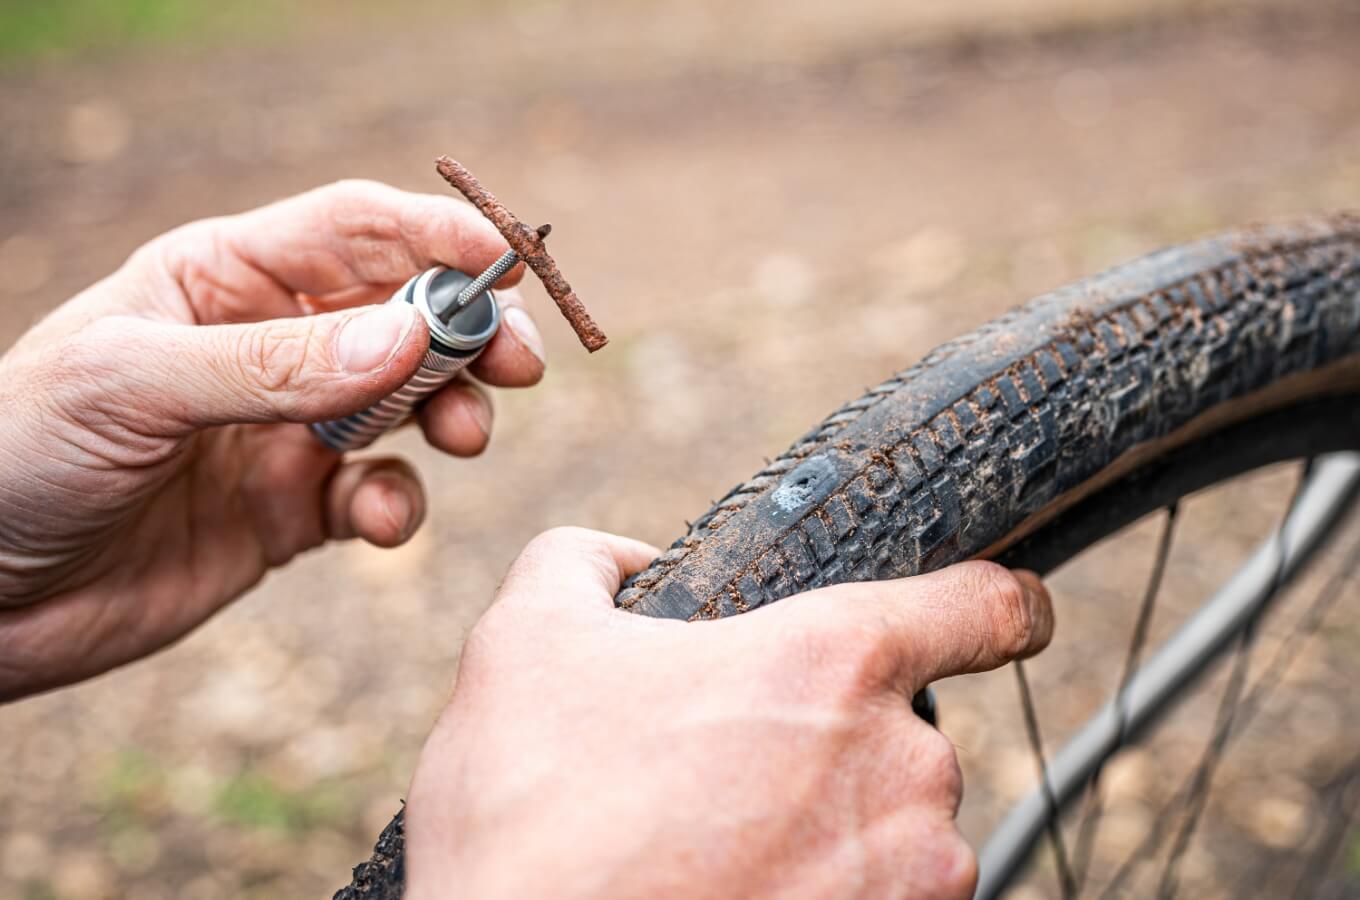
4. Prepare the Plug: Take a strip of the plug material (the “bacon”) and thread it through the eye of the insertion tool. Make sure it’s roughly centered. Some kits have you fold it in half, others just thread it through. Read the instructions for your specific kit – they’re there for a reason!
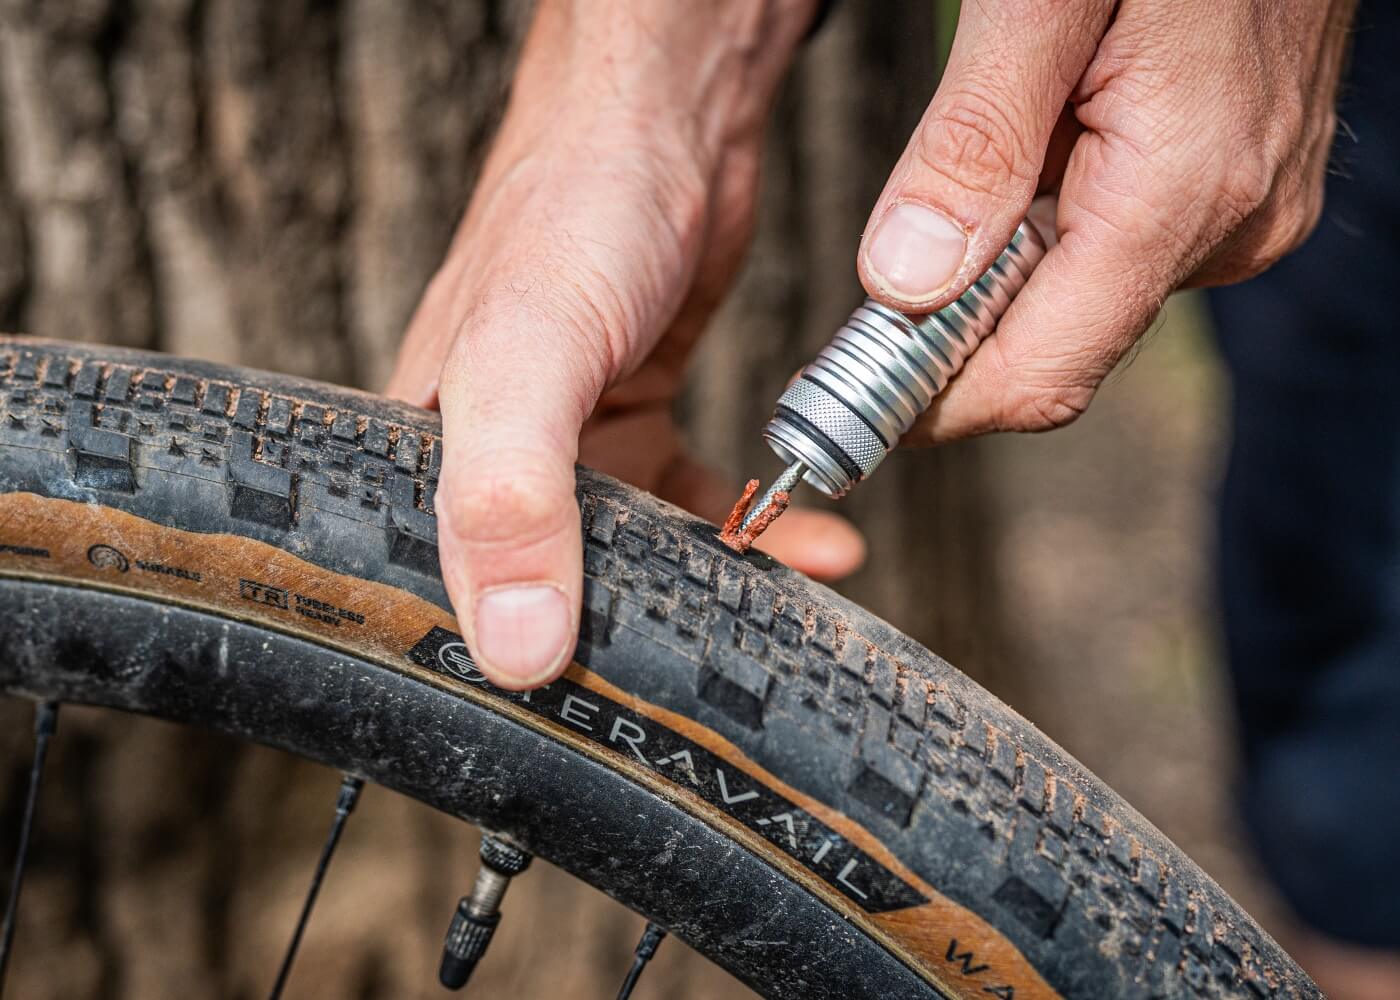
5. The Insertion: This is the moment of truth. Push the insertion tool, with the plug loaded, firmly into the prepared hole. You want to push it in until only about half an inch to an inch of the plug is sticking out. This requires a bit of force. Think of it as a determined push, not a gentle nudge. If it’s really tough, you might need to wiggle it slightly.
6. The Pull: Once the plug is inserted, firmly and quickly pull the insertion tool straight out. The plug should stay in the tire, sealing the hole. If the plug comes out with the tool, try again. Sometimes a second attempt is needed.
7. Trim the Excess: If you have a good amount of plug sticking out, trim it down to about a quarter of an inch. You don't want a giant, flapping piece of rubber.
8. Add More Sealant: Now, here’s the important part. Even if you can see the plug looks good, the sealant inside may have leaked out. You need to add more. The easiest way is through the valve stem. Remove the valve core (if you have a valve core tool, otherwise a small pointy object can work) and carefully pour or inject about 2-4 ounces of sealant into the tire. Replace the valve core.
9. Re-inflate and Seat the Tire: This is where your pump comes in handy. Pump the tire up to your desired pressure. You might hear some hissing as the sealant works its way around the plug and seals any tiny gaps. Give the wheel a spin and a good shake to help the sealant distribute. If the tire doesn't seat properly, you might need to use a floor pump with a good blast of air, or even an air compressor. Sometimes, putting a little bit of soapy water around the bead can help it pop into place. This is often the trickiest part!
10. The Leak Test: Once it looks like it's holding air, leave it for a bit. Submerging the wheel in a bucket of water is the ultimate test. If you see bubbles, you still have a leak. You might need to try plugging it again, or perhaps the damage is too severe for a plug.
When to Call It a Day (or Just Get a New Tire)
While plug kits are fantastic, they aren't a magic bullet for every single puncture. Sometimes, the damage is just too extensive.
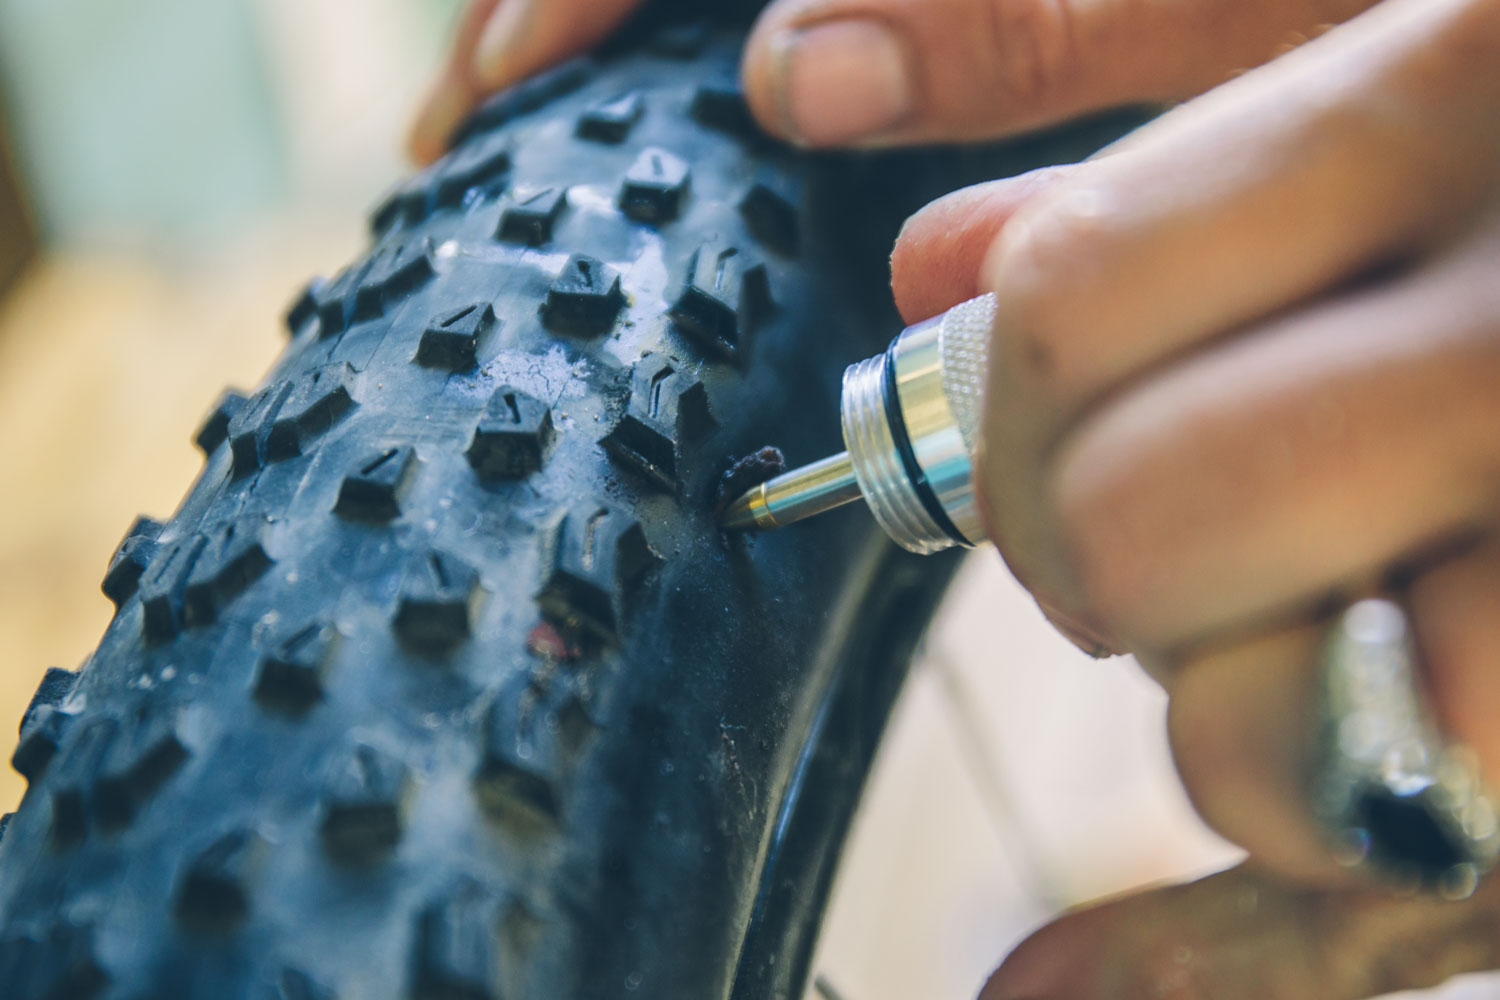
Sidewall Tears: If you have a significant tear or gash on the sidewall, it’s unlikely a plug will hold reliably. The sidewall flexes a lot, and this movement will eventually work the plug loose. This is usually a sign you’re looking at a new tire.
Multiple Punctures in One Area: If you’ve already tried plugging a spot and it’s still leaking, or if you have multiple holes close together, the tire’s structural integrity is compromised. It’s probably time to retire that tire.
Rim Damage: Sometimes the rim itself can be damaged, leading to leaks that aren’t the tire’s fault. If you notice any dents or bends in your rim, that’s a separate issue to address.
It’s always better to be safe than sorry. If in doubt, err on the side of caution and consider replacing the tire. Nobody wants a blow-out miles from civilization.
A Few Extra Tips for the Savvy Rider
So, you’ve successfully plugged your tire and you’re back on the road (or trail!). High fives all around! But let’s not stop there. Here are a few extra nuggets of wisdom that might save you some grief down the line.
Practice Makes Perfect: If you’ve never used a plug kit before, try it out at home when you’re not on a time crunch. Familiarize yourself with the tools and the process. It’s way less stressful that way.
Carry a Spare Tubeless Valve: Sometimes, the valve stem can get clogged with sealant, or even damaged. Carrying a spare and the tool to remove/install it can be a lifesaver.
Know Your Sealant: Different sealants have different lifespans and properties. Some are better suited for colder climates, some last longer. Do a little research and choose one that suits your riding conditions.
Regular Maintenance: Periodically check your tire pressure. This isn't just for performance; it also helps ensure the sealant is evenly distributed and ready to do its job.
Learn to Seat a Tubeless Tire: While not strictly a repair, being able to confidently seat a tubeless tire is a crucial skill. It will save you a lot of frustration, especially when you’re trying to get back on the trail after a repair.
Don't Over-Tighten Valve Cores: This might sound minor, but a slightly loose valve core can leak. A tightly screwed-in valve core can sometimes cause issues with the valve sealing properly. Find that sweet spot!
The "Bacon Strip" Smell: Get used to it. That slightly rubbery, slightly chemical smell is the scent of adventure, and sometimes, repair. Embrace it!
Fixing a tubeless tire can feel intimidating at first, but it’s a skill that every tubeless rider should have in their arsenal. It empowers you, it saves you money, and it gets you back to doing what you love – riding your bike!
So, the next time you hear that dreaded phhhttt, don't panic. Grab your plug kit, take a deep breath, and remember this guide. You’ve got this. And who knows, you might even find a strange sense of satisfaction in conquering that puncture. Happy riding!