
How To Replace Knob And Tube

Hey there, DIY enthusiast! So, you're looking at your old house, or maybe just a particularly charming fixer-upper, and you've spotted it: the infamous knob and tube wiring. Don't panic! It's not the boogeyman of the electrical world, though sometimes it feels that way, right? Think of it as a vintage relic, a charming reminder of a bygone era. But, much like a rotary phone or a fondue set, while it has its nostalgic appeal, it’s probably time to upgrade it for modern living. And guess what? Replacing it, while it sounds like a Herculean task, is totally doable. Let’s dive in and make your home safer and more power-friendly!
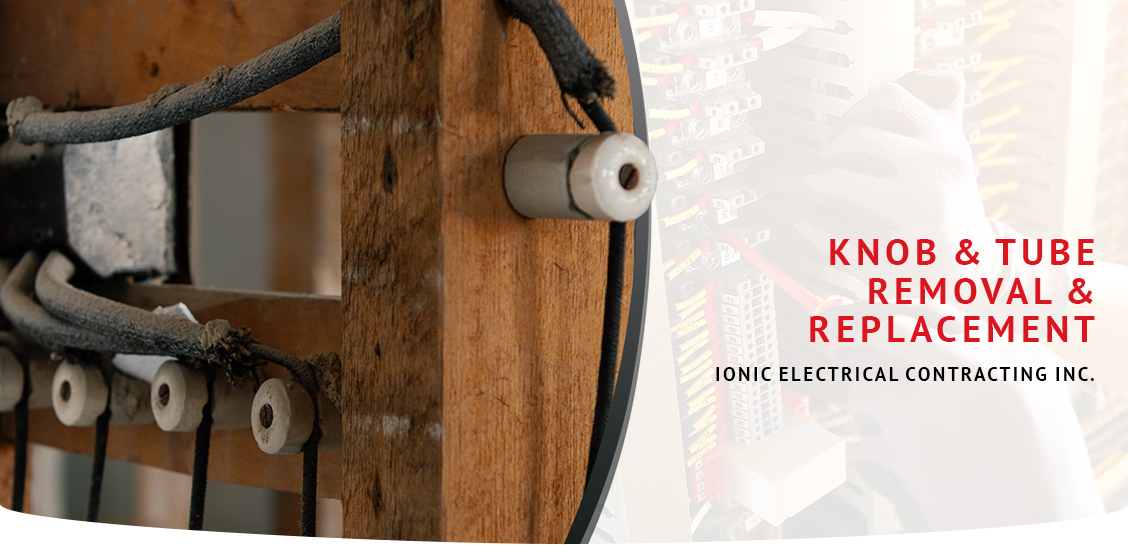
First off, what is knob and tube wiring? Imagine a time before plastic coated wires snaked through your walls. Back then, they used porcelain knobs to guide individual wires around corners and porcelain tubes to run them through joists. It’s pretty neat, in a historical sort of way. It’s usually single-insulated wires, meaning no ground wire. And that, my friends, is a bit of a bummer in today's world of three-pronged plugs and sophisticated electronics. Also, it’s not designed for the sheer amount of power we cram into our homes nowadays. Think of it as trying to power your smart TV and your toaster oven simultaneously on a horse and buggy!
So, why the urgency to ditch this old-school system? Well, there are a few reasons. For starters, it's a fire hazard. The insulation can become brittle over time, and it's not designed to handle the electrical load of modern appliances. Plus, if it's been modified (and let's be honest, it probably has, maybe by a well-meaning but slightly confused great uncle), things can get dicey. Insurance companies often frown upon it, making it harder (and more expensive!) to get coverage. And let's not forget the sheer inconvenience of not having enough outlets for all your gadgets. Who wants to be strategically unplugging lamps to charge their phone? Not you, not me, not anyone!
Okay, I'm Convinced. How Do I Actually Do This?
Deep breaths! This isn't a weekend project for the faint of heart, but it’s absolutely achievable with the right planning, some patience, and a healthy respect for electricity. My first piece of advice? If you're not comfortable with electrical work, or if you have a complex system, seriously consider hiring a licensed electrician. It's an investment in your safety and peace of mind. They’ve seen it all, and they can navigate the quirks of older homes with expert precision. But if you're feeling brave and up for a challenge, let's break it down.
The general idea is to run new, modern wiring throughout your house, essentially bypassing or removing the old knob and tube. This usually involves installing new electrical boxes, new circuits, and new outlets and switches. It’s like giving your house a whole new nervous system! You'll be dealing with things like Romex (the standard, plastic-sheathed wire you're used to), circuit breakers, and all sorts of fun tools.
Step 1: The All-Important Planning Phase (Don't Skip This!)
This is where you become a detective. You need to map out your existing electrical system. Where are the junction boxes? Where does the knob and tube run? You might need to do some gentle exploratory work (think small holes you can patch later). Understand your current electrical panel too. How many circuits do you have? What's their capacity? This is also the time to decide what kind of electrical setup you want going forward. More outlets? Dedicated circuits for big appliances like your fridge or microwave? Smart home integration? Now's your chance to dream big!

Create a wiring diagram. This might sound daunting, but it’s crucial. Sketch out where you want your new outlets, switches, and lights to go. Think about how you actually use your space. Do you need an outlet by your reading chair? More lights in the kitchen? This diagram will be your roadmap. It will also help you calculate how much wire, how many boxes, and how many breakers you'll need. Don't forget to research your local electrical codes! You don't want to do all this work only to have it fail inspection. Safety first, friends!
Gather your tools and materials. You'll need basics like screwdrivers, wire strippers, a voltage tester (absolutely essential – never work with live wires!), a fish tape (your best friend for pulling wire through walls), a drill, and a stud finder. For materials, think Romex wire (14/2 for lighting, 12/2 for most outlets), electrical boxes (for outlets, switches, and ceiling fixtures), circuit breakers, wire nuts, and outlet/switch covers.
Step 2: The Exciting (and Dusty) Part: Running New Wires
This is where the action happens! You’ll be working in sections. Start with one room or one circuit at a time. Identify where your new circuits will start from your electrical panel. You’ll need to install new circuit breakers for these new circuits. This involves shutting off the main power to your panel (again, if you’re not comfortable with this, call an electrician!).
Once your panel is ready, you'll run the new wires. This usually involves drilling holes through studs and joists to create pathways for the Romex. This is where the fish tape comes in handy – it helps you pull the wire through those tight spaces. You’ll be feeding wires from the new electrical boxes (where your outlets and switches will go) back to the panel.
Don't forget to install electrical boxes! These are the little metal or plastic homes for your outlets and switches. Make sure they are securely mounted to the wall studs. You'll want to make sure the box is positioned at the correct height for your outlets and switches. Consistency is key here!
Be mindful of existing utilities. You don’t want to accidentally drill into a water pipe or another electrical wire. A good stud finder can help detect these, but always proceed with caution. And wear your safety glasses! Nobody wants sawdust in their eyes.

Step 3: Connecting the Dots (The Nitty-Gritty)
Once your wires are run, it's time to make the connections. This involves connecting the wires to your outlets, switches, and then to the circuit breakers in your panel. This is the part where extreme caution is paramount. Always, always, always double-check that the power is off at the breaker before you touch any wires. Use your voltage tester liberally!
In your electrical boxes, you’ll connect the wires to your outlets and switches. Generally, black wires connect to the brass screws, white wires to the silver screws, and bare copper (ground) wires to the green screws. Switches are usually wired in series, so the power comes in, goes through the switch, and then out to the fixture or outlet.
At the panel, you’ll connect the wires to the new circuit breakers. Again, follow code and your diagram meticulously. Make sure all connections are tight and secure. Loose connections are a major cause of electrical fires, so don't be shy with your wire nuts!
Step 4: The Grand Finale: Testing and Patching
After everything is connected, it's time for the moment of truth! Turn the power back on at the main breaker. Then, one by one, turn on your new circuit breakers. Test each outlet and switch to make sure it’s working correctly. Grab a lamp, plug in your phone charger, flip those switches – enjoy the sweet satisfaction of your handiwork!
You'll likely have made a few small holes in your walls during the process. Now comes the patching and painting. Fill any holes with drywall compound, sand them smooth once dry, and then paint to match your existing walls. It's like magic – you've not only upgraded your electrical system but also spruced up your walls!
A word of caution about removing knob and tube: While the goal is to run all new wiring, you might encounter situations where you can't completely remove all traces of the old system. In such cases, ensure any remaining knob and tube is properly insulated and not connected to any active circuits. A good electrician can advise on the best practices for dealing with this.
So there you have it! Replacing knob and tube wiring is a significant undertaking, but it’s incredibly rewarding. You’re not just upgrading your home’s infrastructure; you’re investing in its safety, its future, and your own peace of mind. Think of all the new appliances you can power, the movie nights you can have without dimming lights, and the sheer joy of knowing your home is up to modern electrical standards. It's a fantastic feeling, and you'll be so proud of yourself for tackling it. You’ve transformed a potentially hazardous old system into a robust, reliable, and modern electrical network. Go you! Now, go plug in all those things you’ve been wanting to!