How To Set Steamvr As Default Openxr Runtime

Hey there, VR adventurers and digital explorers! So, you've got your fancy new headset, you're ready to dive into some mind-blowing virtual worlds, and you've heard whispers of this magical thing called OpenXR. Exciting stuff, right? But then you might be thinking, "Okay, great, but how do I actually tell my computer to use my favorite VR platform, like SteamVR, as the go-to for all these OpenXR-y adventures?" Fear not, my friends, because you've come to the right place! We’re about to embark on a quest, a noble mission if you will, to make sure your virtual reality experiences launch from the familiar, comforting embrace of SteamVR.
Think of it like this: you have a favorite restaurant, right? You love their pizza, their atmosphere, the friendly waiter. Now, imagine you want to order takeout from that restaurant. You wouldn't call up a random pizza place and say, "Hey, can you deliver me the deliciousness of my favorite pizza place?" Of course not! You'd go straight to your beloved eatery. Setting SteamVR as your default OpenXR runtime is exactly like making sure all your virtual reality takeout orders (aka, your VR apps) go directly to your absolute favorite VR pizza joint – which, in this case, is the awesome ecosystem of SteamVR!
Now, before we get our hands dirty, let's have a quick chat about what OpenXR actually is. Don't worry, no need for a PhD in computer science here. Basically, OpenXR is like a universal translator for VR. It’s a standard that allows VR developers to create apps that can run on pretty much any VR system, without having to write separate code for Oculus, for Vive, for Windows Mixed Reality, and so on. It’s a big, beautiful, interconnected VR world, and OpenXR is the bridge that connects them all.
And SteamVR? Well, SteamVR is like the super-popular, well-loved theme park that all these OpenXR-powered rides can plug into. It handles all the nitty-gritty stuff like tracking your controllers, rendering the images to your headset, and generally making sure everything runs smoothly. So, by setting SteamVR as your default, you’re essentially telling your system, "When any OpenXR app wants to run, point it straight to the magnificent wonderland of SteamVR!"
Why Bother With This Default Shenanigans?
You might be wondering, "Is this really necessary? My VR stuff seems to work fine!" And you know what? For many of you, it probably does! However, there are a few excellent reasons why you might want to take a moment to set SteamVR as your default OpenXR runtime. It’s like giving your VR setup a little tune-up for optimal performance and fewer headaches down the line.
Firstly, it ensures consistency. Some games or applications might try to launch with a different runtime if you have multiple installed. This can lead to… well, let’s just say "interesting" results. Sometimes it’s a black screen, sometimes it’s a blurry mess, and sometimes it just plain refuses to start. By setting SteamVR as the default, you're removing that ambiguity and saying, "SteamVR, you are the boss!"
Secondly, it can sometimes help with performance. While most runtimes are pretty good, some users find that their preferred platform, like SteamVR, is simply better optimized for their specific hardware and workflow. If you've tinkered with settings in SteamVR to get that buttery-smooth frame rate, you’ll want to ensure your apps are benefiting from those tweaks!
And thirdly, and perhaps most importantly for us tinkerers and enthusiasts, it's about control. We like to have our digital domains organized, and telling our system which software should be in charge is a fundamental part of that control. It’s like choosing your favorite outfit for a special occasion – you want to make sure you look and feel your best!
The Grand Unveiling: How To Do It!
Alright, enough preamble. Let’s get down to business! Setting SteamVR as your default OpenXR runtime is surprisingly straightforward. We’re not going to be doing any complex coding or delving into the dark arts of the registry (unless absolutely necessary, but we'll try to avoid that for now!).
Step 1: Make Sure SteamVR Is Up To Snuff!
Before we even think about setting it as the default, let’s do a quick health check on SteamVR itself. This is your trusty steed, so we want it in top condition!
- Launch SteamVR: If you don’t have it running already, fire it up! Put on your headset and make sure everything looks good. Your guardian boundaries are clear, your controllers are tracked, and you can see the familiar SteamVR home environment.
- Check for Updates: This is crucial! Open Steam, go to your Library, find SteamVR, and right-click on it. Select "Properties," then "Updates." Make sure it’s set to update automatically. Also, while you’re in the SteamVR window (the one that pops up on your desktop), look for any notifications about SteamVR itself needing an update. Keeping your VR software current is like changing the oil in your car – it prevents a lot of potential problems!
- Restart Your Computer (The Classic Fix!): Sometimes, the simplest solution is the best. If you’ve recently installed or updated SteamVR, a quick restart of your computer can help ensure all the new settings and files are properly integrated.
Step 2: The Heart of the Matter – The OpenXR Runtime Settings
Now for the main event! This is where we tell your system what to do. The exact location of these settings can vary slightly depending on your Windows version and what VR software you have installed, but we’ll cover the most common scenarios.
Scenario A: The "Easy Peasy" Method (Most Likely!)
In most modern VR setups, especially if you’ve been using SteamVR for a while, the easiest way is often right within SteamVR itself. It’s like a built-in control panel for your VR destiny!
- Launch SteamVR. (Yes, again! It’s important to have it running for this part.)
- Open the SteamVR Status Window. This is the little window that usually pops up on your desktop when SteamVR starts. It shows your headset, controllers, and base stations.
- Click on the Menu Icon. In the SteamVR Status window, you'll see a small button, usually three horizontal lines (like a hamburger menu), in the top-left corner. Click it!
- Navigate to Settings. In the dropdown menu that appears, you should see an option for "Settings." Click on that.
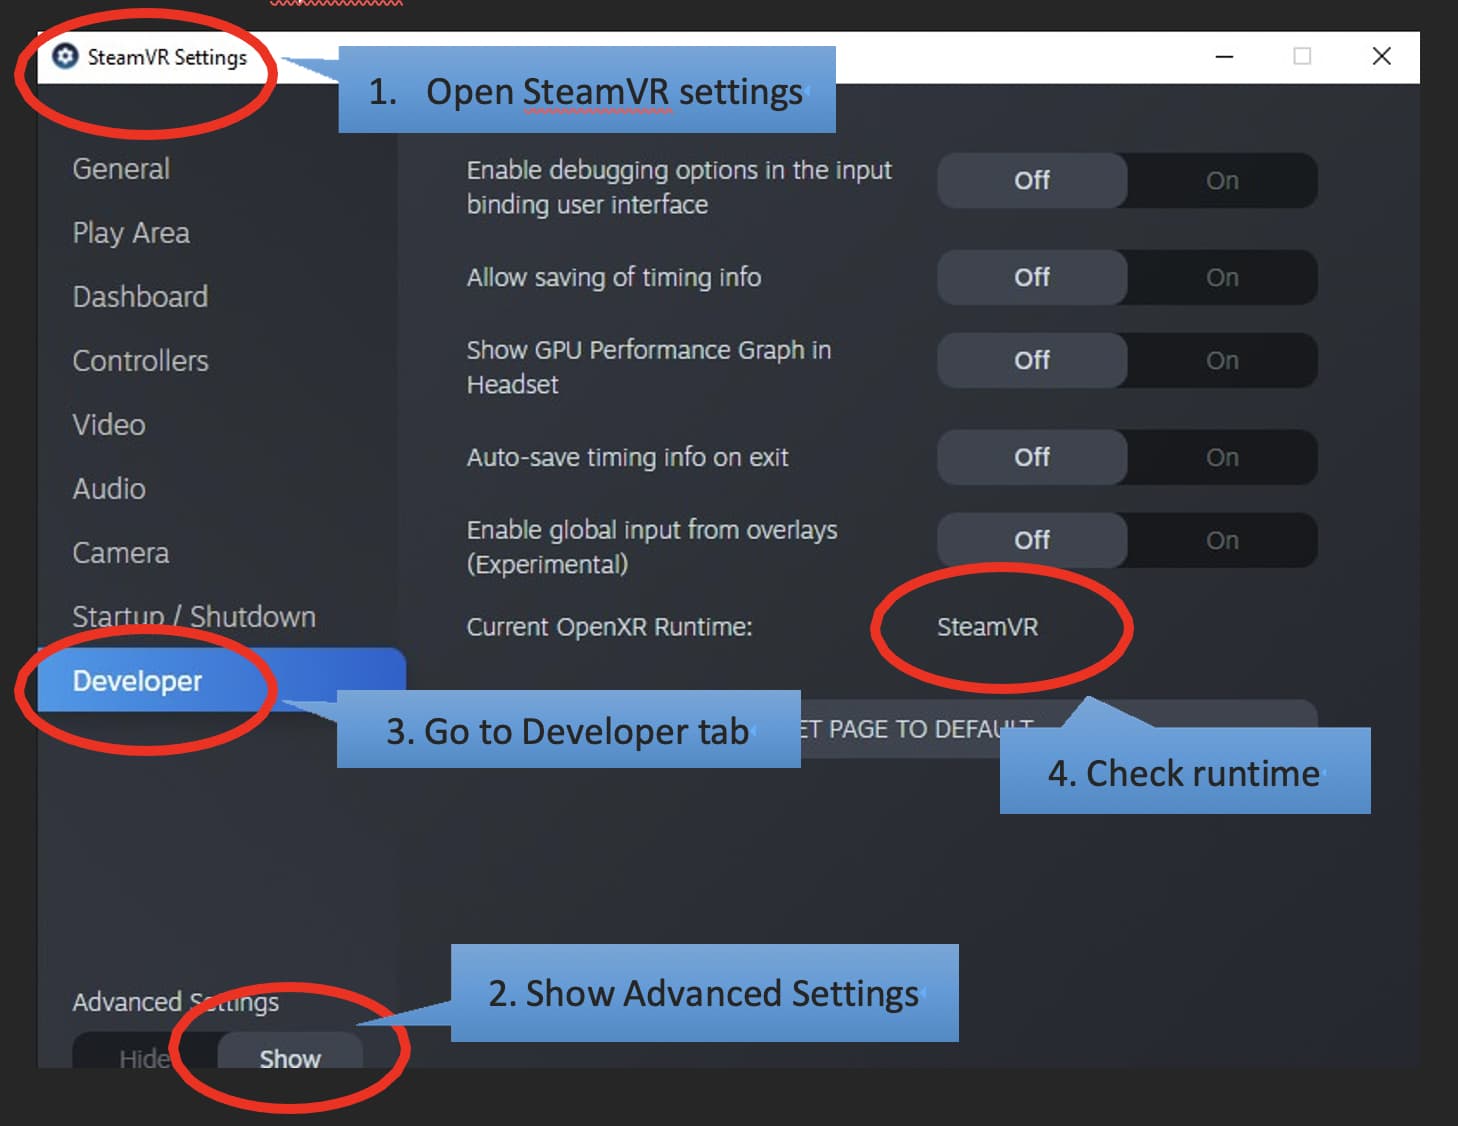
- Find the "Developer" Tab. Within the Settings window, look for a tab or section labeled "Developer." Sometimes it might be slightly different, like "Advanced" or "Runtime," but "Developer" is the most common.
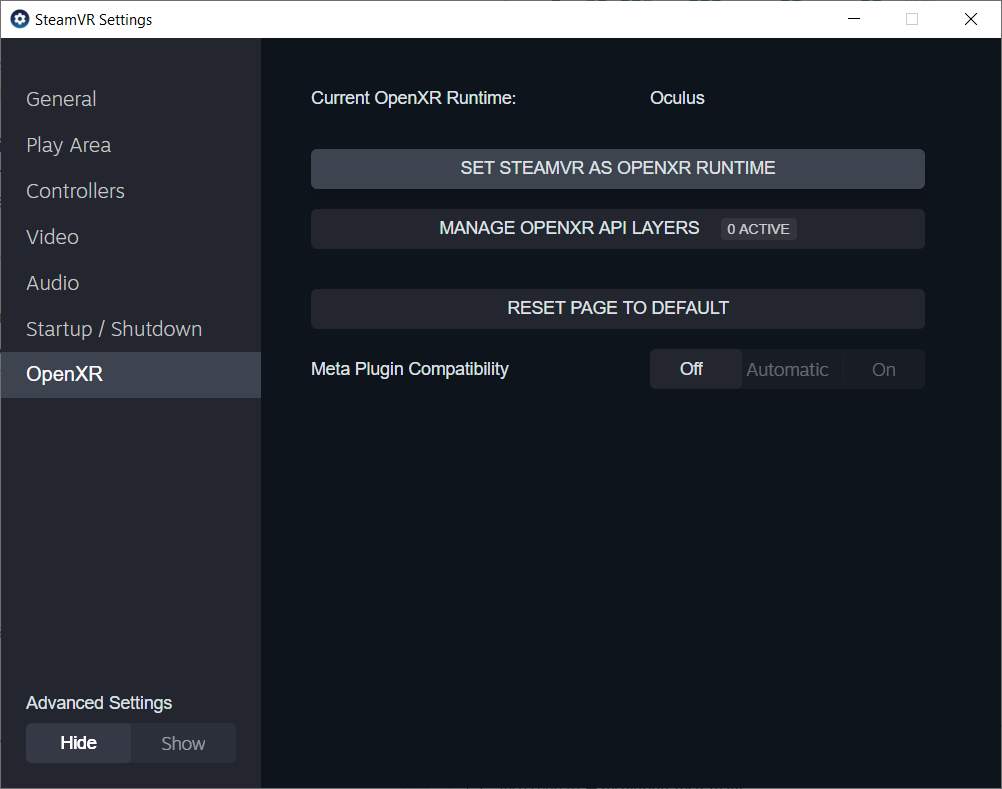
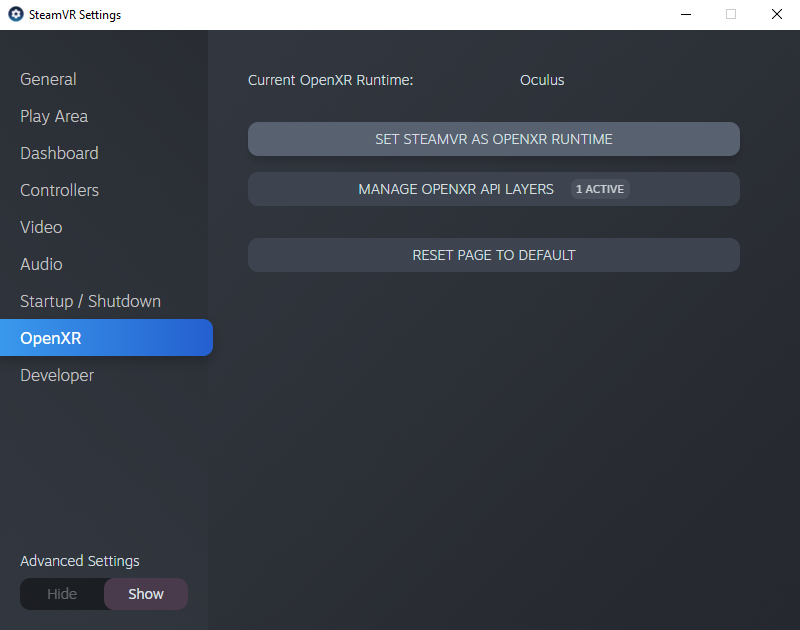
- Locate the OpenXR Runtime Setting. Bingo! In the Developer section, you should find an option related to the "OpenXR Runtime." You’ll likely see a dropdown menu or a list of available runtimes.
- Select SteamVR. From the list, choose "SteamVR" or "SteamVR (Current)." This is the magic button!
- Confirm and Apply. There might be a button to "Set as Default" or simply close the window. If you need to explicitly click a "Set as Default" button, do so!
And voilà! In many cases, that’s all there is to it. You’ve just told your system to use SteamVR for all its OpenXR adventures. High five!

Scenario B: The "Uh Oh, I Don't See It" Method (For the Adventurous!)
What if you don't see the OpenXR option in SteamVR settings? Don't panic! This usually means another VR application has taken the reins and might be managing the OpenXR runtime outside of SteamVR. In this case, we need to go a little deeper.
This usually involves accessing the OpenXR runtime settings directly from Windows. Here's how you might find it:
- Search for "OpenXR". In the Windows search bar (the little magnifying glass icon on your taskbar), type "OpenXR." You should see an application or a setting related to it, often named "OpenXR Runtime" or similar.
- Launch the OpenXR Runtime Application. Click on the search result to open it.
- Select SteamVR as Default. Similar to the previous method, you should see a list of available OpenXR runtimes. Select "SteamVR" from the list and click the "Set as Default" or "Activate" button.
If you still can’t find it, it might be because you don't have any other OpenXR runtimes installed that are conflicting, or the system is defaulting correctly without an explicit setting. But if you're experiencing issues or want to be absolutely sure, the methods above are your best bet.
Step 3: Testing, Testing, One, Two, Three!
You’ve done the deed! But how do we know it worked? Time for a little virtual reality field test!
- Launch a Known OpenXR Application. Try launching a VR game or application that you know uses OpenXR. This could be a newer VR game from Steam, or a standalone VR app that you suspect is OpenXR compliant.
- Observe the Launch. Does it launch directly into SteamVR? Do you see the SteamVR overlay? Does everything feel… right? If it launches smoothly and looks like it's running through SteamVR, congratulations!
- Troubleshooting (If Needed): If, for some reason, it still launches into another runtime or doesn't launch at all, don’t despair! Go back through the steps. Did you restart your computer after making the changes? Are you sure you selected SteamVR and not something else? Sometimes, a complete uninstall and reinstall of SteamVR can also clear up stubborn issues.
A Few Extra Bits of Wisdom (Because We Like to Be Thorough!)
While setting the default is usually the main goal, there are a couple of other things worth mentioning:
- Other Runtime Software: If you have other VR headsets or platforms installed (like Oculus, Viveport, or Windows Mixed Reality), they might also install their own OpenXR runtimes. This is why you might see multiple options when setting the default. SteamVR is generally a great choice for PC VR enthusiasts, but know that other options exist!
- Per-Application Overrides: In some rare cases, individual applications might have their own settings to force a specific OpenXR runtime. This is usually for compatibility reasons. If you find an app isn't working with your default, check its specific settings first before changing your global default.
- Future-Proofing: As OpenXR becomes more widespread, having this setting correctly configured will save you a lot of potential hassle as new VR experiences emerge. It’s like getting your ducks in a row for the future of VR!
And there you have it! You've successfully navigated the slightly technical, but ultimately rewarding, path of setting SteamVR as your default OpenXR runtime. You're now equipped with the knowledge to ensure your virtual adventures launch from your preferred platform, offering a more consistent and enjoyable VR experience. It’s like having a perfectly organized toolkit for your virtual reality crafting – everything is in its right place, ready for you to create amazing things!
So go forth, my friends! Dive into those worlds, explore those digital landscapes, and know that your VR journey is now set to run on the reliable engine of SteamVR. May your frame rates be high, your tracking be flawless, and your virtual realities be endlessly wondrous. Happy exploring!