
How To Sharpen Damascus Steel Knife

Alright, so you've got yourself a fancy Damascus steel knife, huh? Nice! Those swirling patterns are seriously gorgeous. Like a tiny, deadly work of art. But let's be real, as pretty as it is, if it's dull, it's just… sad. A sad, expensive paperweight. We don't want that, do we? Absolutely not. So, today, we're gonna chat about how to get that blade slicing like a dream again. Think of me as your friendly knife-sharpening fairy godmother. Poof!
Now, before we dive in, let's get one thing straight. Damascus steel. It's not just steel, right? It's layers. Lots and lots of layers. Think of it like a delicious mille-feuille, but way sharper. This layered construction is what gives it that awesome wavy look. And because it's layered, it can be a tad more delicate when it comes to sharpening than your average, everyday kitchen knife. We gotta treat it with a little respect, you know? No brute force here, my friends.
So, what do you need to get started? Well, you've got a few options. The most traditional and arguably the best way to really hone that edge is with a whetstone. Or, as some folks call them, a sharpening stone. Sounds old-school, right? But trust me, these things are magic. You'll want a couple of different grits. Think of grits like sandpaper, but for knives. Lower grit means coarser, good for fixing up a really dull edge or reprofiling. Higher grit means finer, for polishing that edge to a razor-sharp finish. Like going from a rough scrub to a gentle buff.
For your Damascus beauty, I'd recommend starting with a medium grit stone, say, around 1000. This is your workhorse. It'll take off just enough material to get a good edge going. Then, you'll want to move up to a finer grit, maybe 3000 or even 6000. This is where the real sharpening happens. You're essentially creating a mirror finish on that edge. Shiny and deadly. We love that.
Before you even think about touching that stone, you gotta get it wet. Or oiled. It depends on the type of stone. Water stones need to be soaked. Seriously, like a little spa treatment for your stone. Let 'em soak until the bubbles stop. That's your sign it's ready. Oil stones use a special honing oil. Don't just grab any old cooking oil, okay? It'll gum up the stone and make a mess. We're aiming for precision, not a greasy disaster.
Now, the technique. This is where it gets a little… zen. You're gonna hold your knife at a consistent angle. This is super important. Too steep, and you'll be grinding away the edge. Too shallow, and you won't be sharpening at all. For most kitchen knives, a 15-20 degree angle is a good ball-park figure. You can use those little angle guides if you're feeling fancy, or you can just eyeball it. Practice makes perfect, right? Think of it like finding your sweet spot.
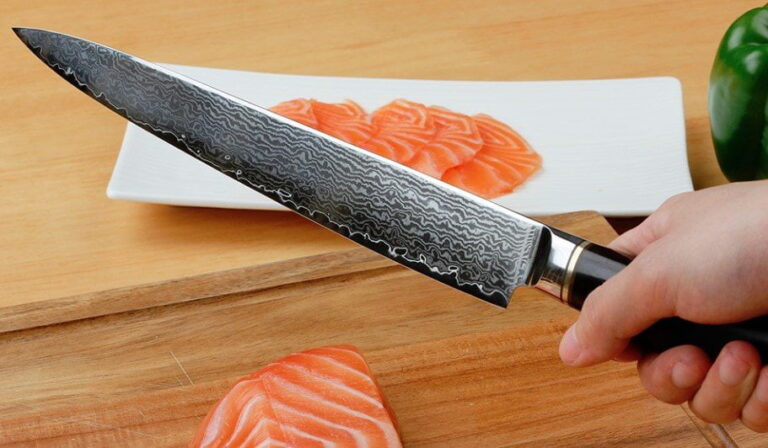
Lay the blade flat on the stone, then lift the spine until you've got that desired angle. You'll see the sweet spot. Keep it there. Then, with a smooth, controlled motion, push the blade across the stone, from heel to tip, like you're trying to shave off a whisper-thin layer. Don't dig in! It's a gentle glide. Imagine you're painting a masterpiece on the stone.
You want to do this on one side of the blade until you feel a tiny burr form on the other side. What's a burr, you ask? It's like a little wire of metal that’s been pushed over the edge. You can feel it with your fingertip (carefully, of course!). It’s a sign that you’ve made contact and started to create a new edge. It’s the proof you’re on the right track!
Once you feel that burr, flip the knife over and do the same thing on the other side. Same angle, same smooth strokes. Keep going until you feel that burr on the first side again. You're basically doing the same amount of strokes on each side. Consistency is key, folks!

After you've gone back and forth a few times on your medium grit stone, it's time to move up to your finer grit. You'll use the same technique, but this time, you're just polishing. You're refining that edge. You'll do fewer strokes on these finer stones. Think of it as the final flourish. The last touches on your masterpiece.
And what about those fancy ceramic rods? Those are great too! They're more for touching up an already sharp edge than for major sharpening. Think of them as your daily maintenance. You can give your blade a few quick passes on a ceramic rod every now and then to keep it keen. It’s like brushing your teeth for your knife. Keeps things fresh!
Some folks swear by electric sharpeners. And hey, if it makes your life easier and you’re careful, go for it. But honestly, for a beautiful Damascus knife, I’d steer clear of most of those. They can be aggressive and can actually damage those delicate layers. Plus, you lose that satisfying, almost meditative feeling of using a whetstone. It’s a whole vibe.

The biggest mistake people make? Rushing. Seriously. Take your time. Put on some chill music, have a cup of coffee (hence our current chat!), and just focus. It's not a race. The sharper your knife, the less effort you need to put in when you're actually using it. So, a little time spent now saves you a lot of frustration later. Patience is a virtue, especially when it comes to sharp objects.
Another little tip: once you've finished sharpening, especially on those super fine stones, you'll have an incredibly sharp edge. This means it can also be a little fragile. Treat it with care! Don't use it to pry open cans. That's a recipe for disaster. And for goodness sake, don't throw it in the dishwasher. That's a big NO-NO for any good knife, let alone a Damascus. Hand wash only, please!
And how do you know if it's sharp enough? Well, besides the obvious "it cuts through tomatoes like butter" test, you can do the paper test. Get a piece of printer paper. Hold it up and try to slice through it with your knife. If it slices smoothly without snagging or tearing, you're golden. If it rips, you've still got some work to do. Don't worry, we've all been there.

For those of you who are really serious about your blades, you might even consider a leather strop. This is like the final polish. After you've used your finest grit stone, you can strop your blade. It's essentially a piece of leather, often loaded with a fine abrasive compound. You drag the blade across it, spine first, to remove any microscopic burrs and really align that edge. It's like giving your knife a final buffing. So fancy!
Remember, each Damascus knife is a little bit unique. The hardness, the steel composition – it can all vary. So, don't be afraid to experiment a little. Pay attention to how your knife feels on the stone. Does it feel like it’s biting? Or is it just gliding? You’ll develop a feel for it. It’s like learning to ride a bike, you know? A few wobbles at first, then you’re cruising.
And if you're feeling totally intimidated, there's no shame in getting it professionally sharpened. There are knife sharpening services out there that are absolute wizards. They can get your Damascus knife back to its former glory. But learning to do it yourself is incredibly rewarding. Plus, you'll never have to live with a dull knife again. Imagine the power!
So, there you have it. A little chat about bringing your beautiful Damascus steel knife back to its sharp, slicing glory. It’s not rocket science, but it does require a bit of finesse and a whole lot of love for your tools. Go forth and sharpen, my friends! May your edges be ever keen and your cuts ever clean. And remember, happy knife, happy life!