
How To Start A Wood Stove Fire Without Smoke

There’s something inherently cozy about a wood stove. It’s the crackle, the warmth that seeps into your bones, the dancing flames that hypnotize you after a long day. But let’s be honest, sometimes the romance is overshadowed by the less-than-glamorous reality: smoke. We’ve all been there, haven't we? That initial puff of grey billowing into the room, making your eyes water and your neighbors wonder if you’re secretly running a miniature forest fire in your living room. Fear not, fellow fire enthusiasts! Today, we're diving into the art of starting a wood stove fire without the smoke. Think of it as mastering the Jedi trick of fire-starting – harnessing its power with minimal collateral atmospheric disruption.
It’s not about being a lumberjack or having a secret handshake with the Fire Gods. It’s about understanding a few simple principles and adopting a slightly different approach. And trust me, once you nail this, you’ll feel like you’ve unlocked a new level of domestic bliss. No more gasping for air, no more frantic window-opening sessions. Just pure, unadulterated, smoky-free warmth.
So, grab a mug of something warm (maybe even brewed over your future perfectly started fire), and let’s get down to business.
The Foundation: What Makes Smoke? (And How to Avoid It)
Before we start coaxing flames, let’s get a little science-y. Smoke, in essence, is unburnt fuel. When wood doesn't get enough oxygen or heat to combust completely, it releases smoke. It’s like a car sputtering along – inefficient and a bit smelly. Our goal is to ensure that when that beautiful piece of oak or pine hits the heat, it burns cleanly and efficiently. This means focusing on two key players: airflow and temperature.
Think of your wood stove as a tiny, very efficient engine. It needs fuel (wood), air (oxygen), and heat to run. If any of these are out of whack, you get smoke. And nobody wants a smoky engine, whether it’s under the hood of your car or in your living room.
A common mistake people make is treating the wood stove like a campfire. You wouldn’t just throw a bunch of logs onto a pile of embers at a campsite and expect instant, smokeless flames, right? The same logic applies indoors, but with a bit more finesse. The confined space of your stove means you have to be a little more deliberate about how you introduce air and heat.
It's a bit like preparing a gourmet meal. You don't just chuck all the ingredients into a pot and hope for the best. You prep, you season, you control the heat. Starting a smokeless fire is the same. It’s about respect for the process, and a little bit of knowledge goes a long way.
The Secret Weapon: Kindling and a Top-Down Approach
Forget the crumpled newspaper and a few random twigs. For a truly smokeless start, we’re going to embrace the power of proper kindling and adopt a strategy that’s a little counter-intuitive for some: the top-down fire.
Now, you might be thinking, "Top-down? Doesn't that sound like it would smoke more?" Ah, but that's where the magic lies! Traditional bottom-up fires can smolder and produce a lot of smoke as the heat struggles to reach the upper layers of wood. The top-down method, however, encourages a more efficient burn from the get-go.
Here’s the lowdown. You’ll need a few things:

- Dry Kindling: This is your starter fuel. Think of small, dry twigs, wood shavings, or commercially produced fire starters. The drier, the better! Wet kindling is a smoke-producing machine.
- Small Split Wood: These are your finger-sized to wrist-sized pieces of wood. Again, absolutely dry.
- Medium Split Wood: Slightly larger pieces, about the size of your forearm.
- Larger Logs: Your main fuel source. These should be seasoned and dry.
The key to success is ensuring all your wood is seasoned. Seasoned wood has been dried for at least six months, ideally a year, allowing its moisture content to drop significantly. This is crucial. Wet or green wood contains a lot of water, and when you try to burn it, that water has to evaporate first. This process consumes energy, cools the fire, and leads to incomplete combustion – the very definition of smoke.
Think of it like trying to iron a damp shirt versus a dry one. The damp one takes ages, steams a lot, and doesn't look great. The dry one irons smoothly and quickly. Your wood is no different!
Let’s Get Building: The Top-Down Masterclass
This is where the fun begins. First, open your wood stove’s air vents to their widest setting. This is crucial for providing the initial oxygen needed for a strong, clean burn. You want to give that fire the best possible start.
1. The Base: Large Logs. Start by placing 2-3 of your larger, seasoned logs at the bottom of the firebox. Don’t pack them too tightly; you need space for air to circulate.
2. The Middle: Medium Split Wood. Lay your medium-sized split wood pieces on top of the large logs, perpendicular to them. Again, leave some breathing room between the pieces.
3. The Heart: Small Split Wood. Now, layer your small split wood on top of the medium pieces. This is where the initial flame will really take hold.
4. The Spark: Kindling. Finally, create a generous pile of your dry kindling on top of the small split wood. This is what you’ll be lighting.
It might look a bit like a Jenga tower of future warmth, but trust the process. This layered approach allows the flame to burn downwards, igniting each layer progressively and efficiently. As the kindling burns, it heats the small wood, which then heats the medium wood, and so on. This gradual heating process ensures a cleaner burn and minimizes smoke.
Lighting the Flame: The Moment of Truth
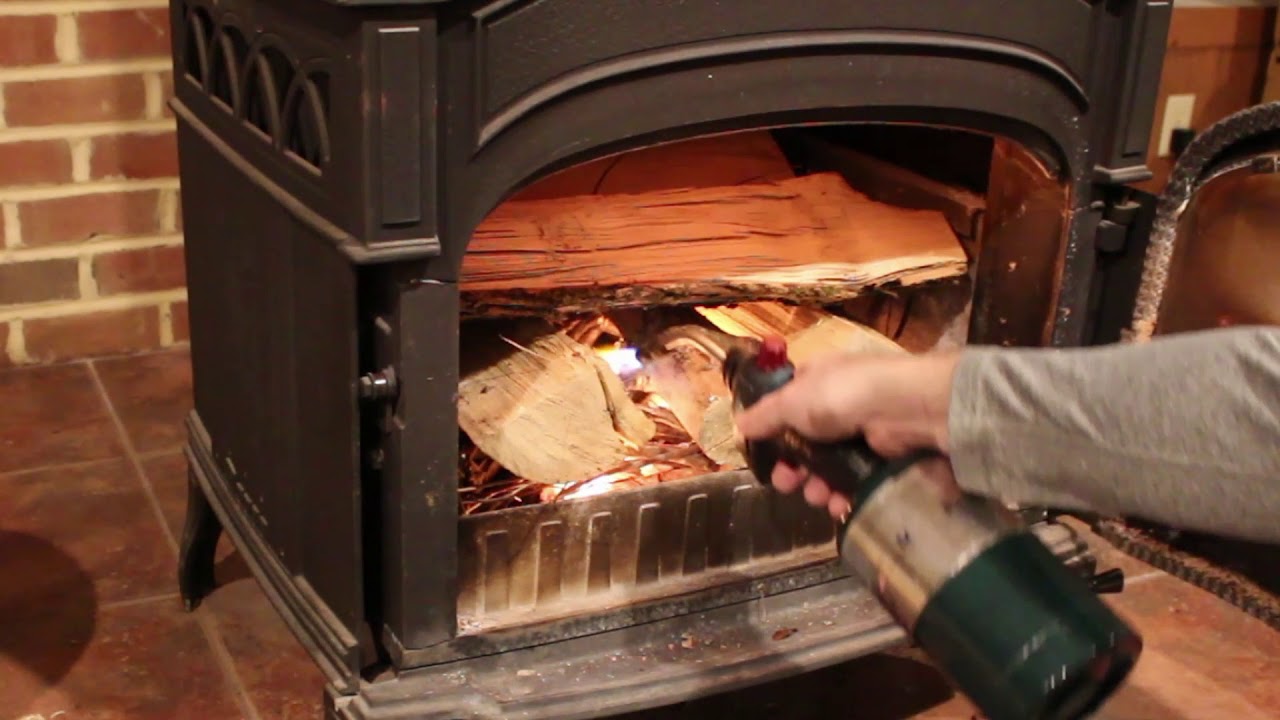
Now for the exciting part! With your beautifully constructed tower of wood, take a long match or a fireplace lighter and ignite the kindling at multiple points. You want to get a good, strong flame going on top.
As the kindling burns, it will start to ignite the small split wood beneath it. You’ll see the flames licking down. This is where your wide-open air vents are working their magic, providing ample oxygen for this initial, crucial stage.
Resist the urge to poke and prod! Let the fire do its thing. You might see a slight wisp of smoke at first as the kindling catches, but it should dissipate very quickly as the flames establish themselves.
If you’re using a wood stove with an ash pan and a grate, ensure the grate is clear of ash. Ash can block airflow, and a lack of airflow is a smoke-lover's best friend (which is exactly what we don’t want!). Clean ash pans also contribute to better combustion.
A little tip from the pros: some people like to put a bit of crumpled newspaper under the largest logs as an initial boost, but the true top-down method aims to minimize or eliminate this for the cleanest burn. If you do use paper, use it sparingly and ensure it ignites fully.
The goal is a roaring, bright fire on top that quickly consumes the layers below. Think of it as a controlled cascade of warmth.
The Art of the Burn: Managing Airflow for Sustained Warmth
Once your fire is roaring and the medium and even some of the larger logs are well alight, it's time to fine-tune your airflow. This is where you transition from the initial "get-it-going" phase to sustained, efficient burning.
As the fire settles and you have a good bed of coals established, you can start to gradually close down the air vents. You don't want to close them completely; that would smother the fire and bring back the smoke. Instead, find the sweet spot where the flames are still vibrant but not roaring uncontrollably.
Every wood stove is different, so this will involve a bit of experimentation. Pay attention to the flames. If they’re too lazy and dark, you need more air. If they’re excessively rapid and smoky, you might be getting too much air, or your wood isn’t burning efficiently. The ideal flame is bright orange and lively.
A good rule of thumb: aim for a flame that looks like it's dancing, not like it's gasping for breath.
This is also where the concept of secondary combustion comes into play, though you might not even realize it’s happening. Many modern wood stoves are designed with secondary combustion systems that burn off the smoke and gases that would otherwise escape up the chimney. This makes them incredibly efficient and eco-friendly. By maintaining the right temperature and airflow, you’re helping these systems do their job.
Cultural aside: In many European countries, the efficiency and design of wood stoves are a matter of national pride. They’re not just for heating; they’re often beautiful pieces of furniture that are integral to the home’s aesthetic. Mastering a smokeless fire is like mastering a classic recipe – a little skill, a lot of satisfaction.
Think of managing the vents like adjusting the tempo of a piece of music. Too fast, and it’s chaotic. Too slow, and it loses its energy. You’re looking for that perfect rhythm of heat and airflow.

Troubleshooting: When Smoke Happens (And What to Do)
Even with the best intentions, sometimes a little smoke can escape. Don't despair! Here are a few common culprits and how to fix them:
- The Cold Flue: This is probably the most common reason for smoke spillage. If your chimney is cold, the air inside it is denser and won’t draw smoke upwards. This is why opening the vents wide initially is so important – it creates a strong draft to heat up the flue. If you’ve been away for a while or it’s a very cold day, you might need to pre-warm your flue by holding a lit piece of newspaper up the chimney for a few minutes.
- Wet Wood: We’ve hammered this home, but it bears repeating. If your wood is even slightly damp, it will produce smoke. Ensure your wood is properly seasoned and stored in a dry place.
- Overloading the Stove: Trying to cram too much wood into the firebox at once can restrict airflow and lead to incomplete combustion. Less is often more, especially when starting.
- Blocked Chimney: Creosote buildup or debris can obstruct your chimney. Regular chimney sweeping is essential for both safety and efficient burning.
- Door Seal Issues: A worn-out door gasket can allow air to leak into the firebox in uncontrolled ways, potentially causing smoke.
If you do get a puff of smoke, the immediate action is to open the air vents wide. This will help clear the smoke and encourage a stronger draw up the chimney. If it persists, quickly open a window to ventilate. Remember, a little smoke is an indicator that something needs adjusting.
Don't let a little smoke defeat you. It's part of the learning curve, and with practice, you'll become a seasoned pro (pun intended!).
The Payoff: A Clean Burn and a Cozy Heart
Mastering the smokeless wood stove fire is more than just a practical skill; it’s a pathway to a more enjoyable and mindful way of heating your home. Imagine: sinking into your favorite armchair, a good book in hand, with the gentle glow and comforting warmth of your stove, and not a wisp of smoke in sight. It’s a small luxury that can make a big difference in your daily life.
The crackle of the wood, the radiant heat, the visual poetry of the flames – all of these elements contribute to a sense of calm and well-being. When you’re not battling smoke, you can truly appreciate the primal comfort that a wood stove provides.
It's a reminder that sometimes, the simplest things in life require a little understanding and a gentle touch. Just like nurturing a plant or perfecting a sourdough starter, coaxing a clean fire from wood is a rewarding process. It connects you to the elements, to the natural world, and to the simple, profound pleasure of creating warmth with your own hands.
So, the next time you’re about to light your wood stove, take a deep breath, remember these tips, and embrace the challenge. You'll be rewarded with a cleaner, more efficient, and infinitely more pleasant fire. And in a world that often feels chaotic and overwhelming, that little bit of controlled warmth and smoky-free peace can be exactly what your soul needs.