How To Start Dahlia Tubers Indoors

Hey there, fellow garden enthusiasts and curious minds! Ever seen those ridiculously gorgeous dahlia blooms – you know, the ones that look like they’ve been sculpted by tiny, floral fairies? They’re absolutely stunning, right? Well, what if I told you that those show-stopping beauties often start their journey as something that looks…well, a little less glamorous? Yep, we're talking about dahlia tubers!
If you’re picturing a bunch of gnarly, potato-like things, you're not entirely wrong, but there's a whole lot more magic hidden within them. And the coolest part? You can give these little guys a head start by popping them indoors. Think of it as a cozy, pre-season spa treatment for your future floral stars.
So, why bother with this whole indoor starting thing? Well, if you’re anything like me, the thought of waiting for those last spring frosts to pass can feel like an eternity. Starting dahlias indoors is like giving yourself a little head start on the fun. It means you get to watch those first tender shoots emerge, get your hands a bit dirty (in the best way!), and ultimately, have bigger, stronger plants ready to go when the weather finally cooperates.
It’s also a fantastic way to deal with limited space or if you’re in a region with a shorter growing season. It's like giving your dahlias a ticket to the express lane to blooming fabulousness. Pretty neat, huh?
Unboxing Your Future Blooms: What Exactly Are Dahlia Tubers?
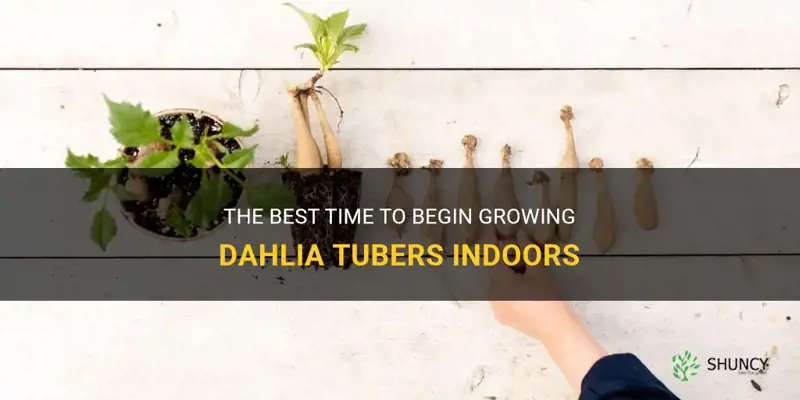
Before we dive into the how-to, let’s chat a bit about what we’re working with. Dahlia tubers are essentially modified stems that grow underground. They're packed with all the energy and nutrients your dahlia plant needs to sprout and grow. Think of them as tiny, dormant power packs, just waiting for the right signal to spring to life.
When you buy dahlia tubers, they might look a bit dry and shriveled. Don't panic! This is totally normal. They’ve been stored, often for months, and they’re in a resting state. It's like they’ve been on a long hibernation, and now it's time for them to wake up and stretch.
You'll often see these tubers have “eyes” – little nubs or indentations that look like…well, eyes! These are where the new growth will emerge from. It's crucial to make sure your tuber has at least one of these eyes to ensure it can sprout. Without an eye, it's like trying to start a car without a battery; it just won't go anywhere.
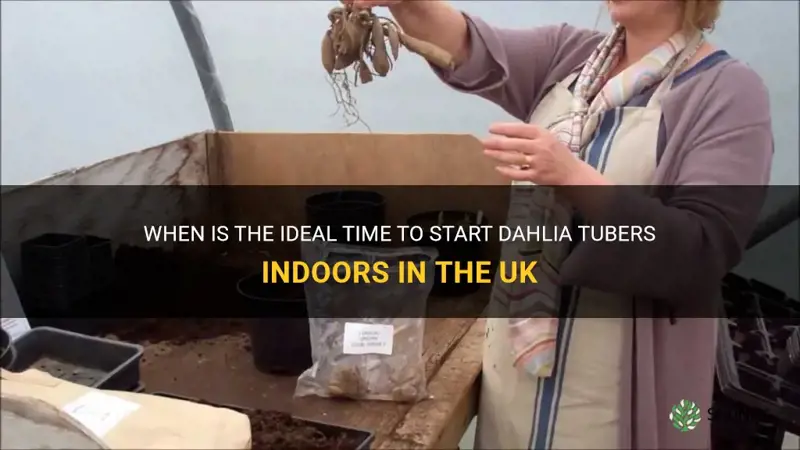
The Big Question: When Do We Start This Indoor Adventure?
Timing is everything, right? For starting dahlias indoors, you want to get them going about 4-6 weeks before your last expected frost date. This gives them a good chunk of time to get established and strong enough to handle being transplanted outside.

How do you figure out your last frost date? A quick online search for "[Your City/Region] last frost date" should do the trick. Knowing this date is like having a secret map to the perfect planting time. It's not an exact science, as weather can be a bit wild sometimes, but it’s a really good guideline.
Starting too early might result in leggy, weak plants that are more susceptible to pests and diseases when they finally go outside. Starting too late means you might miss out on some of those spectacular blooms later in the season. So, aim for that sweet spot, and you’ll be golden.
Gathering Your Supplies: What You'll Need for the Dahlia Nursery
Okay, so we’re ready to get our hands dirty! What do we need for this cozy dahlia nursery?
- Your Dahlia Tubers: Of course! Make sure they look reasonably healthy and have those all-important eyes.
- Pots or Containers: You don't need anything fancy. Old yogurt containers, plastic cups with drainage holes poked in the bottom, or even small nursery pots will work perfectly. The key is good drainage. We don't want soggy tubers sitting around, that’s a recipe for disaster.
- Potting Mix: A good quality potting mix is essential. Something light and airy is best. You can find specific mixes for starting seeds and tubers, or a general potting mix will do. Avoid using garden soil; it can be too dense and might harbor unwanted critters.
- Water: Just plain old water.
- A Warm Spot: Dahlias love a bit of warmth to get them going. A sunny windowsill, a heat mat (if you have one), or even the top of your refrigerator can work.
- Optional: A little bit of patience and a lot of enthusiasm!
See? Nothing too complicated! It’s more about creating the right environment for these little guys to wake up and get moving.
The Grand Planting Ceremony: How to Actually Do It
Alright, let’s get planting! It's not rocket science, I promise.
Step 1: Prepare Your Tubers (If Needed)
If your tubers are really dry and shriveled, you can give them a little soak in lukewarm water for a few hours. This can help plump them up. However, don't soak them for too long, as they can rot.
If your tuber is a large clump, you might want to divide it. Look for those eyes and make sure each piece you plant has at least one. You can gently break apart the clumps with your hands or use a clean knife. It's like dividing up a birthday cake, but for dahlias!
Step 2: Potting Up Your Tubers
Fill your pot or container with potting mix, leaving about an inch or two of space at the top. Now, here’s the slightly fiddly part: placing the tuber. You want to lay the tuber on its side or with the eye(s) facing upwards. Don't bury it too deep. About 2-3 inches of potting mix over the top is usually sufficient.
Think of it like tucking them into bed. You don't want to smother them; just give them a nice, cozy blanket of soil.
Step 3: Watering
Once your tuber is nestled in its pot, give it a light watering. You want the soil to be moist, not waterlogged. We're aiming for a gentle drink, not a flood. Overwatering at this stage is a common mistake and can lead to rot.
It’s better to err on the side of slightly dry than too wet. You can always add more water, but you can’t take it away if it becomes a swamp!
Step 4: The Waiting Game (and Warmth!)
Now, place your potted tubers in that warm spot we talked about. Keep an eye on them. You’re looking for signs of life!
Within a few weeks, you should start to see little sprouts emerge from the soil. It's a truly exciting moment, like watching a secret unfold. When you see those first green shoots, you know you're on the right track!
What to Do Next: Caring for Your Sprouting Stars
Once your dahlias have sprouted, they’ll need a little more attention. They’re still delicate babies at this stage, even if they’re already showing their potential for grandeur.
Light, Light, Light!
As soon as those sprouts appear, they’ll need plenty of light. If you don’t have a super sunny windowsill, this is where grow lights can be a game-changer. They'll prevent your dahlias from becoming leggy and weak as they reach for the sun.
Think of it as giving them their own personal sunshine, even on a cloudy day. This strong light is crucial for developing sturdy stems and healthy leaves.
Watering Wisdom
Continue to keep the soil consistently moist, but not soggy. Water when the top inch of soil feels dry to the touch. As the plant grows, it will need more water, but always check the soil first.

It’s like caring for a new puppy – they need regular drinks, but you don’t want them to be constantly soaking wet.
Hardening Off: The Great Outdoors Introduction
This is a super important step before you transplant your dahlias outside. "Hardening off" is the process of gradually acclimating your indoor-grown plants to outdoor conditions. This prevents them from going into shock from the sun, wind, and cooler temperatures.
About a week or so before your last frost date, start taking your potted dahlias outside for a few hours each day. Gradually increase the amount of time they spend outdoors. Start in a sheltered spot, out of direct sun and wind, and slowly introduce them to more exposure. It’s like easing them into a new social scene; you don’t want to overwhelm them.
Transplanting Time!
Once all danger of frost has passed and your plants have been successfully hardened off, it’s time to plant them in their final outdoor home. Choose a spot with plenty of sunshine (at least 6-8 hours a day) and well-draining soil.
Dig a hole slightly larger than the pot, gently remove the dahlia from its container, and plant it at the same depth it was in the pot. Water them well and watch them grow!
Starting dahlias indoors is a rewarding process that allows you to witness the entire life cycle of these incredible flowers, from a humble tuber to a magnificent bloom. It’s a little bit of gardening magic, right in your own home. So, go on, give it a try! You might just surprise yourself with the floral fireworks you can create.