
How To Tig Weld Aluminum For Beginners
I still remember the first time I tried TIG welding aluminum. It was a disaster. A glorious, smoky, sputtering, absolutely epic disaster. I’d watched a million YouTube videos, thought I was practically a seasoned pro, and then… well, let’s just say my attempts looked less like elegant, shiny beads and more like someone had attacked a piece of tin foil with a lightning-spewing hot dog. My dad, who’s been welding longer than I’ve been alive, just chuckled and said, "Aluminum, eh? It's got a mind of its own, that one." And you know what? He wasn't wrong. Aluminum is, shall we say, particular. But don't let my initial faceplant discourage you! With a bit of understanding and a healthy dose of patience (and maybe a fire extinguisher on standby, just in case), you too can conquer this shiny, finicky metal. So, grab a cup of your favorite beverage, settle in, and let's talk about how to TIG weld aluminum without ending up looking like I did.
The biggest hurdle when starting with aluminum TIG welding is the perception that it's impossibly difficult. And okay, maybe it's not as forgiving as mild steel. It's like that friend who's super cool until you spill something on their pristine white carpet – suddenly they're a completely different person. But once you understand its quirks, it becomes surprisingly manageable. Think of it as learning a new dance. At first, you're tripping over your own feet, but with practice, you start to find the rhythm.
Understanding the Enemy (or rather, the Friend): Aluminum's Peculiarities
So, what makes aluminum so… aluminum-y? Well, it all boils down to a few key differences from steel:
Oxide Layer Shenanigans
This is your arch-nemesis, the first thing you need to understand. Aluminum naturally forms a tough, stubborn oxide layer. This layer has a much higher melting point than the aluminum itself. If you try to weld over it without removing it, you'll be trying to melt something that’s already significantly hotter than your base metal. This leads to all sorts of problems like contamination, porosity, and just plain ugly welds. Think of it as trying to paint over rust – it’s not going to end well.
How to fight it: Mechanical cleaning is your best friend here. Use a dedicated stainless steel brush that has only been used on aluminum. Seriously, don't cross-contaminate with steel brushes that have seen steel. You’ll just be grinding in more contaminants. A good scrub-a-dub-dub before every weld is crucial. Some folks also use chemical cleaners, but for beginners, a good old-fashioned brush is usually sufficient and less messy.
Heat, Heat, and More Heat (But Not Too Much!)
Aluminum is a heat sink. This means it dissipates heat very quickly. This is good because it cools down fast, but it's also bad because it means you need a lot of amperage to get it to melt and flow. You’ll likely be running your machine at higher settings than you would for steel of the same thickness. But here’s the ironic twist: if you get too much heat in one spot, it melts incredibly fast, and suddenly you’ve got a hole bigger than your intended weld seam. It’s a delicate balancing act. It’s like trying to toast bread – you want it golden brown, not charcoal.
What to do: This is where your foot pedal control (or amperage control knob if you’re not using a pedal) becomes absolutely vital. You need to be able to feather that heat in and out like a pro. Start with a lower amperage and ramp up quickly, then be prepared to back off the heat as the puddle forms and starts to flow. Practice, practice, practice on scrap pieces! Get a feel for how quickly the puddle forms and starts to sag.
That Shiny, Wiggly Puddle
The puddle on aluminum looks different from steel. It’s usually more fluid, and it has a distinct "wash" or shimmering effect on the surface when it’s at the right temperature. When you're starting, it can be hard to distinguish the perfect puddle from one that's about to go nuclear. The key is to look for that gentle, rolling wave. If it starts to look like a bubbling, angry abyss, you've gone too far. You want a smooth, controllable puddle.
Tip for beginners: Many people find it helpful to start with a DCEN (Direct Current Electrode Negative) setting for aluminum, which is counterintuitive because most people associate AC with aluminum. While AC is generally preferred for its cleaning action, DCEN can offer a more focused arc and be slightly easier to control for beginners on thinner materials. Once you're comfortable, you can absolutely transition to AC. We'll get to AC later, don't you worry!
Gearing Up: What You'll Need
Alright, so you're ready to dive in. What do you actually need to make this happen? You're probably already set up for basic TIG welding, but there are a couple of aluminum-specific essentials:

Your TIG Welder
This is the obvious one. You need a TIG welder. For aluminum, especially thicker stuff, you’ll want a machine with sufficient amperage. A 180-amp machine is a good starting point for most home shop projects involving thinner aluminum (up to about 1/8 inch). If you plan on tackling thicker sections, you’ll need something more powerful.
Important note: If your welder has AC capabilities, that's ideal for aluminum. AC welding offers a "cleaning action" that helps break up the oxide layer, making it easier to get a clean weld. If you only have DC, don't despair! You can still weld aluminum on DCEN, as mentioned, but it requires a bit more meticulous cleaning. Just know that AC will make your life easier in the long run.
The Torch and Consumables
You'll need a TIG torch, naturally. For aluminum, you'll want to use a tungsten electrode. Pure tungsten was once the go-to for aluminum, but it tends to ball up and contaminate the weld. Most people now opt for 2% Ceriated (gray band) or 2% Lanthanated (blue band) tungsten. These provide a more stable arc and are less prone to contamination. Stick to a 1/16" or 3/32" diameter for most common applications.
Pro tip: Keep your tungsten sharp! A nice, pointed tip will give you a more focused arc, which is crucial for controlling that fluid puddle. For AC, you’ll want to ball the tip slightly. For DCEN, a sharp point is usually best. Confusing, right? The manual for your machine and your tungsten manufacturer's recommendations are your friends here.
You'll also need argon gas. Pure argon is the standard shielding gas for TIG welding aluminum. Make sure your bottle is full and your flow meter is set correctly (typically around 15-25 CFH, depending on your setup and the material thickness). Good gas coverage is vital to prevent contamination from the atmosphere.
Filler Material
Just like with steel, you’ll need filler rod. For aluminum, you'll often see two common alloys: 4043 and 5356. 4043 is generally considered easier to use for beginners because it flows nicely and is less prone to cracking. It also has a lower melting point. 5356, on the other hand, is stronger and more corrosion-resistant, but it can be a bit trickier to handle for newcomers. Start with 4043; it’s your safe bet.
A word to the wise: Always match your filler rod to the base metal you’re welding! Welding 6061 aluminum with 4043 filler is a common and good combination. If you’re not sure what alloy your aluminum is, try to find out. Mixing filler metals can lead to brittle welds or other unwanted properties.

Safety Gear, Obviously!
This is non-negotiable. You need a good auto-darkening welding helmet, welding gloves, a fire-resistant jacket or leathers, and a respirator if you're welding in an enclosed space. Aluminum fumes can be nasty. Don’t skimp on safety. Your eyesight and lungs are not replaceable!
The Actual Welding Process: Let's Get Down to Business
Okay, you’ve got your gear. You’ve scrubbed your aluminum until it gleams. You’re ready to lay down some metal. Here’s a step-by-step breakdown, keeping in mind that practice is key. Don't expect perfection on your first try.
Step 1: Clean, Clean, and Then Clean Some More
I’m going to say it again because it’s that important. Get out that stainless steel brush. Scrub the area you're going to weld, and scrub the filler rod. Don't touch the cleaned metal with your bare hands afterwards – the oils from your skin can cause contamination. Wear gloves!
Step 2: Set Your Machine
This is where it gets tricky, and it will vary depending on your machine and the thickness of your aluminum. As a starting point for AC welding (if your machine has it), you might try:
- Amperage: Start around 100-150 amps for 1/8-inch thick material and adjust from there. Thinner material needs less, thicker needs more.
- Balance Control (AC): This controls the amount of cleaning action vs. penetration. For aluminum, you generally want more cleaning action, so experiment with settings between 50% and 70% electrode positive. This can be a bit advanced, so don't get too hung up on it initially.
- Frequency Control (AC): Higher frequencies (150-200 Hz) can provide a tighter, more focused arc, which is great for control. Lower frequencies are more common for steel.
- Gas Flow: 15-25 CFH of pure Argon.
- Tungsten Grind: For AC, a slightly balled tip. For DCEN, a sharp point.
If you’re using DCEN (no AC on your machine), focus on getting a sharp tungsten. Your amperage will likely be similar or slightly higher than AC for the same material thickness, as you lack that inherent cleaning action. Your cleaning becomes even more critical.
Step 3: The Arc
Start your arc by touching the tungsten to the metal and immediately lifting it about 1/8 to 1/4 inch away. This is called "arc initiation." You’re looking for a nice, stable arc. You might have to experiment with your lift height to find the sweet spot.
Step 4: Puddle Control and Filler Addition
This is the main event. As soon as you establish your arc, you should see a puddle forming. Remember that fluid, shiny puddle we talked about? That’s what you’re aiming for. Use your foot pedal (or amperage dial) to maintain this puddle. Imagine you’re gently rocking a boat. Too much power, and it capsizes. Not enough, and it goes nowhere.

Once you have a stable puddle, introduce your filler rod. Dip the rod into the puddle, melt a small amount, and pull it back slightly. Then dip again, moving your torch forward at a consistent pace. The filler rod should melt into the puddle, not be blasted away by the arc. Think of it as feeding the puddle.
The key here is to maintain a consistent puddle size and movement. If the puddle gets too big, back off the heat with your foot pedal. If it starts to cool too much, add a little more heat and filler. This is the dance you need to learn.
Beginner blunder to avoid: Don't hold the torch too far away from the puddle. This allows contaminants to get in and makes it harder to control the heat. Keep your torch head relatively close to the work.
Step 5: Travel Speed and Bead Formation
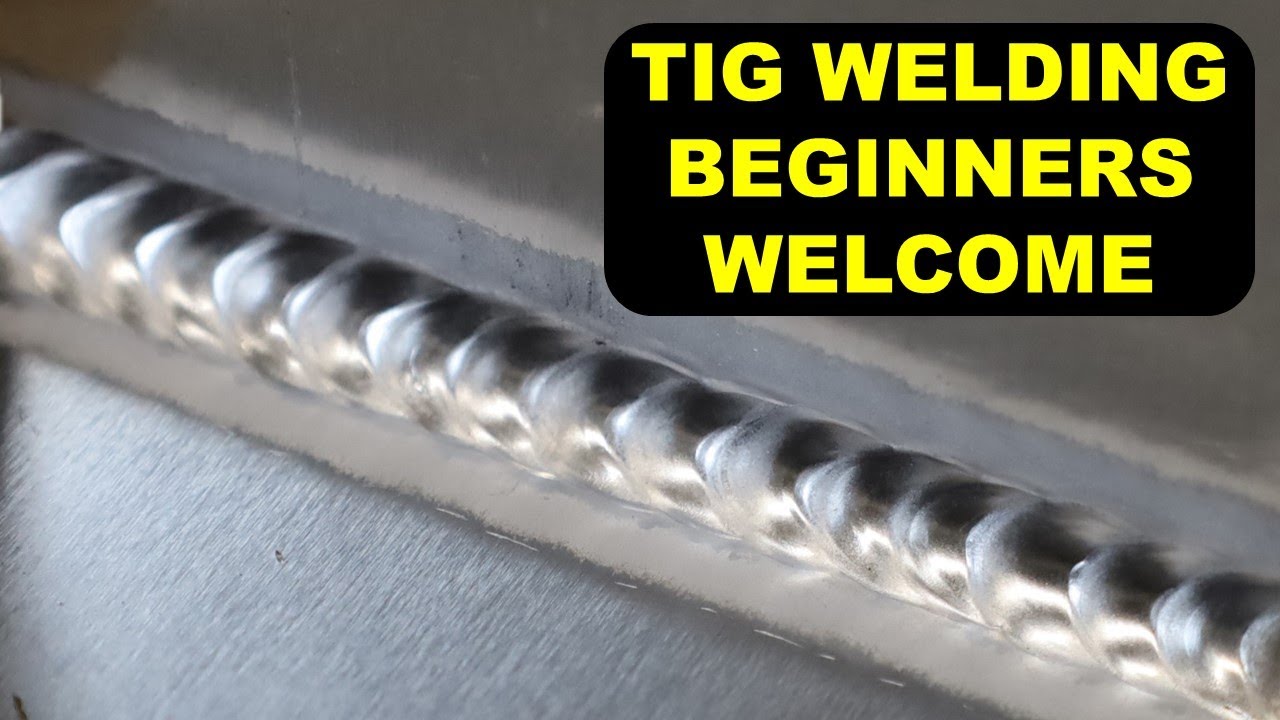
As you move the torch forward, you're building your bead. Aim for consistent spacing between your dips of filler rod. The bead should be uniformly wide and have a nice, smooth ripple pattern. If the ripples are too large or irregular, your heat or travel speed is likely off. It's all about finding that rhythm.
Step 6: Tie-in and Completion
When you reach the end of your weld, or when you need to tie into another pass, you need to ensure a good tie-in. This means fusing the end of your weld smoothly into the base metal or the previous weld. Avoid leaving craters, which can be stress risers. You can often achieve this by slightly increasing heat as you finish and filling the crater.
The dreaded crater: If you end up with a crater, try to go back over it briefly with the torch to fill it in. Some experienced welders will even tap a new filler rod into the crater to fill it. It’s not pretty, but it’s better than leaving a weak spot.
Practice Makes… Well, Less Disaster
Look, you’re not going to be welding aerospace components on your first try. The goal is to get comfortable with the puddle, understand how the heat affects the metal, and develop your hand-eye coordination. Here are some good practice materials:

- Scrap aluminum sheet (1/8 inch is a great starting point).
- Old aluminum brackets or brackets from projects.
- The bottom of an aluminum can (this is for very low amperage practice, mostly for arc control).
Spend an entire session just practicing laying beads on a flat piece of scrap. Don’t worry about making a perfect joint. Focus on the arc, the puddle, and the filler. This is your sandbox.
Troubleshooting Common Aluminum Woes
Even with practice, you might run into some issues. Here are a few common ones:
Porosity (Little Bubbles)
This is almost always due to contamination. Either your cleaning wasn't thorough enough, you used a contaminated filler rod, or you had poor shielding gas coverage. Double-check your cleaning routine and your gas flow.
Cracking
Aluminum can be prone to cracking, especially certain alloys or if you have restraint (the metal is held too rigidly). Using the correct filler rod (4043 is more forgiving) and avoiding excessive heat can help. Preheating thicker sections can also reduce cracking risk.
Burn-through
You’ve melted a hole! This is usually a sign of too much heat, too slow travel speed, or a lack of filler material. Back off the heat, move faster, and practice your puddle control.
My personal mantra: "If it melts, it’s probably me." It’s a humbling thought, but it’s often true!
The Joy of Aluminum
TIG welding aluminum can feel like wrestling an octopus at first. It's slippery, it's unpredictable, and it’s a whole lot messier than steel. But there's a unique satisfaction that comes with laying down a beautiful, clean aluminum weld. That shiny, silvery bead is like a badge of honor. So, don't give up after your first smoky mishap. Embrace the challenge, learn from your mistakes, and keep practicing. Soon enough, you'll be TIG welding aluminum with confidence, and your dad (or whoever your welding guru is) will be nodding approvingly. Happy welding!