
How To Use A Concrete Form Tube

Hey there, coffee-sipping buddy! Ever looked at one of those giant cardboard tubes and wondered what in the world you'd do with it? Well, surprise! That's probably a concrete form tube, and today, we're going to dive into the surprisingly simple, yet oh-so-satisfying world of using them. Think of it like giving your concrete a cozy, temporary cardboard hug before it gets all strong and solid. Fun, right?
So, you're building something, huh? Maybe a sturdy new fence post, a really substantial deck pier, or even a whole darn patio column. Whatever it is, you're going to need a way to shape that liquid concrete into something useful and, dare I say, attractive. And that, my friend, is where our cardboard hero swoops in to save the day!
Forget fancy, complicated molds that cost a fortune. These form tubes? They're the OG. The workhorses. The unsung heroes of the DIY concrete world. And using them is, well, pretty much like playing with really big, muddy Play-Doh. Just with a lot more structural integrity at the end.
The Mighty Form Tube: What is it, Anyway?
Picture this: a long, sturdy cardboard cylinder. That's it! Simple, right? They come in all sorts of diameters, from skinny little guys for fence posts to beefy behemoths for, you know, actual buildings. They're designed to hold their shape when wet concrete is poured into them, and then, get this, you can often just leave them there! Yep, some of them are made to be buried and become part of your project. Talk about multi-tasking!
Why cardboard, you ask? Great question! It’s surprisingly strong when wet, yet it can eventually decompose or be easily removed if needed. Plus, it's lightweight and way cheaper than, say, a custom-built metal mold. It's the eco-friendly, budget-friendly champion of concrete forming.
Think of it as concrete's temporary slumber party sleeping bag. It keeps everything neat and tidy while the concrete is doing its thing, hardening up and becoming, well, concrete. Without it? You'd have a concrete puddle. Not exactly the strong, upright structure you were aiming for, was it?
Choosing Your Tube: Size Matters (Sometimes)
Okay, so you need a form tube. But which one? This is where you gotta do a tiny bit of homework. Your project dictates the size. A skinny fence post? You don't need a 12-inch diameter monster. A massive deck support? A little 4-inch tube is going to look…well, a little sad and wimpy.
Most projects will have a recommended diameter. If you're building a deck, for example, your local building codes (and your own sanity) will likely tell you what size footings you need. And guess what? That size will tell you the diameter of the form tube you should grab. It's all connected, like a concrete conspiracy!
Don't just eyeball it, okay? Getting the right size means your concrete will be strong enough for its job. Nobody wants a wobbly deck, right? Or a fence post that leans like it’s had one too many at happy hour. Measure twice, cut once… or in this case, measure twice, buy the right tube once.

Getting Ready: Prep Work is Key!
Alright, you've got your tube. Now what? Before you even think about mixing that glorious gray stuff, we gotta get our ducks in a row. This is the part where you’re the conductor of an orchestra, and everyone (including your form tube) needs to be in tune.
First things first: digging the hole. This is usually where your form tube will live. Make sure it’s deep enough for stability and wide enough to accommodate your tube with a little wiggle room. You'll want some space for gravel at the bottom for drainage, and some space for… well, to make sure the tube fits!
Next, stabilize your tube. This is CRUCIAL. You don't want that cardboard cylinder doing a spontaneous interpretive dance once the concrete starts pushing against it. Think of it like giving it a big, supportive hug that’s going to last for a while. This usually involves stakes, lumber, and some serious elbow grease.
You’ll want to drive stakes into the ground around the outside of the tube. Then, use pieces of wood (like 2x4s or 2x6s) to brace the tube against those stakes. Screw or nail the wood to the stakes and to the tube itself. Make sure it’s snug! You want it to feel like it's rooted to the spot, not like it's about to take flight.
And here's a pro-tip from your friendly neighborhood concrete enthusiast: leveling. Use a level on top of the tube to make sure it's perfectly straight up and down. A crooked post is… well, it's a crooked post. Nobody’s impressed. Take the time to get it plumb. It’s worth it, trust me.
Sealing the Deal: Preventing Leaks
Now, for a little secret weapon: waterproofing. This is less about keeping the concrete dry (that's the point!) and more about making sure your precious concrete mix doesn't decide to escape through any tiny gaps or seams in your cardboard tube. Nobody wants a concrete leak. It's messy, it's wasteful, and it's just plain… wrong.
A little bit of duct tape can be your best friend here. Run it along any seams where the cardboard is joined, and especially around the bottom where it meets the ground. You can even wrap the entire bottom few inches of the tube in tape. Think of it as giving your tube little concrete-proof undies. You can also use caulk, but duct tape is usually easier and faster for us DIYers.
Why is this so important? Well, when you pour that wet concrete, it's got a lot of water in it. That water is what makes it flow. If it can flow out of the tube, you're going to end up with a weaker mix and potentially a weird, lumpy shape. We want smooth, strong concrete, not a concrete puddle with a wobbly cardboard skirt!
The Big Pour: Time to Get Your Hands Dirty (Literally!)
Here it is, the moment of truth! You’ve got your hole dug, your tube is standing tall and proud (and braced!), and you’re ready to mix some concrete. This is where the magic happens. Are you excited? I'm excited!
First, a little prep for the inside of the tube. You can lightly oil the inside of the form tube. This makes it easier to remove later if you decide you don't want the cardboard to stay. It’s like giving your cake pan a good greasing – makes the release so much smoother.
Now, you have two main options for your concrete: pre-mixed bags or ordering a truckload. For smaller projects, a few bags of concrete mix from the hardware store are usually the way to go. Just follow the instructions on the bag religiously. Too much water, and it's weak. Too little, and it's a nightmare to work with.
For bigger jobs, like a whole patio or a large foundation, ordering a concrete truck is the way to go. It’s more expensive, but oh-so-convenient. They mix it perfectly for you, and you just have to guide it where you want it. Just make sure you have a crew ready to help!
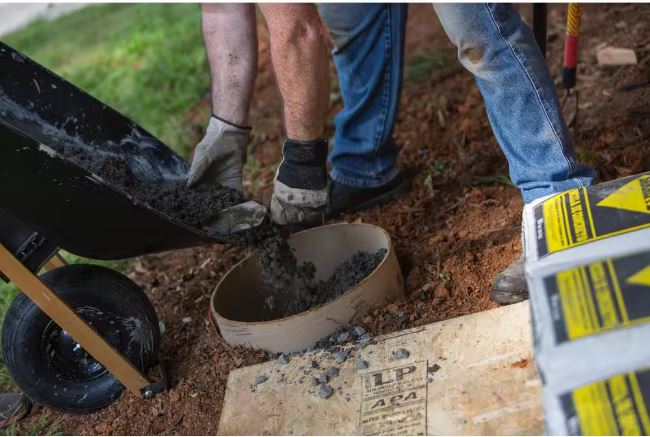
When you start pouring, do it in layers. Don't just dump it all in at once. Pour about a foot or so, then use a piece of rebar or a stick to poke down into the concrete. This is called "rodding" or "pounding", and it’s super important for getting rid of air bubbles. Air bubbles are the enemy of strong concrete!

Think of those air bubbles like little voids where the concrete could be stronger. By poking and jiggling, you encourage those bubbles to rise to the surface and escape. You want dense, solid concrete, not bubbly, crumbly concrete. Nobody wants crumbly concrete. It’s just… sad.
Keep pouring in layers, rodding each layer as you go. Fill the tube up to your desired height. Make sure to overfill slightly so you can screed it smooth later. You can always take a little off, but it's a pain to add more once it's started to set!
Finishing Touches: Making it Pretty (and Strong!)
Once you've got your concrete all poured and rodded, it's time for the finishing touches. This is where you turn that lumpy pour into something that looks intentional and professional.
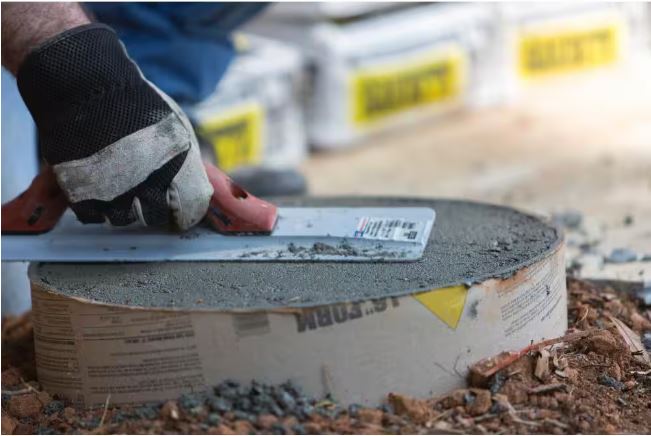
First, you'll want to screed the top. This means using a straight board (a piece of lumber works great) to drag across the top of the tube, leveling off the excess concrete. It’s like frosting a cake, but with concrete. You want a nice, flat surface.
After screeding, you’ll want to trowel the surface. This is where you use a trowel (a hand trowel or a larger bull float, depending on the size of your pour) to smooth out the surface even more. There are different stages of troweling, from initial floating to final finishing. The goal is a smooth, even surface.
Don't rush this part. As the concrete starts to stiffen, you'll be able to work it more. You're aiming for a nice, uniform finish. If you’re unsure, there are tons of great videos online showing you how to screed and trowel concrete. Seriously, YouTube is your friend here.
The Waiting Game: Curing is Key
So, the concrete is in the tube, it’s looking pretty good, and you’re tired. Great! Now comes the most important part: waiting. This is called curing, and it’s where the concrete actually gains its strength. You can’t rush this, my friend. Patience is a virtue, especially with concrete!
Keep the concrete moist during the curing process. This is essential for strength. You can do this by misting it with water occasionally, or covering it with plastic sheeting to trap the moisture. Don't let it dry out too quickly, or it’ll be weak and prone to cracking. Think of it like nurturing a baby – it needs constant care!
The length of curing time depends on the type of concrete and the weather, but generally, you're looking at at least a week, and often longer, before you can really put any significant stress on it. For fence posts and deck piers, you'll want to wait until it's fully cured before attaching anything to it. Don't be tempted to rush! The longer it cures, the stronger it will be.
Removing the Form (or Not!)
Now, about that form tube. What do you do with it? Well, it depends on the type of tube and your project.
Some form tubes are designed to be left in place. These are often called "permanent" or "stay-in-place" forms. They add a bit of extra protection and can even be decorative. If yours is designed this way, you just leave it. Easy peasy.
Other tubes are meant to be removed once the concrete has cured enough. If you oiled the inside, this should be relatively easy. You might need to carefully cut away at the cardboard with a utility knife or even just peel it off. Sometimes, a gentle tap with a hammer can help loosen it.
If you choose to remove it, do so carefully. You don't want to chip or damage your beautiful new concrete pillar. Be patient, and if it's really stuck, maybe just leave it. Who says you can't have a cardboard accent on your project? It's a conversation starter, right?
And there you have it! You’ve just conquered the concrete form tube. You’ve shaped liquid goodness into solid strength. You’re basically a concrete wizard now. Go forth and build amazing things!