How To Weld Stainless Steel
Hey there, fellow metal enthusiasts! So, you've got yourself some shiny stainless steel and you're thinking, "You know what? I wanna fuse this bad boy together." Awesome choice! Stainless is super cool, right? It doesn't rust, it looks slick, and it's used for everything from your fancy cutlery to that beastly exhaust pipe on your hot rod. But welding it? Well, that can sometimes feel a bit like trying to tame a particularly stubborn unicorn. Don't worry, though, we're gonna break it down, nice and easy, like we're just chewing the fat over a couple of lattes.
First things first, why is welding stainless a little bit different? It’s all in the name, really. That "stainless" bit? It means it’s got chromium in it, usually around 10.5% or more. That chromium stuff is what forms that invisible, protective layer that keeps it from getting all rusty and sad. Pretty neat, huh?
The thing is, this super-protective layer can be a bit sensitive. It doesn't like to be messed with too much, and if you're not careful, you can actually ruin its stainless-ness. Yeah, I know, the irony! We call this “sensitization,” and it’s basically like giving your stainless steel a really bad sunburn. Not good!
So, what’s the secret sauce then? Well, it’s all about keeping things clean, keeping things cool (relatively speaking!), and using the right tools for the job. Think of it like this: you wouldn't try to paint a masterpiece with a mop, would you? Same logic applies here. We gotta be a bit more… delicate.
Let's Talk About The Right Way to Weld Stainless
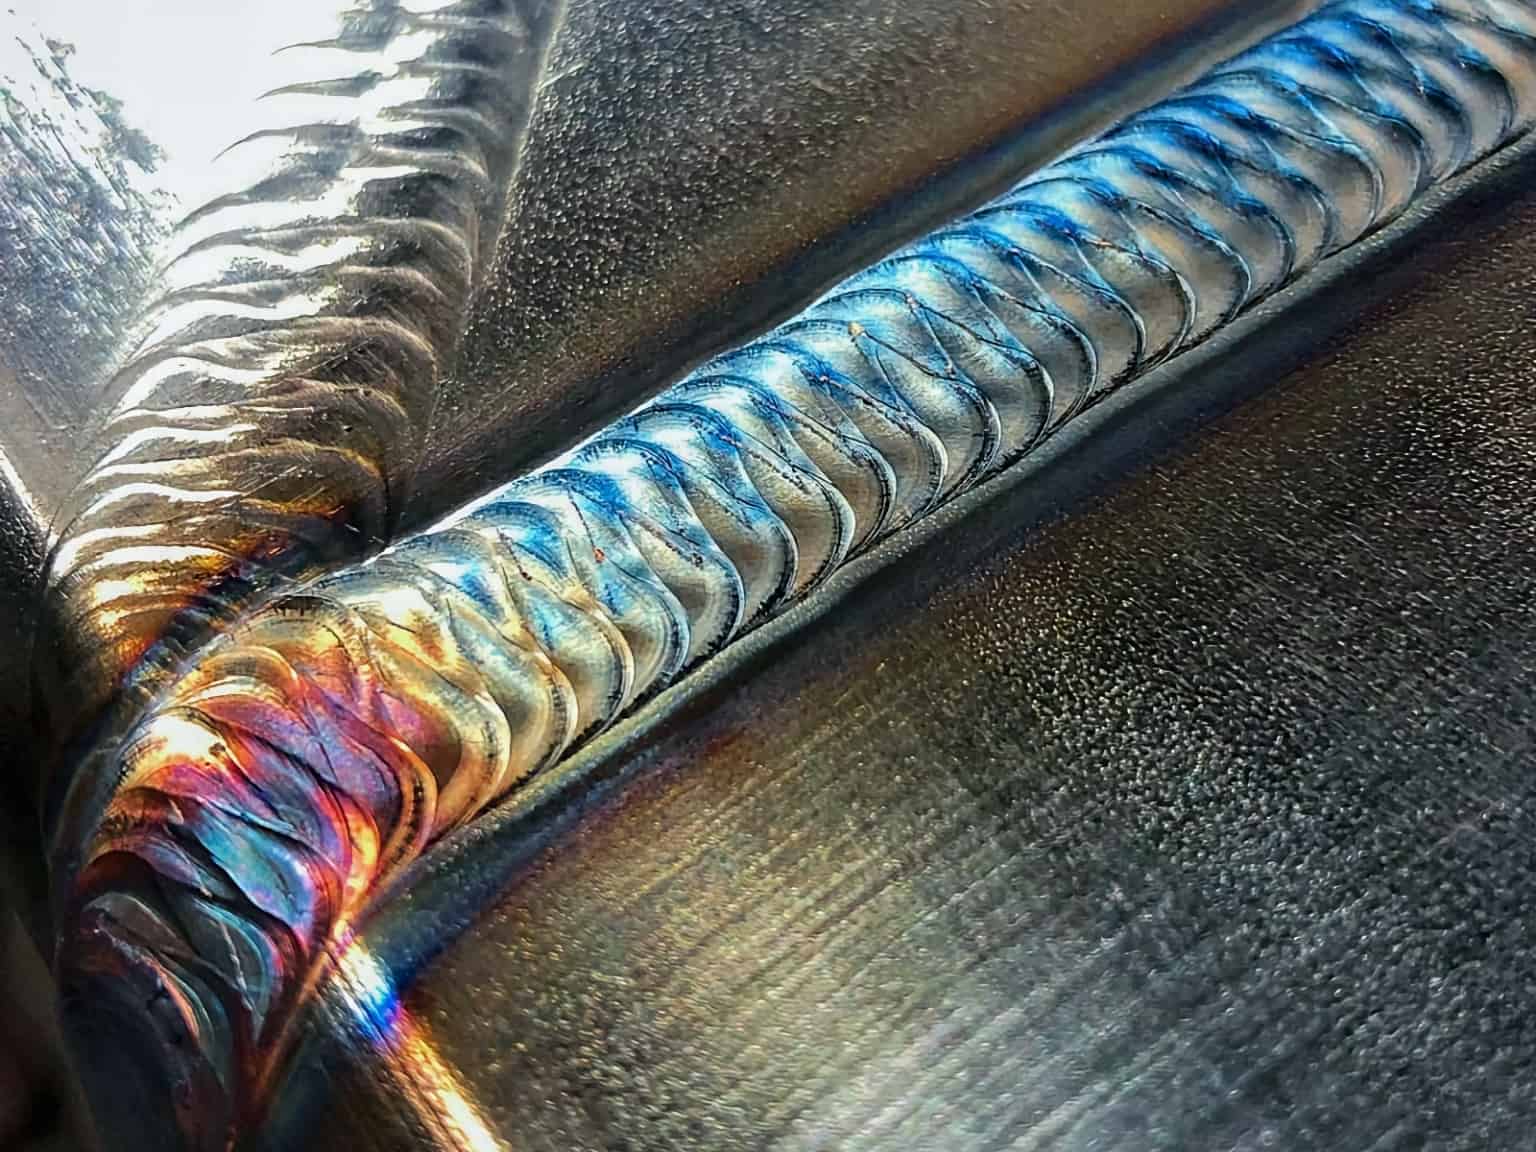
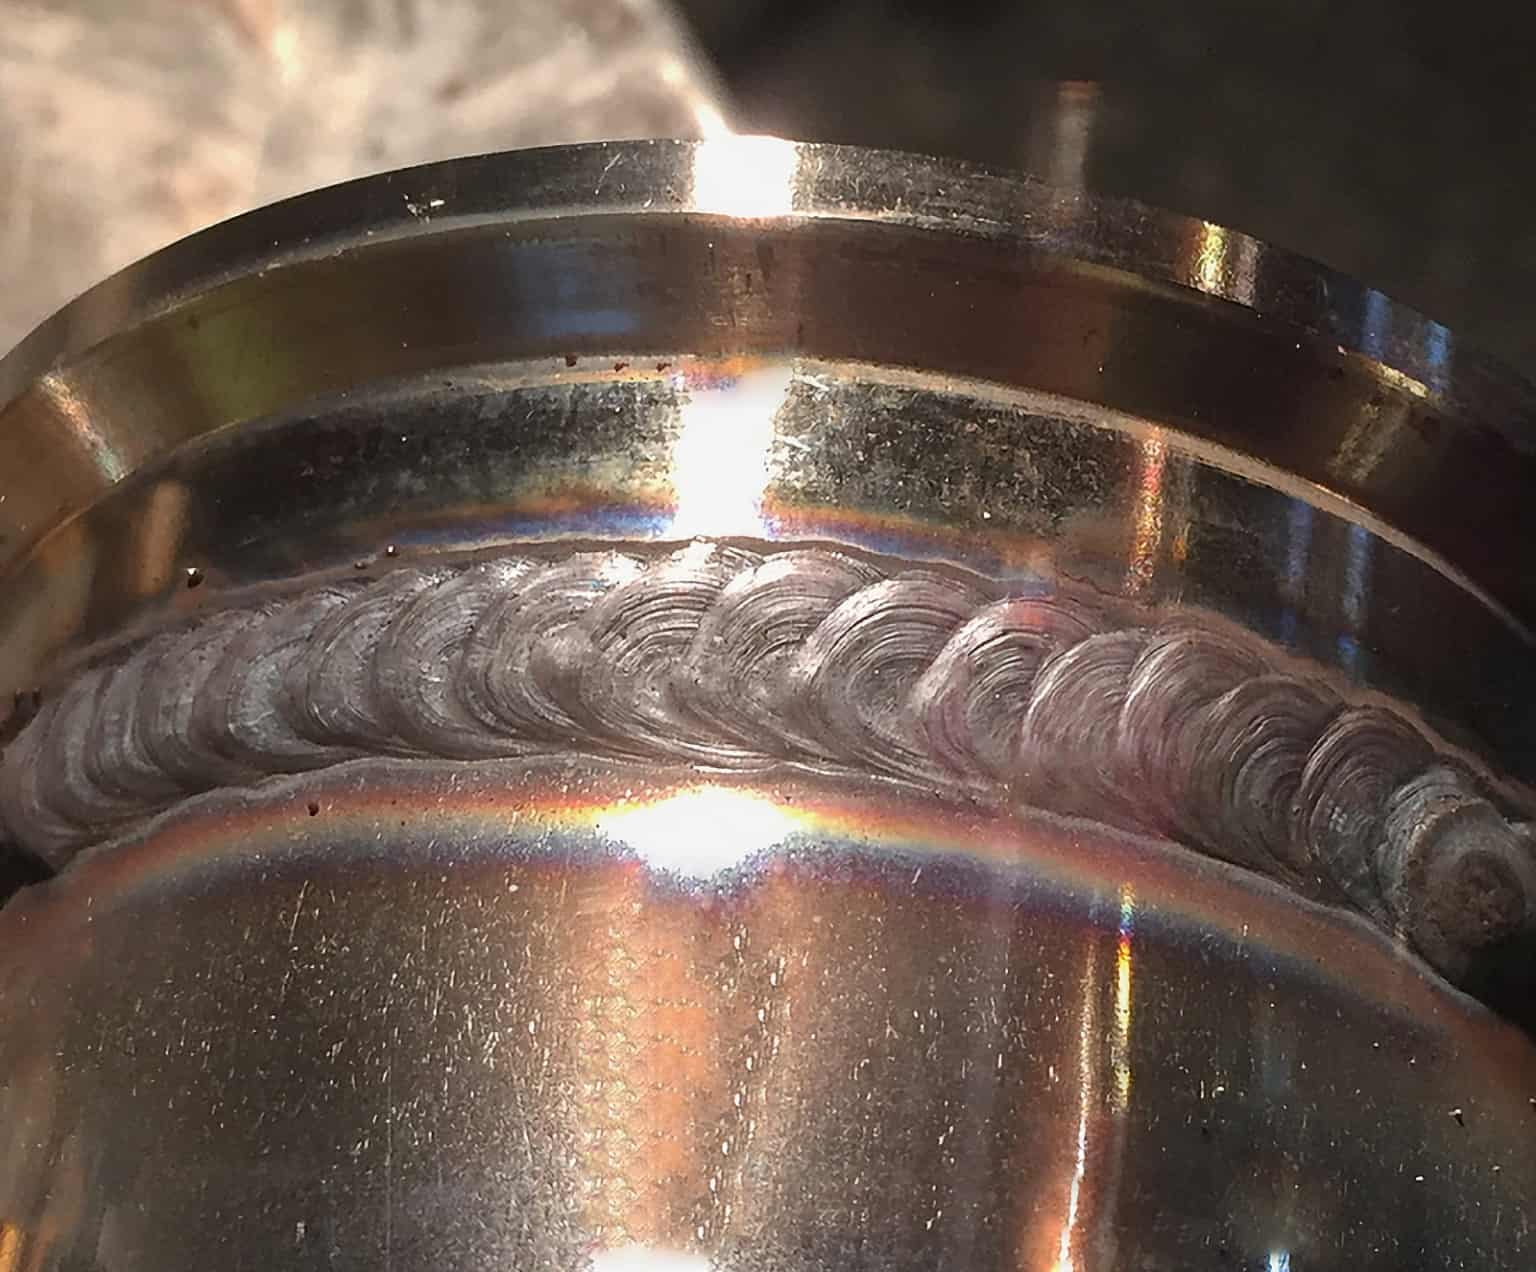
Okay, deep breaths. We're not talking rocket science here. It's more like advanced Lego building. And the biggest players in our stainless steel welding game are TIG (also known as GTAW) and MIG (also known as GMAW). Both are great, but they have their own quirks. Let's dive into TIG first, because, in my humble opinion, it’s the Beyoncé of stainless welding. It’s elegant, it’s precise, and it gives you that chef’s kiss finish.
TIG Welding Stainless: The Fancy Pants Method
TIG welding uses a non-consumable tungsten electrode. Think of it as a super-hot, super-precise laser pointer. You also use a separate filler rod, which you dip into the molten puddle like you’re stirring a tiny, molten soup. And you need shielding gas, usually pure argon, to keep all that nasty air away from your super-hot metal. It's like giving your weld a little personal bubble bath of protection.
Why is TIG so good for stainless? Because it gives you control. You can control the heat input exactly. Too hot, and you risk burning through, or worse, damaging that precious chromium layer. Too cold, and you get a weak, sloppy joint. It’s a delicate dance, but oh-so-rewarding when you nail it.
What kind of TIG setup do we need? You can get away with a basic AC/DC TIG welder for stainless, but a DC-only welder is generally preferred. We’re not melting aluminum here, so the fancy AC wave forms aren’t strictly necessary. Think of it as choosing the right tool for the specific job. No need for the overkill!
Electrodes? For stainless, you’ll usually want to use a 2% thoriated tungsten. It’s the classic choice, and for good reason. Just make sure it’s clean! Any gunk on the tungsten is an invitation for contamination. We want a sparkly clean tungsten, just like we want a sparkly clean stainless steel. It’s all about the bling!
And the filler metal? This is where it gets a little technical, but don’t let it scare you. The most common filler for stainless is 308L. The 'L' stands for 'low carbon.' Why low carbon? Because high carbon can lead to cracking. We want our welds to be strong and happy, not brittle and grumpy. So, always look for that 'L' for your general stainless projects. For more specialized stainless alloys, you might need different fillers, but for most of us just starting out, 308L is your best friend.
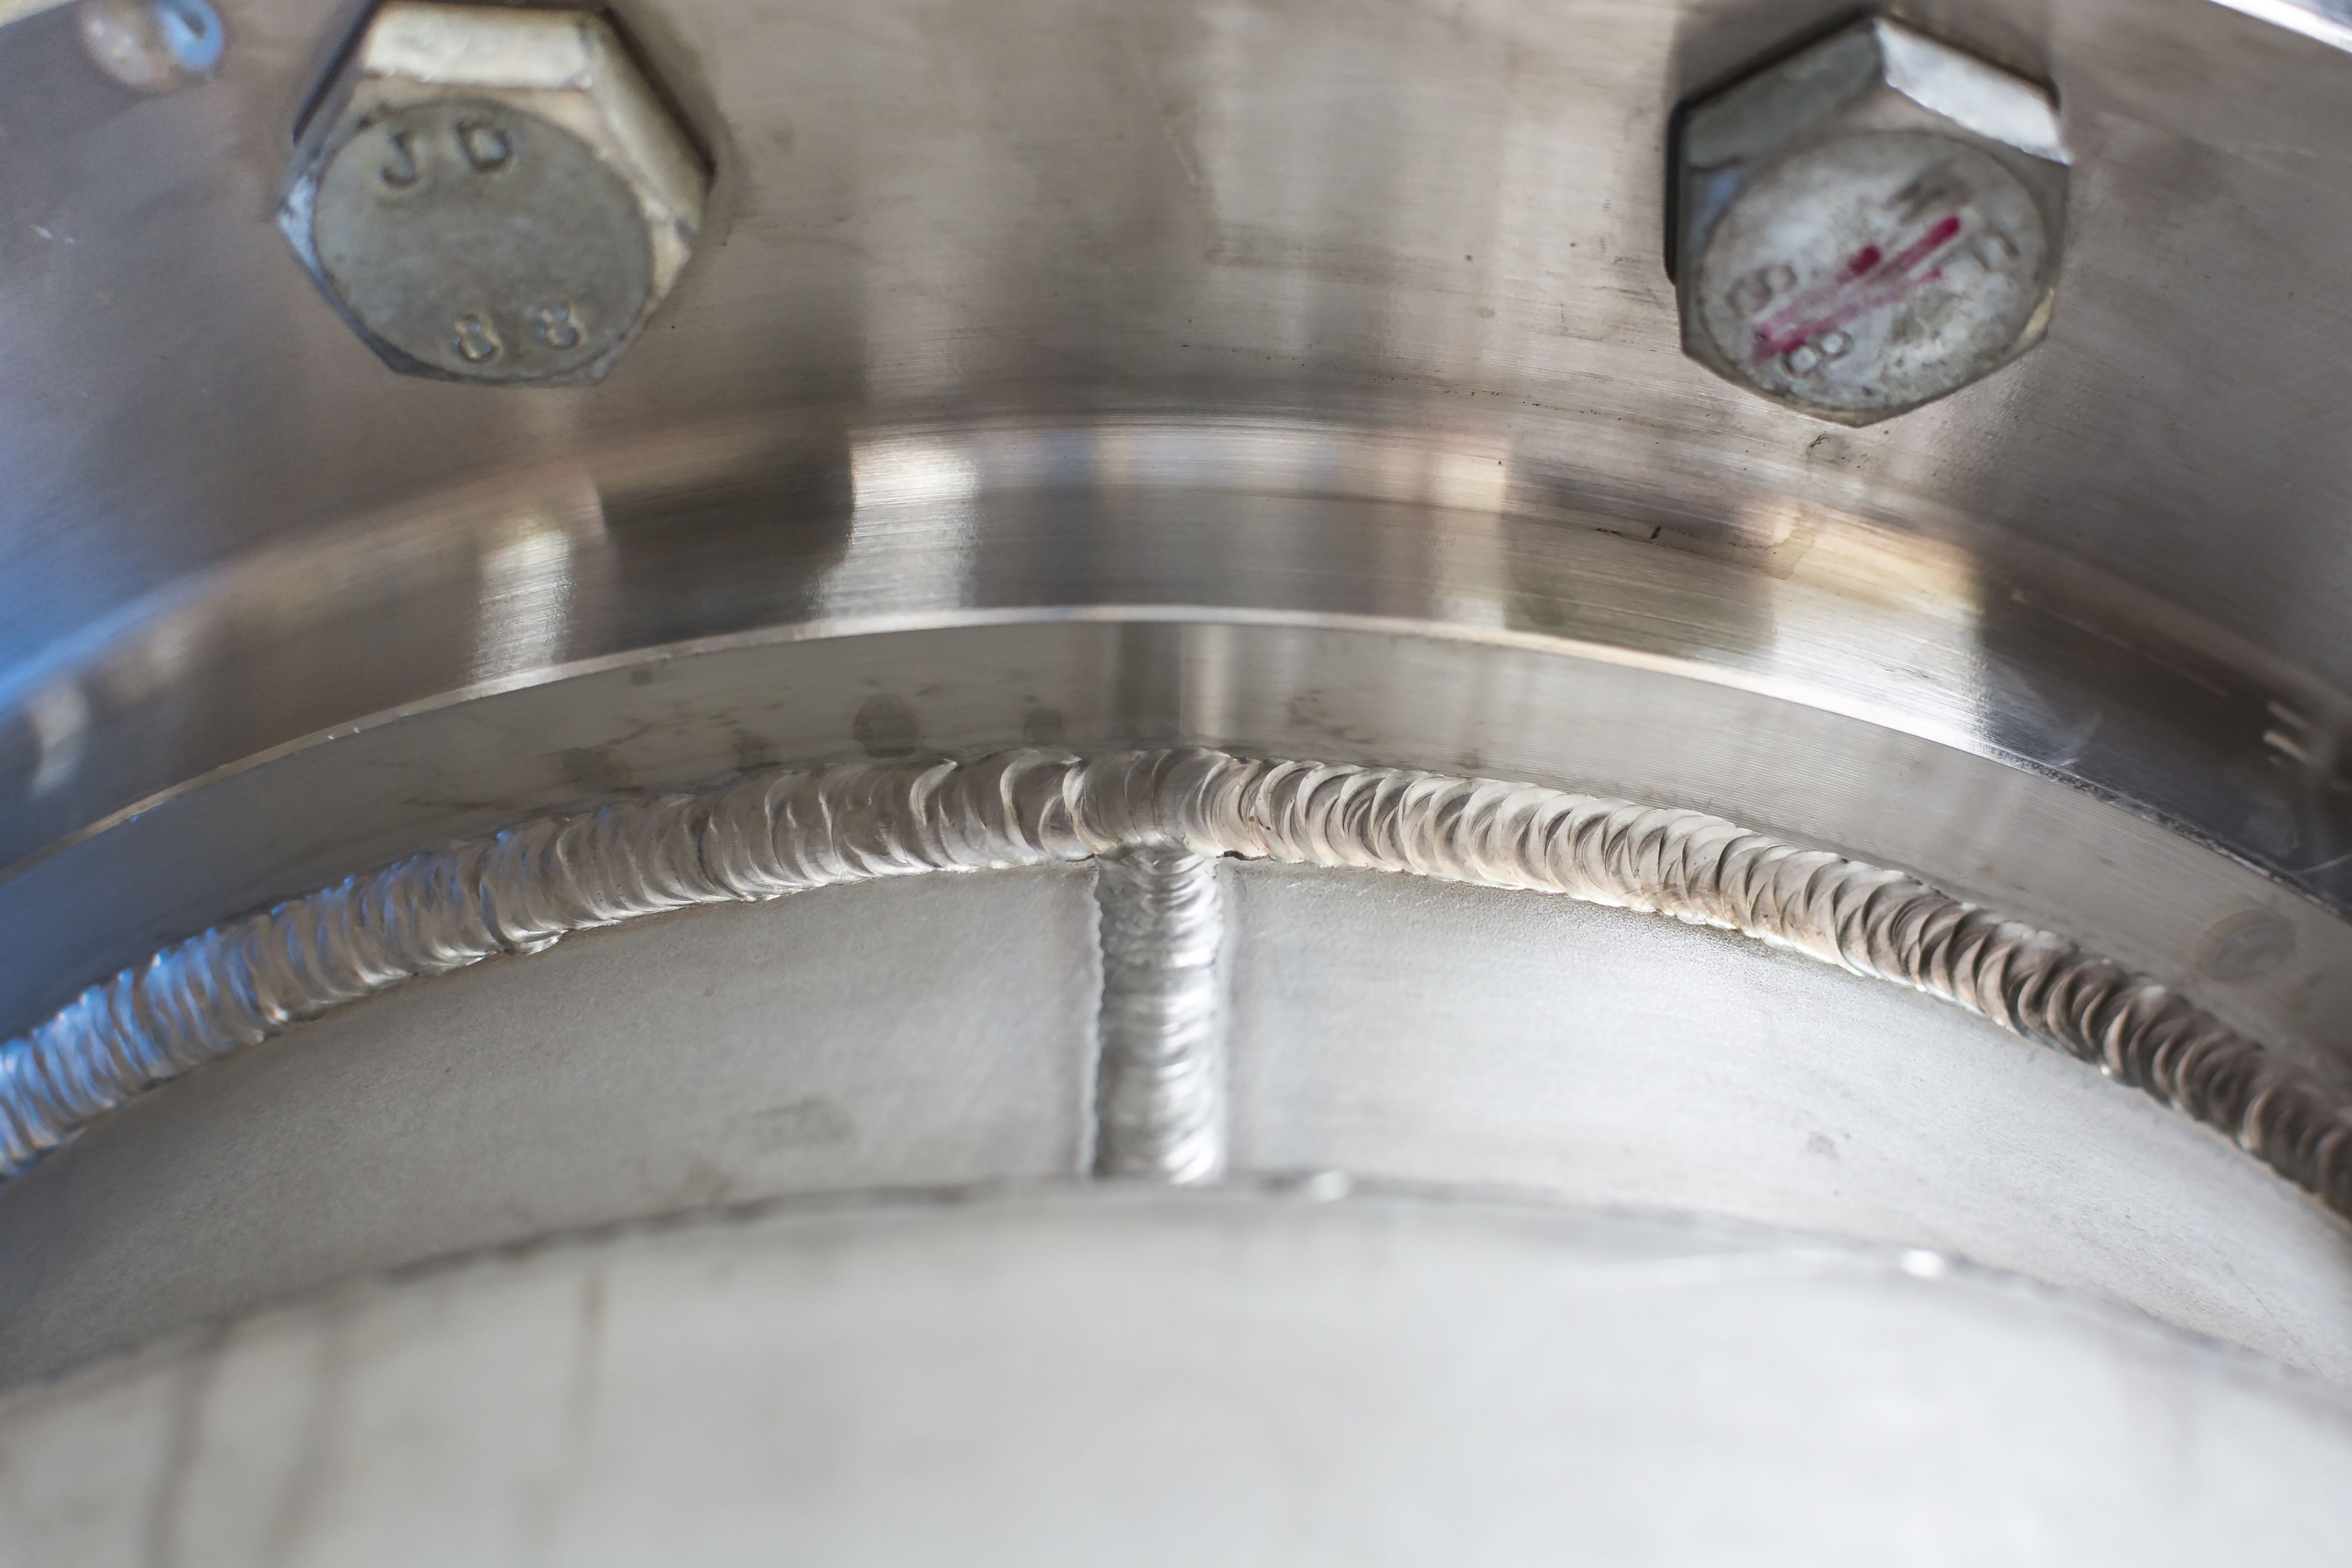
So, you’ve got your TIG welder humming, your tungsten sharpened (just a nice point, no needle!), your filler rod ready, and your shielding gas flowing. What next? Cleaning! Oh, the cleaning. I cannot stress this enough. Stainless steel is called stainless because it has that protective oxide layer. If you contaminate it, you’re asking for trouble. Use a dedicated stainless steel wire brush (seriously, dedicated. Don’t use the same brush you used on your mild steel, or you’re just moving rust around!), and some isopropyl alcohol or a good degreaser. Get it sparkling clean. Think of it as prepping for a royal ball. Presentation is everything!
Alright, time to lay down some beads. Keep your torch angle nice and consistent. You’re aiming for a beautiful, smooth puddle. Dip that filler rod in with a steady rhythm. Don't be afraid to practice on some scrap pieces first. Seriously, nobody gets it perfect the first time. I certainly didn't! My first stainless welds looked like a confused caterpillar had a bad day. But with practice, you'll get that rhythm down. It’s all about muscle memory and a little bit of patience.
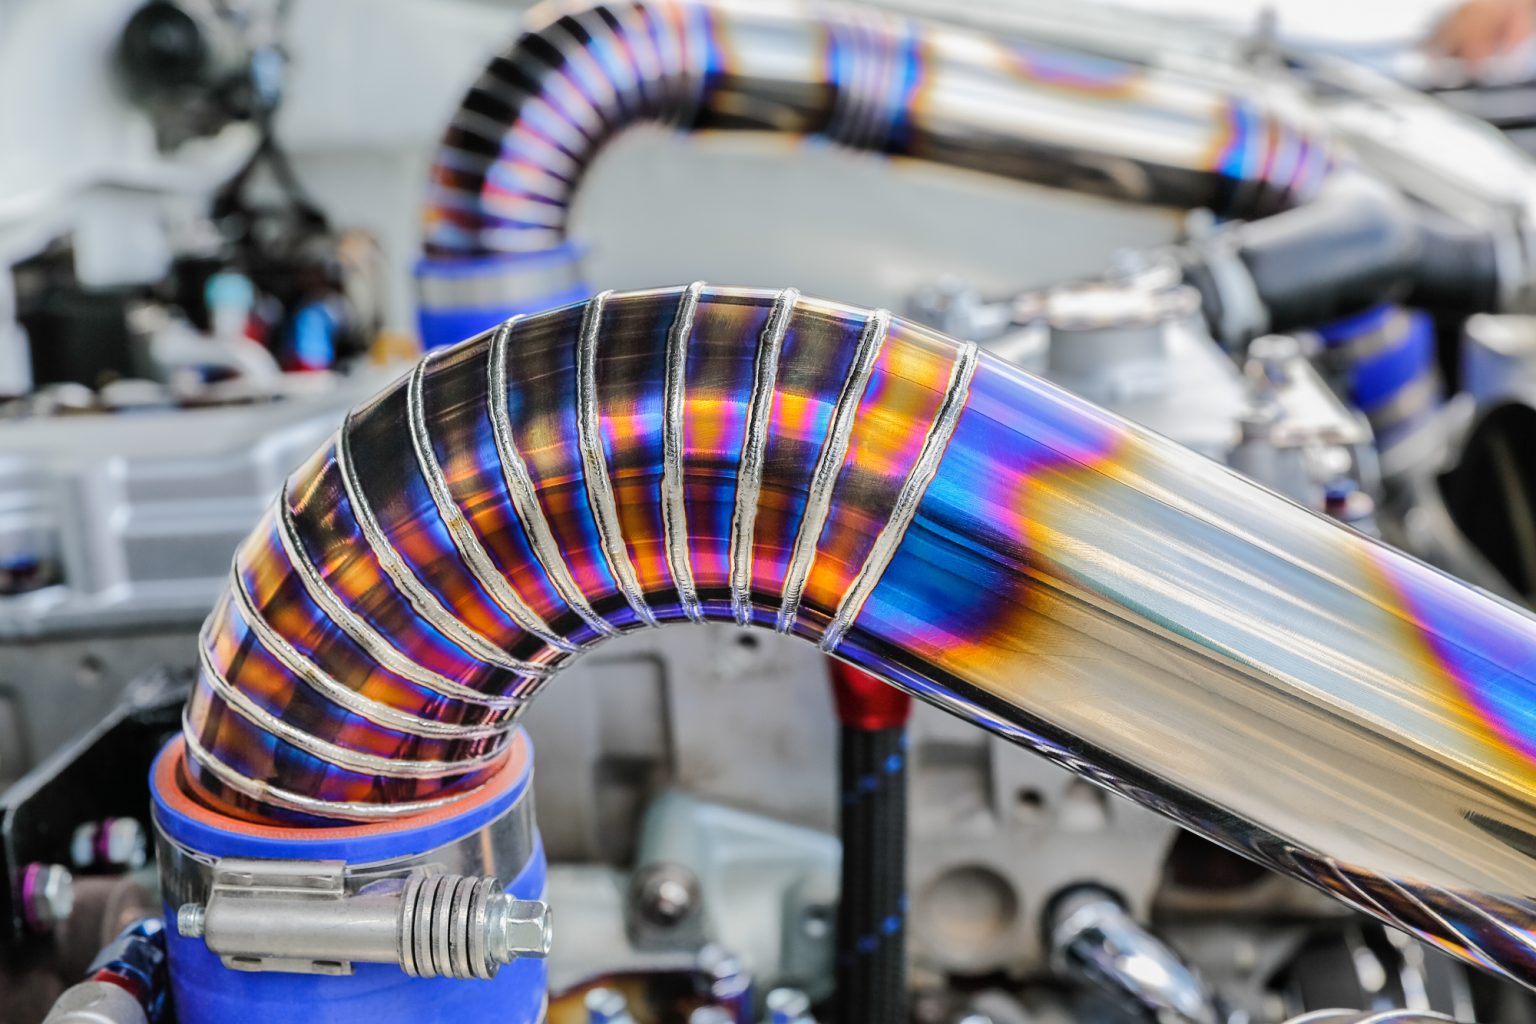
And post-weld cleaning? Absolutely crucial. You might get some heat tint, that bluish or rainbow-colored stuff on your metal. That’s okay, it’s normal. But you gotta get rid of it. A good stainless steel passivation or pickling paste can help restore that protective oxide layer. Or, you can use a good stainless steel polish and a dedicated brush. The goal is to get it looking as good as new, and more importantly, performing as good as new!
MIG Welding Stainless: The Speed Demon
Now, if you’re more of a “get it done quick and dirty” kind of person, or you’re working on thicker stuff and need to lay down some serious material, MIG welding might be your jam. MIG welding uses a continuously feeding wire electrode that melts as you weld, and you still need that magical shielding gas.
For stainless MIG, you’ll typically use a solid stainless steel wire, usually 308L again. The gas is still usually argon, but sometimes a little bit of CO2 can be added for certain applications (though pure argon is generally preferred for a cleaner finish). Think of it as a faster, less precise but still effective way to get the job done.
The biggest difference here is heat input. MIG tends to put more heat into the workpiece than TIG. This can be a good thing for speed, but it also increases the risk of heat distortion and that dreaded sensitization we talked about. So, if you’re MIGging stainless, you gotta be extra mindful of that heat.
One of the common MIG techniques for stainless is short-circuit transfer. This is where the wire touches the workpiece, creates a short circuit, melts, and then you pull back slightly to break the arc, only to have it touch again. It’s a quick, choppy motion, good for thinner materials and less heat input. Another is spray transfer, which is for thicker stuff and higher heat. It’s like a continuous stream of molten metal. Choose your adventure!
Just like with TIG, cleaning is paramount. Get that stainless steel squeaky clean before you even think about pulling the trigger. A dedicated stainless wire brush and some degreaser are your best friends. Don't skimp on this step, or you’ll be regretting it later!
When you’re welding, try to keep your travel speed consistent. Don’t linger too long in one spot, or you’ll be inviting that heat to do its worst. A good rule of thumb is to keep the puddle moving. Think of it as a little metal river, and you’re gently guiding it along.
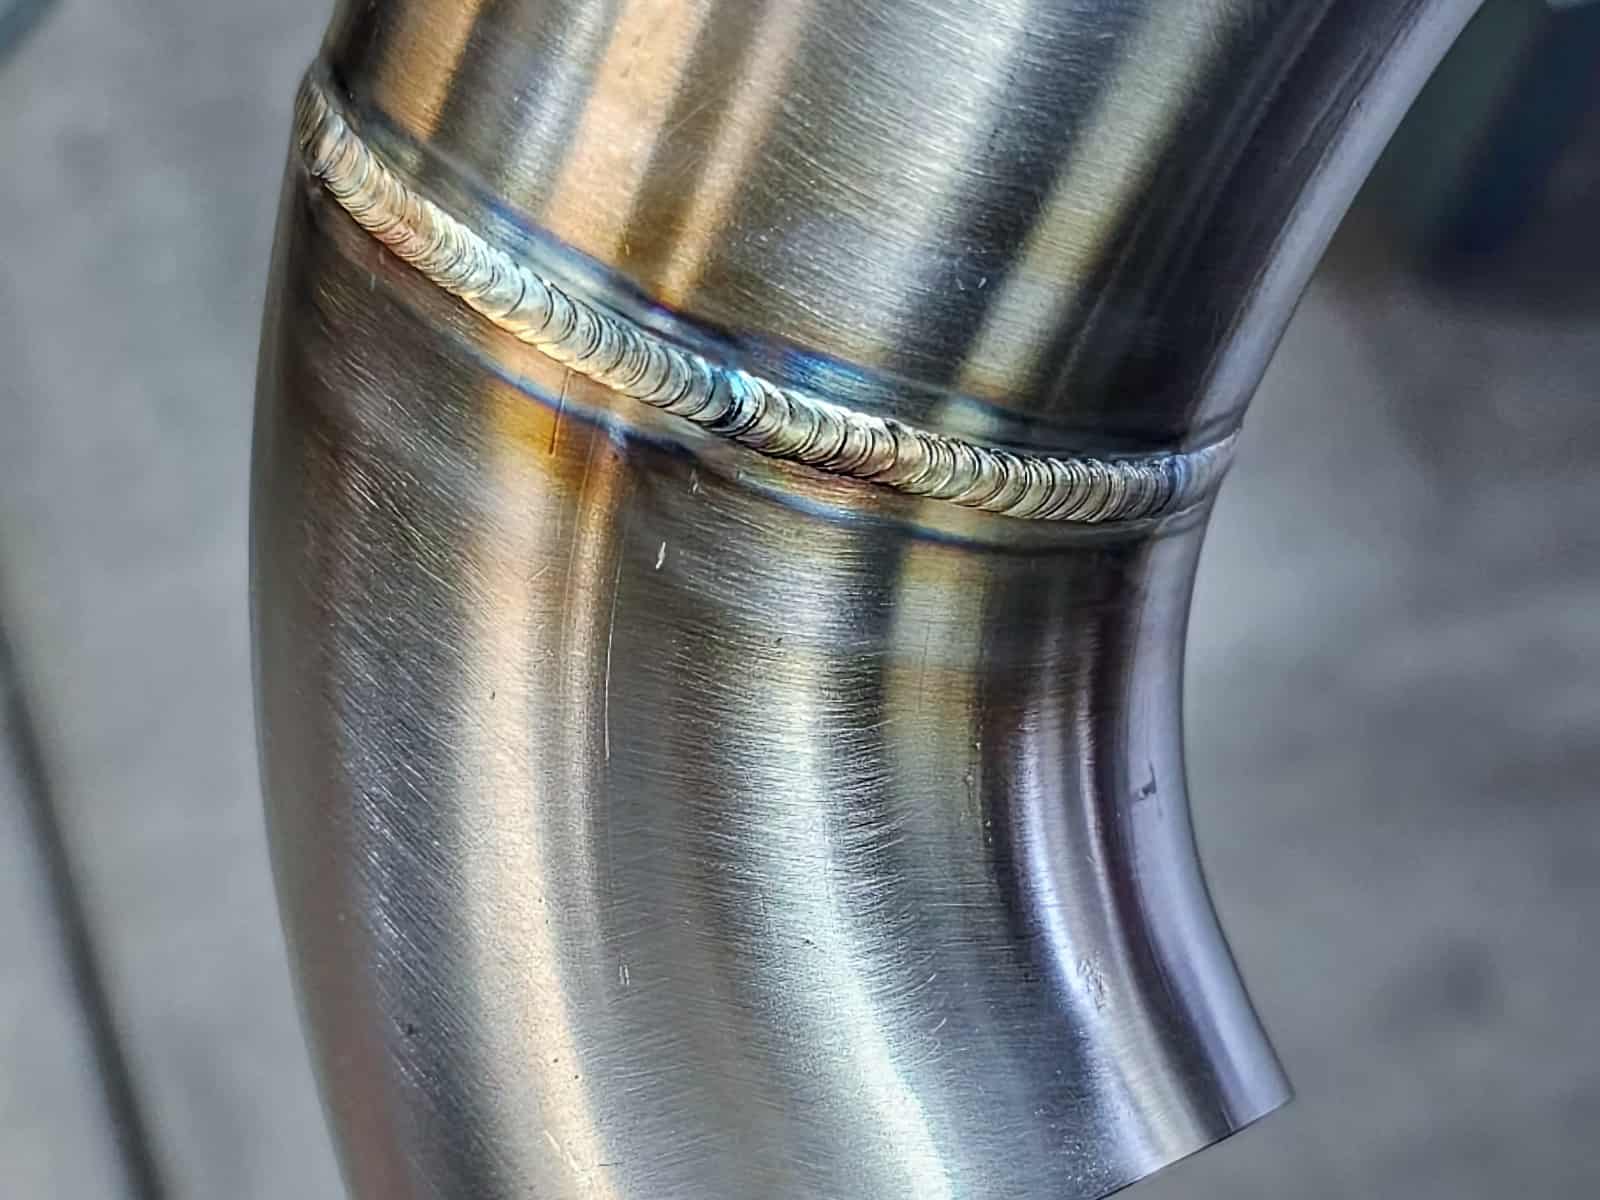
And the same goes for post-weld cleaning. Get rid of that heat tint! It’s not just about looks; it’s about restoring that protective layer. So, get out your passivation paste or your stainless polish and give it a good scrub.
Things to Keep in Mind When Welding Stainless (Don't Forget These!)
Okay, so we've covered TIG and MIG, but there are a few universal truths when it comes to welding stainless that you absolutely cannot forget. These are the little gems of wisdom that will save you from welding headaches and rusty disappointments.
Heat Management is Your New Best Friend
Seriously. Stainless steel doesn't dissipate heat as well as regular old carbon steel. It likes to hold onto that heat like a grumpy toddler holds onto their favorite toy. This means you can easily overheat it, leading to distortion, discoloration, and that awful sensitization that we’ve been harping on about. So, what do you do? Use intermittent welding. Weld a bit, let it cool down, weld a bit more. Think of it as taking breaks. Your welds will thank you, and your stainless steel will be eternally grateful.
Also, consider using heat sinks. These are copper or aluminum blocks that you can place near your weld to help draw away some of that excess heat. It’s like giving your metal a little cooling towel for its brow. Ingenious, right?
Contamination is the Enemy!
I know, I know, I've said it a million times, but it's that important. Keep everything clean. Your workspace, your tools, your metal, your filler rods, your tungsten. Any little bit of oil, grease, dirt, or even the residue from your regular welding gloves can cause problems. Use dedicated stainless steel brushes, clean rags, and good degreasers. It’s like trying to cook a gourmet meal – you wouldn’t use a dirty pan, would you? Same principle!
Post-Weld Treatment is Non-Negotiable
That heat tint we keep mentioning? It’s not just unsightly; it’s a sign that you’ve compromised the protective oxide layer. You need to remove it to restore the stainless steel's corrosion resistance. This usually involves using pickling paste (which is a bit aggressive but very effective) or a passivation solution. After that, you might want to use a good stainless steel polish for that extra shine. It’s the finishing touch that makes all the difference!
Choosing the Right Stainless Steel Type
Did you know there are different kinds of stainless steel? Mind-blowing, I know! The most common ones you'll encounter are the austenitic grades, like 304 and 316. These are generally the easiest to weld. 304 is your everyday stainless, found in kitchens and a million other places. 316 is a bit more corrosion-resistant, often used in marine environments, thanks to the addition of molybdenum. There are also martensitic and ferritic stainless steels, which have different properties and welding requirements, but for most DIYers, you'll be dealing with the austenitic ones. So, if you can, figure out what grade you have. It’ll make your life a whole lot easier!
Don't Forget Your Safety Gear!
Duh, right? But seriously, welding stainless can produce some nasty fumes, especially from certain coatings or if you're not careful with your cleaning. So, good ventilation is a must. And, of course, your trusty welding helmet, gloves, and flame-resistant clothing. Nobody wants to come home smelling like burnt toast and looking like a lobster. Safety first, always!
Practice Makes Perfect (or at Least, Way Better)
Look, welding stainless steel isn't something you just pick up and master overnight. It takes practice. Lots of it. So, get yourself some scrap pieces, fire up your welder, and just start. Experiment with different settings. See what happens when you go a little faster, a little slower. Pay attention to how the puddle behaves. The more you practice, the more intuitive it will become. You'll start to feel the heat, see the puddle respond, and your welds will get cleaner and stronger.
Don't be discouraged by early failures. Every mistake is a learning opportunity. I’ve definitely made my fair share of… shall we say, interesting welds. But each one taught me something new. It’s a journey, not a destination, and the destination is some awesome, shiny, rust-free welds!
So, there you have it! Welding stainless steel. It might seem a little intimidating at first, but with a bit of knowledge, the right tools, and a whole lot of practice, you'll be creating beautiful, durable stainless steel projects in no time. Now go forth and weld some shiny things! And if you make something cool, you gotta show me!