How To Weld Tig Stainless Steel

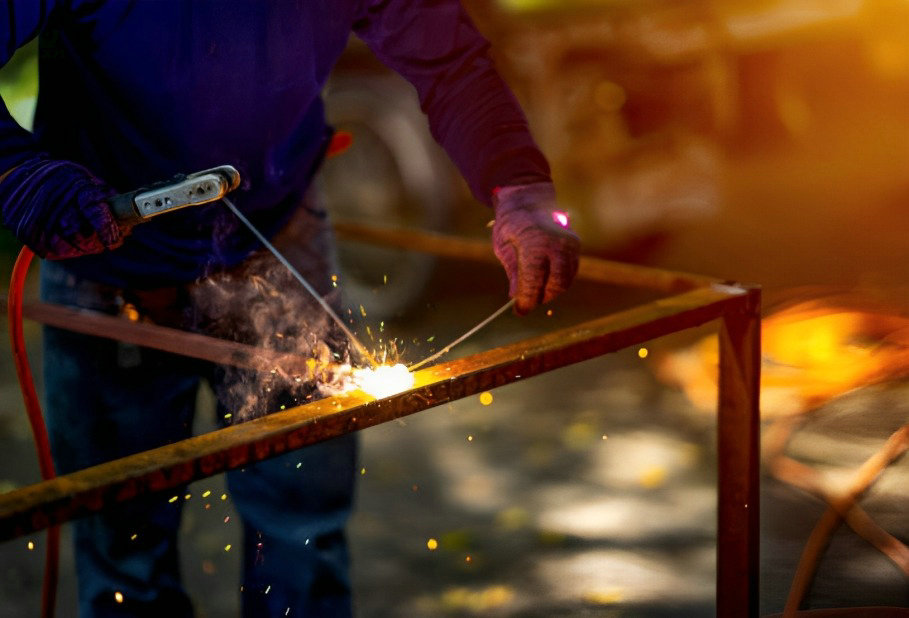
Alright, let’s chat about something a little bit… shiny. We’re diving headfirst into the world of TIG welding stainless steel. Now, before you picture a smoky, sweat-drenched industrial scene straight out of a ’70s documentary, let’s reframe this. Think of it more like a craft, a way to bring together pieces of gleaming metal with the finesse of a seasoned chef plating a delicate dish. It’s about control, precision, and, let’s be honest, creating something truly beautiful and functional.
Stainless steel, that glorious material that resists rust and looks perpetually chic, can be a bit of a diva when it comes to welding. It’s not as forgiving as mild steel, and if you treat it with the same old-school brute force, you’ll end up with a sad, discolored mess. But fear not! With a few pointers and a relaxed approach, you can tame this metallic beast and unlock its full potential. So, grab a beverage of your choice – maybe a craft beer or a fancy iced coffee – and let’s get this party started.
The allure of the Shine
Why stainless steel, you ask? Beyond its undeniable good looks, stainless steel is practically everywhere. From your sleek kitchen appliances and that gorgeous exhaust on your dream car to intricate medical equipment and the structural elements of modern architecture, it’s a material that screams durability and style. And being able to TIG weld it means you’re not just fixing things; you’re contributing to that elevated aesthetic. Imagine crafting your own custom motorcycle exhaust, a bespoke set of kitchen knives, or even a truly unique piece of garden art. The possibilities are as vast as your imagination.
There’s a certain satisfaction, a real joie de vivre, in working with materials that stand the test of time. Stainless steel, with its inherent resilience, embodies that. It’s like creating something with a built-in legacy. And TIG welding, with its clean, precise welds, complements that inherent quality perfectly. No spatter, minimal cleanup, and a weld bead that can be as smooth as polished glass. It’s the art of the controlled flame, the dance of the tungsten and the filler rod.
Gearing Up: Your Stainless Steel Studio
Before we get our hands dirty, let’s talk gear. Think of this as building your own little creative hub, a space where inspiration meets innovation. You don’t need a sprawling workshop; a dedicated corner of the garage or even a well-ventilated shed can work wonders.
The Essential Toolbox (for Stainless Steel Edition)
First and foremost, you'll need a TIG welding machine. For stainless steel, a DC (Direct Current) machine is generally your go-to. Look for one with adjustable amperage control – this is crucial for managing the heat. Many modern machines offer pulse TIG capabilities, which is a game-changer for stainless steel. We’ll get to that later, but for now, just know it’s a feature worth considering.
Next up, your torch. A standard 17V or 26V torch will serve you well. You’ll want a collection of tungsten electrodes. For stainless steel, a 2% cerium oxide (grey band) or 2% lanthanum oxide (blue band) tungsten is usually recommended. They offer good arc stability and longevity. Make sure they’re sharp – a finely ground, pointed tungsten is key for precise control.
Now, for the magic gas. Argon is your best friend here. Pure argon is the standard for TIG welding stainless steel. You’ll need a regulator and a flowmeter to control the gas flow. Aim for about 15-20 cubic feet per hour (CFH). Think of it as the protective bubble that keeps your molten metal from getting contaminated by the atmosphere. Like a sophisticated, invisible shield.
Filler metal is your trusty sidekick. For stainless steel, you'll typically use stainless steel filler rods. The most common type is 308L, which is compatible with 304 stainless steel. If you’re working with a different grade of stainless, make sure to match your filler rod accordingly. It’s like pairing wine with cheese – the right combination makes all the difference.
Don't forget the essentials for safety and cleanliness. A good welding helmet with auto-darkening capabilities is a must-have. You’ll also need welding gloves, a leather apron, and some sturdy work boots. And for stainless steel, cleanliness is paramount. You'll need a stainless steel wire brush (never use a brush that's been used on mild steel!), acetone or isopropyl alcohol for degreasing, and some clean rags. No grease, no oil, no fingerprints – these can all lead to weld contamination and those dreaded discoloration spots.
The Dance of the Arc: TIGging Stainless Steel Like a Pro
Alright, the stage is set. The gear is ready. Let’s talk about the actual process. It’s less about aggression and more about a delicate ballet between heat, filler, and movement. Think of it as a carefully choreographed performance, where every step matters.
Heat Management: The Golden Rule
Stainless steel has lower thermal conductivity than mild steel. What does this mean in plain English? It means heat tends to build up in one spot, leading to distortion and potential burn-through. This is where your amperage control and, if you have it, pulse function come into play.
Start with a lower amperage than you might use for mild steel. You can always turn it up, but you can’t un-melt your material. A good starting point for thin gauge stainless (around 1/16th inch) might be between 50-75 amps. Thicker material will require more, but always err on the side of caution.
Pulse TIG: Your Stainless Steel Secret Weapon
If your machine has a pulse function, get ready to be impressed. The pulse allows you to cycle between a high peak amperage and a lower background amperage. This helps to melt the puddle, but then gives it a chance to cool slightly before the next peak. It’s like a gentle rhythmic breathing for your weld, drastically reducing heat buildup and minimizing distortion. You can control the pulse frequency (how fast it cycles) and the peak/background amperage ratio. Experimenting with these settings is where the magic happens.
For stainless steel, a lower pulse frequency (around 1-2 Hz) with a good peak-to-background ratio is often a sweet spot. This gives you a nice, controlled puddle and a beautiful, consistent bead.
Tungsten and Filler: The Dynamic Duo
Your tungsten should be sharp and pointed. This focuses the arc, giving you precise control. The distance between the tungsten and the workpiece is also important. A shorter arc generally means more focused heat. Aim for about the diameter of your tungsten. It’s like holding a fine-tipped pen; you want that control.
When it comes to filler rod, the technique is to dip it into the puddle just as it forms. Don't just jam it in there. Think of it as feeding a hungry baby bird – gentle and timely. You want to add just enough filler to fill the gap or build the bead, without overheating the rod itself. A common mistake is to hold the rod too far away, leading to porosity. Keep it close, but don't touch the tungsten!
Movement is Key: The Travel Speed Tango
Your travel speed is critical. Too slow, and you’ll build up too much heat and get a wide, messy bead. Too fast, and you won’t get enough penetration, or you’ll end up with a cold, weak weld. You’re looking for a consistent, smooth motion, like you’re drawing a line with a steady hand. The puddle should follow your torch, not drag behind or race ahead.

A good rule of thumb is to aim for a bead width that’s roughly the same as the diameter of your filler rod. And watch that puddle! It’s your visual cue. A well-formed puddle will be fluid but not overly fluid, with a nice, even shimmer.
Common Pitfalls (and How to Dodge Them)
Even the most seasoned welders encounter challenges. But with a little knowledge, you can navigate the common traps of TIG welding stainless steel.
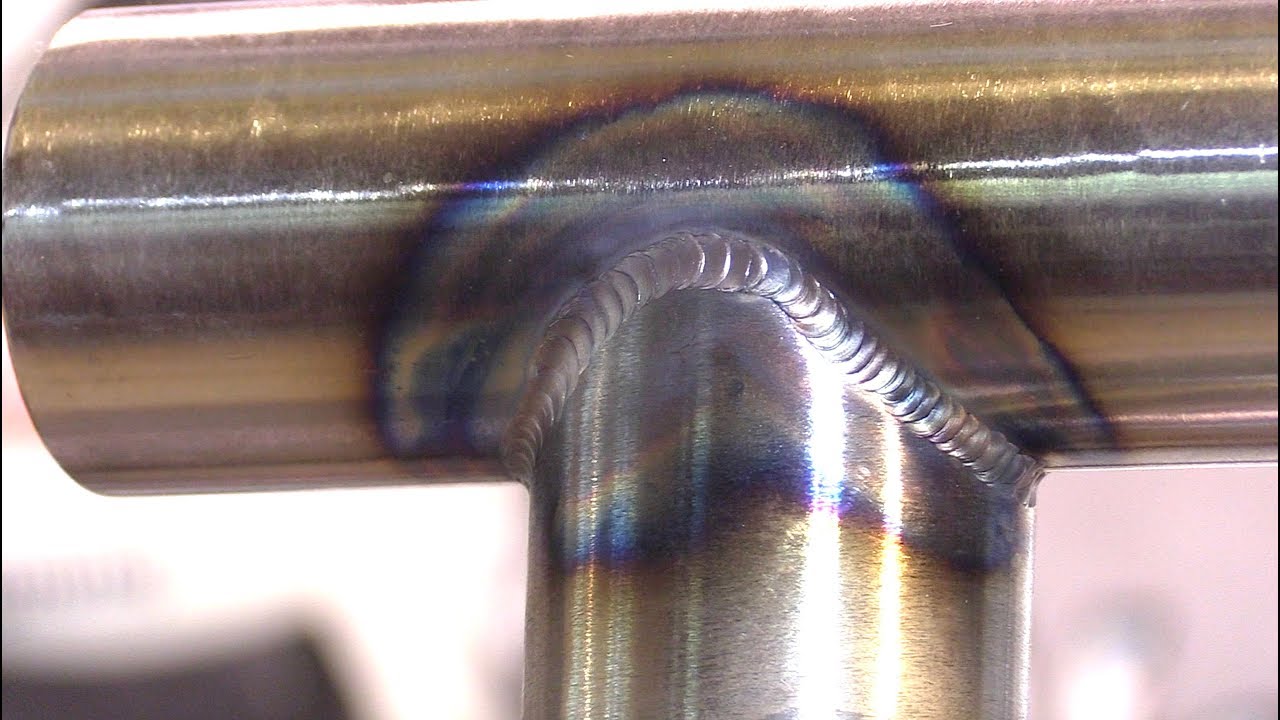
The Dreaded Discoloration: Heat Tint Blues
This is the most visible sign of improper technique. That straw-yellow, blue, or even grey discoloration around your weld is called heat tint. It indicates oxidation, meaning your stainless steel has lost some of its corrosion resistance. While you can often remove it with a specialized stainless steel polish or a light mechanical polish, it’s best to avoid it in the first place.
To minimize heat tint: use proper gas coverage, avoid excessive heat buildup (pulse TIG helps here!), and maintain a consistent travel speed. For critical applications, consider using a purge gas on the backside of your weld to prevent oxidation on both sides. It’s like giving your metal a spa treatment.
Porosity: The Tiny Bubbles of Doom
Porosity are small holes or voids in your weld, which weaken it. This is almost always a sign of contamination. Double-check that your base metal is scrupulously clean, your filler rod is clean, and your argon flow is adequate. Even a slight breeze can disrupt your gas shield and introduce contaminants.
Think of it like this: would you try to cook a gourmet meal with dirty utensils? Probably not. The same applies to welding. Cleanliness is non-negotiable.

Lack of Fusion or Penetration: The Weak Link
This happens when the weld doesn’t properly fuse the base metals together, or when the heat doesn’t penetrate deep enough. Again, inadequate heat input is usually the culprit. Make sure your amperage is set correctly for the material thickness, and you’re not moving too quickly.
Sometimes, a slight wiggle of the torch can help ensure good fusion, especially on thicker materials. It’s about getting that heat into the joint.
Beyond the Basics: Leveling Up Your Stainless Game
Once you’ve got the hang of the fundamentals, there are always ways to refine your skills. Consider exploring different joint preparations, like beveling edges for thicker materials. Experiment with different tungsten types and lengths. And if you’re serious about pushing your skills, look into advanced techniques like orbital welding for pipes, which yields incredibly consistent and beautiful welds.
The world of welding is a continuous learning curve, much like mastering a musical instrument or learning a new language. Each practice session, each completed project, adds another layer to your understanding and your capabilities. Embrace the learning process, and don’t be afraid to make mistakes. They are, after all, your most valuable teachers.
A Moment of Reflection
In a world that often moves at breakneck speed, TIG welding stainless steel offers a welcome opportunity to slow down, to focus, and to engage with a process that demands both technical skill and artistic sensibility. It’s a tangible connection to the materials we use every day, a way to understand their properties and to manipulate them into something new and valuable.
Think about it: the perfectly welded seam on your favorite coffee mug, the seamless integration of a new piece of metalwork in your home, the simple elegance of a well-crafted tool. These are all testaments to the power of human ingenuity and the satisfaction of working with your hands. TIG welding stainless steel is more than just joining metal; it’s about adding a touch of precision, a dash of durability, and a whole lot of shine to the world around us. And in its own quiet way, that’s a pretty good way to live, wouldn’t you say?