Matte Spray Paint For Metal

Hey there, coffee buddy! So, you're thinking about diving into the world of matte spray paint for metal, huh? Awesome choice, my friend. It's like giving your old, tired metal stuff a seriously chic makeover. You know, the kind that makes people go, "Wow, where'd you get that?"
Seriously, matte finishes are so in right now. They’ve got this cool, understated vibe, right? Not all shiny and in-your-face. More like, "Oh, this old thing? I just whipped it up." And for metal? It’s a match made in DIY heaven, I tell you.
Think about it. That rusty old garden chair you’ve been meaning to toss? That metal sign that’s seen better days? Your bike that’s looking a bit… sad? Boom. A little matte spray paint, and bam! Brand new. It’s practically magic, and you’re the wizard. How cool is that?
So, what exactly is matte spray paint for metal? Well, it’s exactly what it sounds like, folks. It's paint in a can, designed to stick to metal like… well, like a really determined toddler to a cookie. And the finish? It’s that smooth, non-reflective look. No annoying glare. Just pure, unadulterated coolness.
Why matte, though? You might be wondering. Isn't shiny just… fancier? Nope, nope, nope. Shiny can be a bit much sometimes, don't you think? It shows every little imperfection. Every smudge, every fingerprint. Matte, on the other hand, is a total pro at hiding those little flaws. It’s like the airbrush tool of the paint world, but in a can. You can even get away with a slightly less-than-perfect prep job, though we'll get to that in a minute. Shhh!
Plus, matte just looks so… sophisticated. Imagine that old metal lamp you found at a flea market. Give it a matte black finish? Suddenly, it’s a statement piece. A conversation starter. You’re basically an interior design guru, just with a can of spray paint. No design school required!
And the best part? It’s ridiculously easy. You don’t need a professional crew, you don’t need a fancy studio. Just a well-ventilated area (super important, we'll cover this!) and your chosen metal item. You can tackle projects that you’d normally pay an arm and a leg for at a boutique. Seriously, you'll be saving so much money, you can probably buy more spray paint. It’s a beautiful, self-sustaining cycle of awesome.
So, what can you actually paint?
The list is pretty much endless, my friend. And that’s the exciting part! You can transform so many things that are just… there. Bland. Boring. Waiting for your magical spray paint touch.
Think about your furniture. Metal patio chairs that have faded under the sun? Old metal bookshelves that are a bit chipped? A wrought-iron coffee table that's seen better days? All prime candidates for a matte facelift. Imagine your patio furniture looking like it just stepped out of a trendy outdoor magazine. You’ll be the envy of the neighborhood. They’ll all be asking for your secrets. And you’ll just smile mysteriously.
What about home decor? Picture frames! Those generic metal ones can be made so much more personal with a coat of matte paint. Candle holders, vases, decorative trays… all can go from drab to fab in minutes. You can even paint those plain metal storage bins you have in your garage. Suddenly, they’re not just storage; they’re stylish accents. Who knew organization could be so chic?

And don't even get me started on garden decor. Metal planters, garden sculptures, even those quirky little gnomes with their chipped paint? A matte finish can revitalize them all. Imagine a terracotta pot that’s looking a bit dingy. Paint it matte black? Suddenly, it’s modern and sophisticated. You're practically a garden fairy, sprinkling matte magic everywhere.
Bikes! Yes, bikes! That old bicycle you use for errands. Give it a matte finish – maybe a cool olive green or a deep navy. It’ll look like you just bought it from a high-end bike shop. Be prepared for compliments. And maybe a few questions about where you got your "new" bike.
Tools! Okay, maybe this is a bit more niche, but hear me out. Some tool handles are metal. Painting them a bright, cheerful matte color can make them easier to find in a cluttered toolbox. Plus, who says your hammer can’t have a bit of style? It's the little things, right?
And let's not forget those random metal bits and bobs. Old hinges that need a refresh? Metal signs you want to give a modern twist? Even plumbing pipes you want to paint for a more industrial look? Matte spray paint for metal can handle it. It’s like the Swiss Army knife of the paint world, but for metal.
Okay, but how? Is it complicated?
Deep breaths, my friend. It's really not. Think of it like this: it’s way easier than assembling IKEA furniture. Seriously. The most important part, the part that will make or break your project, is preparation. And honestly, even that’s not that bad. It’s just a little bit of elbow grease.
First things first: cleanliness is key. You need to get all the gunk off your metal item. Grease, grime, dust, old flaking paint – all of it has to go. If you don't clean it properly, your beautiful matte paint will just… peel off. Sad, right? We don't want sad paint.
So, grab a good degreaser or some soapy water. Give it a good scrub. Then, rinse it really, really well. Make sure there's no soap residue left. You want a clean, bare surface. Think of it as giving your metal object a spa day before its big makeover.
Next up: sanding. Now, don't panic. You don't need to go full-on sandpaper warrior. For most jobs, a light sanding with some fine-grit sandpaper (like 220-grit or higher) is plenty. This just gives the paint something to grip onto. It creates a rougher surface, like tiny little teeth, for the paint to latch onto. It's like giving the surface a little "grip tape" for the paint. You can do this by hand or with a sanding block. Just a few gentle strokes, and you're good to go.
After sanding, you need to wipe away all that dust. Seriously, get a tack cloth or a damp (not soaking wet!) rag. You want to get every last speck of dust off. If you don’t, that dust will get trapped under your paint. And trust me, you’ll see it. It’s not a good look.
Now, for the primer. While some paints claim you don't need it, especially for metal, I’m a big fan of a good metal primer. Especially if your metal item is going to be outdoors or is prone to rust. A primer acts as a bonding agent, making sure your paint sticks like glue. It also helps to create a uniform base color, so your final color looks true. And for rust-prone items, a rust-inhibiting primer is your best friend. It’s like a bodyguard for your metal object, protecting it from the elements.
When you spray the primer, use thin, even coats. Don't try to get it all done in one go. That’s how you get drips. Nobody wants drips. Let each coat dry according to the can's instructions. Patience, young grasshopper.
The Main Event: Spray Painting!
Alright, the prep work is done. You’ve got your clean, primed, and dust-free metal object. Time for the fun part!
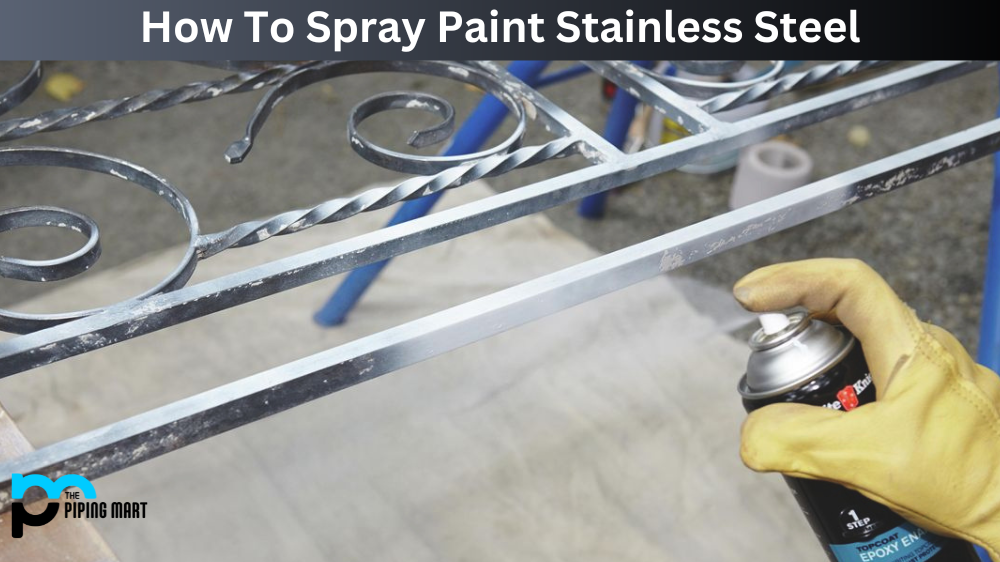
First, make sure you’re in a well-ventilated area. I cannot stress this enough. Outdoors is ideal. If you have to be inside, open all the windows and doors. And please, for the love of all that is good and holy, wear a respirator mask. Seriously. Those fumes are no joke. They smell… well, they smell like chemicals. Your lungs will thank you. And your significant other will thank you for not smelling like a paint factory for days.
Shake that can like you’re trying to win a lottery! You want to hear that little ball rattling around in there. Shake it for at least a minute or two. You need to make sure all the pigment and solvents are all mixed up and ready to go.

Now, for the spraying technique. This is where you get those smooth, even coats. Hold the can about 10-12 inches away from your object. And I mean steady. No jerky movements. Think of it like painting a wall with a giant spray can. You want long, sweeping strokes. Overlap each stroke by about 50%. This ensures you don't miss any spots and that the paint goes on evenly.
Thin coats are your friend. Again, I know I keep saying it, but it's true! Don't try to get full coverage in one pass. You'll end up with drips and runs. It's much better to do multiple light coats than one heavy one. Let each coat dry for a bit before applying the next. The can will tell you how long to wait. Read the can! It’s like a secret map to spray paint success.
If you do get a drip (and let's be honest, it happens to the best of us!), don't panic. You can try to gently wipe it away with a damp cloth while the paint is still wet. If it's dried, you might have to let it dry completely, lightly sand it down, and then re-spray that area. It's a little annoying, but fixable! Consider it a learning experience.
How many coats do you need? It depends on the color you're using and the color of the original object. Usually, 2-3 coats is a good starting point. For lighter colors over darker surfaces, you might need a few more. For darker colors over lighter surfaces, fewer might suffice. Just keep spraying until you get that nice, opaque matte finish you're going for. You'll know it when you see it.
Once you’re done with your final coat, resist the urge to touch it! Let it cure. Curing is different from drying. Drying is when the paint feels dry to the touch. Curing is when the paint is fully hardened and durable. This can take anywhere from 24 hours to a week, depending on the paint and the conditions. Be patient. Your beautiful, matte metal creation deserves it.
Troubleshooting Tips and Tricks
So, you’ve followed all the steps, and you’re still having issues? Don’t sweat it! Even the pros run into little hiccups sometimes. Here are a few common problems and how to fix them:
Uneven coverage or streaks: This is usually due to not holding the can at the right distance or moving too quickly. Try to keep a consistent distance and a steady, sweeping motion. Overlapping your strokes by about 50% is crucial here. And remember, thin coats are your best bet.

Drips and runs: This is the most common offender, right? It means you're spraying too close or applying the paint too heavily. If the paint is still wet, you can sometimes carefully brush away the drip with a clean brush or a damp cloth. If it's dry, you'll need to let it dry completely, sand the offending area smooth, and then reapply a light coat. You might even need to re-prime that spot.
Paint not sticking: This is almost always a preparation problem. Did you clean it well enough? Did you sand it? Did you use a primer? If the paint is peeling or chipping easily, it’s likely not adhered properly. You might have to strip it all off and start over. Gasp! I know, it's a drag, but a little extra effort now will save you a lot of frustration later.
Rust showing through: If you didn't use a rust-inhibiting primer or if the rust was really bad, it can sometimes bleed through. You might need to sand down the rusted areas, treat them with a rust converter, and then re-prime with a rust-inhibiting primer. Then, you can start painting again. It’s a bit of a battle, but a strong finish is worth it!
The color looks different than on the can: The color can look a little different depending on the surface you're painting on and how many coats you've applied. If you’re not getting the opacity you want, add another light coat. Also, consider priming with a color that’s closer to your final color. For example, if you’re painting something white, a white primer will give you a truer white than a gray primer.
Sprayer clogging: This is a common issue, especially if you don't clean the nozzle after use. After each painting session, turn the can upside down and spray for a few seconds until only clear propellant comes out. This clears the nozzle. If it does get clogged, you can try soaking the nozzle in a solvent (like acetone or mineral spirits, check the paint can for recommendations) or using a pin to gently clear the opening. Be careful not to damage the nozzle!
And a little pro tip: always, always do a test spray on a piece of scrap cardboard or an inconspicuous area of your project before you start on the main event. This lets you check the spray pattern, color, and coverage. It’s like a dress rehearsal for your spray painting performance.
So there you have it, my friend! Matte spray paint for metal. It's a game-changer. It's affordable. It's surprisingly easy once you get the hang of it. And the results? They're seriously impressive. You can transform dull, boring metal into something truly special. So grab a can, get prepping, and start creating! You’ve got this. Now, who needs a refill?