Mig Welding Aluminum How To
I remember my first attempt at MIG welding aluminum. It was a disaster of epic proportions. I was trying to fix a busted ATV rack, a relatively simple job, or so I thought. Within minutes, my garage looked like a UFO crash site. Smoke, sparks, and a whole lot of molten aluminum decided to redecorate my workbench. I’m pretty sure I even saw a bit of it trying to escape out the window, like it knew it was making a terrible mistake.
It looked less like a weld and more like a series of aggressive mosquito bites that had melted into a puddle. My dad, bless his patient soul, just shook his head and muttered something about needing the "right tools for the job." And boy, was he right.
Mig welding aluminum… ah, the elusive beast. It’s one of those things that sounds straightforward but can quickly turn into a frustrating, fume-filled, and frankly, expensive learning curve. If you’ve ever looked at a beautiful, shiny aluminum weld and thought, "How in the heck do they do that?" then you, my friend, are in the right place.
Let's be honest, steel is the reliable, forgiving old friend of the welding world. You can beat it up a bit, and it usually still holds together. Aluminum, on the other hand, is more like a finicky diva. It’s got its own rules, and if you don’t play by them, it will absolutely let you know. And usually, it lets you know by melting into a gooey mess or just plain refusing to stick.
So, what’s the big deal with MIG welding aluminum? Well, it’s a combination of factors. Aluminum has a much lower melting point than steel, which means it melts really fast. Like, blink-and-you’ll-miss-it fast. And because it melts so quickly, it also oxidizes very quickly. That powdery white stuff you see on aluminum? That's aluminum oxide, and it has a melting point way higher than the aluminum itself. Weird, right?
This means you've got a layer of high-temp junk sitting on top of low-temp metal, and you need to get that junk out of the way before you can even think about making a good weld. Forget about just zapping it with a MIG gun like you might with steel. This is where the magic, and the frustration, begins.
But don't despair! With the right knowledge and a bit of practice, you can absolutely conquer the aluminum MIG welding dragon. It’s not as impossible as it might seem after that first disastrous attempt. We’re going to break it down, piece by piece, so you can go from “melted mess” to “master of the shiny stuff.”
The Essential Gear: More Than Just a MIG Gun
Okay, before we even think about pulling the trigger, let's talk about the tools. You can’t just grab your everyday steel MIG setup and expect miracles. Aluminum requires some special treatment.
First things first: your MIG welder. Not all MIG welders are created equal when it comes to aluminum. You'll ideally want a machine with a higher amperage rating. Think 180 amps or more. This gives you the power you need to get in, get the job done quickly, and get out before things get too melty. Some machines have specific settings or pulsed modes that are a godsend for aluminum, but even a good DC output machine can work with the right setup.
Now, let’s get to the nitty-gritty of the consumables. This is where a lot of people stumble.
The Wire: It’s Not Your Standard Steel Spool
For MIG welding aluminum, you’re going to need 100% aluminum welding wire. And it’s not just any aluminum wire. You need to know what alloy you’re welding. The most common ones for general fabrication are 4043 and 5356.
4043 is a great all-around choice. It's got a lower melting point than 5356, which can make it a bit easier to work with for beginners. It’s also more resistant to cracking, which is a big plus. Think of it as the dependable sedan of aluminum wires.
5356 has higher tensile strength and is generally considered a bit more ductile. It’s often used for applications where the weld will be under more stress. It can be a little trickier to weld with because it tends to melt faster. It’s more like the sporty convertible – looks great, performs well, but demands a bit more finesse.
Crucially, do NOT use steel wire in an aluminum spool gun or a regular MIG gun set up for aluminum. It’s a recipe for disaster and will clog up your liner faster than you can say “Oops.” And definitely, definitely do not try to use steel wire with aluminum gas or vice versa. Just… don't. Trust me on this one.
The Liner: Smooth Sailing is Key
This is a big one, folks. Aluminum wire is soft and gummy. It’s like trying to push cooked spaghetti through a tiny straw. If you try to push that soft aluminum wire through a standard steel MIG gun liner, it’s going to kink, bunch up, and jam. Every. Single. Time.
You absolutely need a special nylon or Teflon-lined gun liner designed specifically for aluminum wire. This allows the wire to feed smoothly without getting snagged. Think of it as upgrading your spaghetti straw to a super-smooth, Teflon-coated feeding tube. If you’re serious about MIG welding aluminum, invest in a dedicated spool gun or a separate gun with an aluminum liner. Swapping liners constantly is a pain, and honestly, a separate gun is often worth the investment just for the sanity it saves.
And while we're talking about feeding, make sure your feed rollers are also appropriate for aluminum. They're usually U-shaped grooves to grip the softer wire without deforming it.
The Contact Tip: Get the Right Size
Aluminum wire is also typically larger in diameter than steel wire. So, you'll need contact tips with the correct orifice size to match your wire. A tip that's too small will constrict the wire, causing feeding issues and poor arc quality. Too large, and it won't make good contact. Check your wire diameter and get the corresponding tip.
The Shielding Gas: Argon is Your Best Friend
This is another non-negotiable. For MIG welding aluminum, you're pretty much always going to use 100% Argon. CO2 or C25 (75% Argon / 25% CO2) mixes, which are common for steel, are a big no-no for aluminum. They won't give you the clean arc you need, and you'll end up with a nasty, porous weld.
Argon provides the necessary shielding to prevent oxidation and create a clean, stable arc. You'll need a flow meter and a regulator for your Argon tank. As for flow rate, start around 20-25 cubic feet per hour (CFH) and adjust as needed. Too little, and you’ll still get porosity; too much, and you’ll blow your shielding gas away and suck in atmospheric contaminants. It’s a delicate dance.
The Spool Gun: The Ultimate Aluminum Ally
If you're planning on doing any significant amount of aluminum MIG welding, a spool gun is highly recommended, if not essential. Why? Because it puts the wire feeder right at the gun, meaning the aluminum wire only has to travel a very short distance. This dramatically reduces the chances of kinking and feeding problems.
It’s like the difference between trying to blow air through a mile-long straw versus a short, direct tube. The spool gun holds a small spool of wire (usually 1lb), which is great for those smaller jobs where you don't want to commit a whole big spool to something you might not use again for a while. It's a dedicated tool that makes life so much easier.
Prep Work: The Unsung Hero of Aluminum Welding
Alright, we’ve got the gear. Now, let’s talk about something that’s even more important than the gear itself: preparation. If you skip this, you might as well just throw your money into the wind. Seriously.
Cleaning is King (and Queen, and the Entire Royal Court)
Remember that pesky aluminum oxide? It’s the enemy. It’s everywhere. And it needs to be removed before you can weld.
First, you need to remove any grease, oil, or dirt. Use a good degreaser or a dedicated aluminum cleaner. Acetone is a popular choice. Make sure to use a clean lint-free cloth. You don't want to introduce more contaminants.
Then, and this is crucial, you need to remove the oxide layer. The best way to do this for MIG welding is with a stainless steel wire brush. And here's the kicker: you need to use a wire brush that has only ever been used on aluminum. If you’ve used that brush on steel, you’ve just transferred steel particles onto your aluminum, and those will cause contamination and weak welds. So, get a dedicated aluminum wire brush, and keep it clean.
After brushing, try to weld as soon as possible. The oxide layer starts to reform almost immediately. It’s a race against time, my friend.
Some people use other methods like scraping, but for MIG, the wire brush is usually the go-to. Just make sure it’s clean and dedicated.
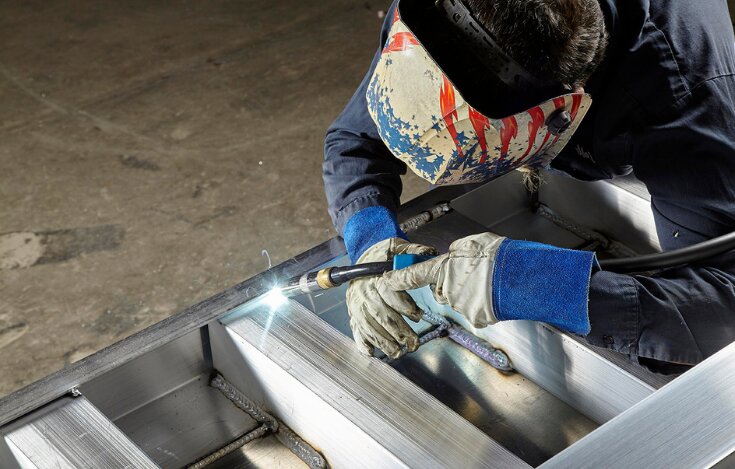
Technique: The Dance of the Torch
Now for the fun part – actually laying down a bead. This is where your dad’s advice about “the right tools” really comes into play, but also where your own skill takes over.
Push Technique: You’re Not Pulling
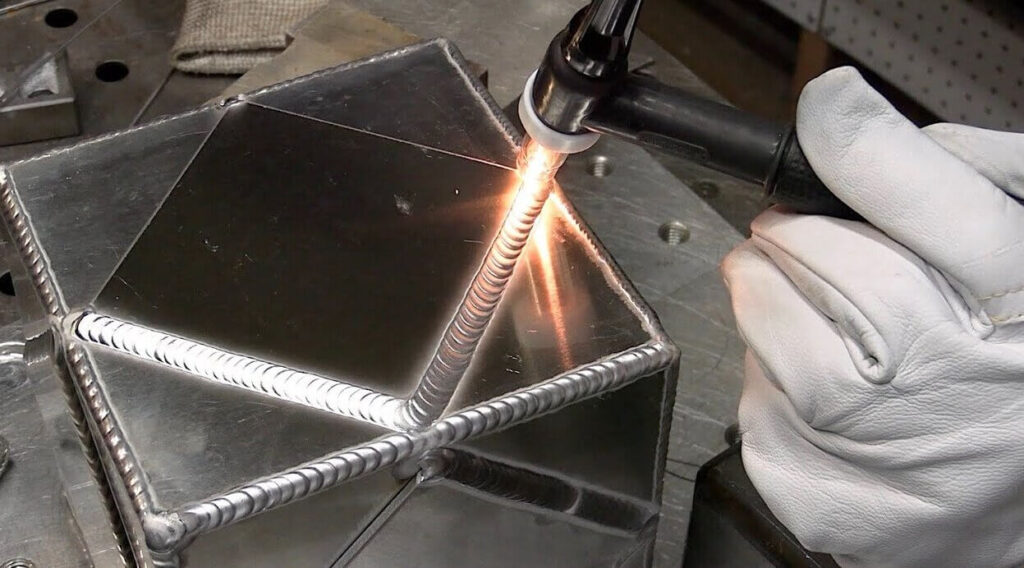
This is a fundamental difference from steel MIG welding. For aluminum, you almost always want to push the weld, not pull it. Think of it like gently nudging a runaway shopping cart.
Pushing the gun helps to keep the molten puddle ahead of the arc, allowing the shielding gas to do its job and protect the weld puddle from the air. It also helps to keep the heat input from building up too much in one spot. Pulling the gun can lead to excessive heat, a larger, less controllable puddle, and increased risk of porosity. So, remember: push, push, push!
Travel Speed: The Golden Mean
This is where that low melting point really bites you. You need to move fast. Too slow, and you’ll just melt a big ol’ hole through your aluminum. Too fast, and you won’t get enough fusion.
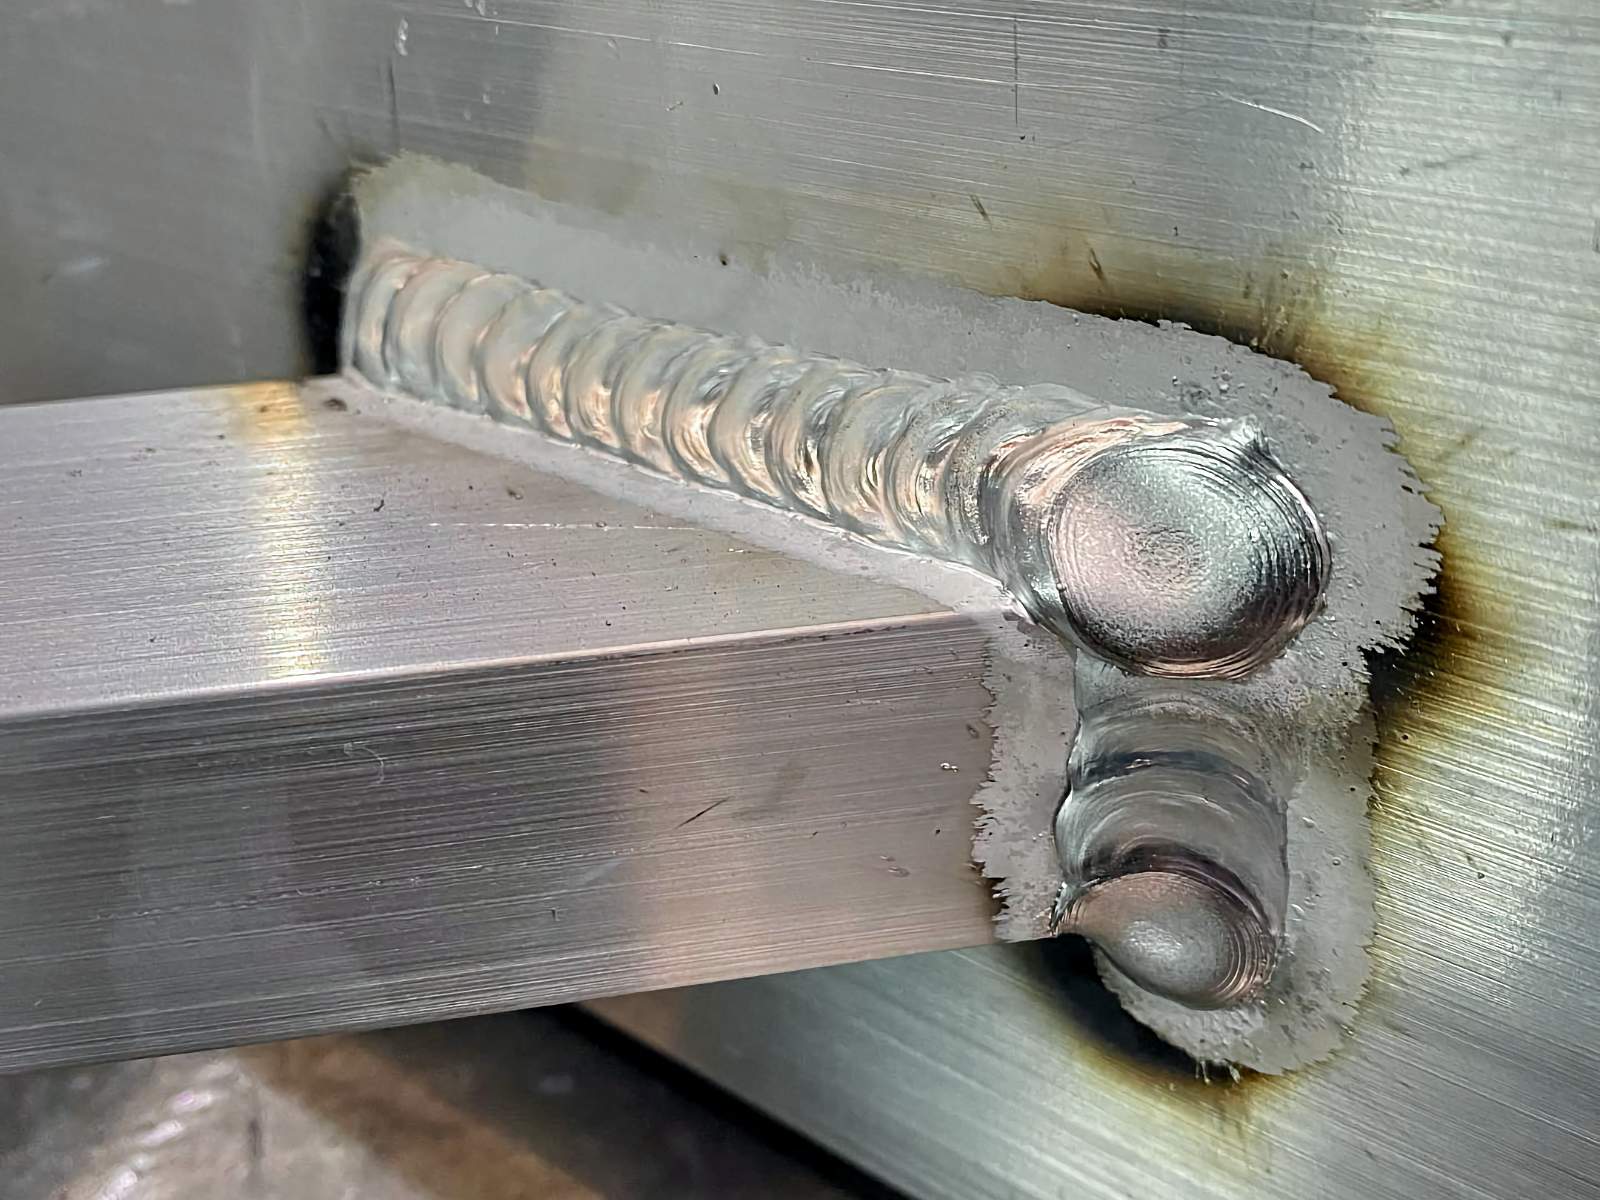
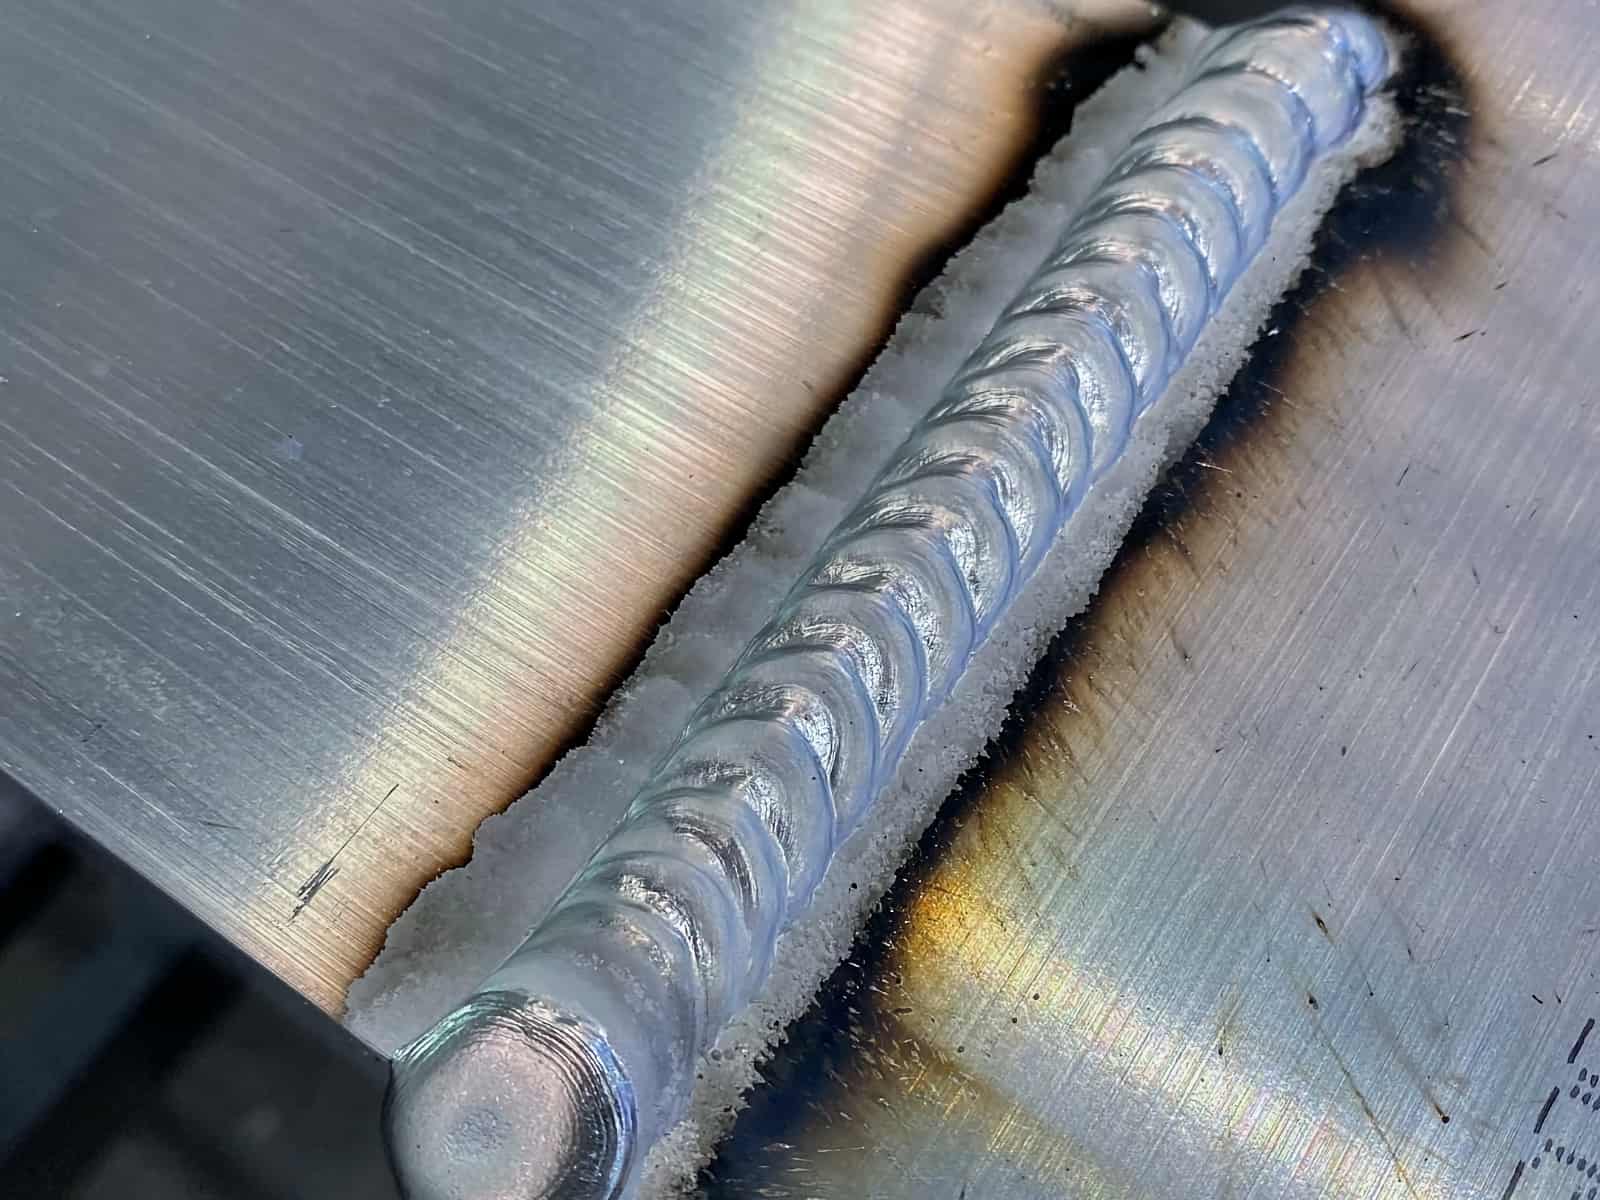
Find that sweet spot. It takes practice. You’re looking for a nice, consistent bead with good penetration and no undercut. Start with faster travel speeds than you might use for steel and adjust from there. The sound of the arc can be a good indicator too – a nice, crisp crackle usually means you’re on the right track. A sputtering, spitting sound is a bad sign.
Gun Angle: Keep it Sweet
When pushing, you want a slight drag angle, but not too much. Aim for a push angle of about 5-15 degrees. Too steep, and you’re essentially shoveling molten metal, which isn’t ideal. Too shallow, and you might lose shielding gas coverage.
Stick-Out: Keep it Short and Sweet
The amount of wire you have sticking out of the contact tip, known as the stick-out, is also important. For aluminum, a shorter stick-out is generally better, usually around 1/2 inch. This helps to keep the wire hot but also provides a more stable arc and better shielding.
The Arc: Listen and Look
Aluminum welding can be a bit noisy and visually chaotic compared to steel. But there are clues. You're listening for that consistent, crackling sound. Visually, you're looking for a puddle that’s not too large, with good wetting out on the edges. You’re aiming for a nice, steady transfer of metal from the wire into the puddle.
Welding Amps and Volts: Finding Your Sweet Spot
This is where your welder’s settings come in. There’s no single magic number, as it depends on your machine, the wire diameter, and the thickness of the aluminum you’re welding.
Generally, you’ll need higher amperage settings than you would for steel of the same thickness. This is because aluminum conducts heat away from the arc much faster than steel. You need that extra heat to achieve fusion.
For voltage, you’re often looking for a slightly lower voltage than you might use for steel. This helps to control the arc and prevent it from getting too bushy.
As a starting point, if you’re welding 1/8-inch aluminum with 0.030-inch wire, you might start around 16-18 volts and 150-170 amps. But this is just a ballpark. Always refer to your welder's manual and experiment on scrap material.
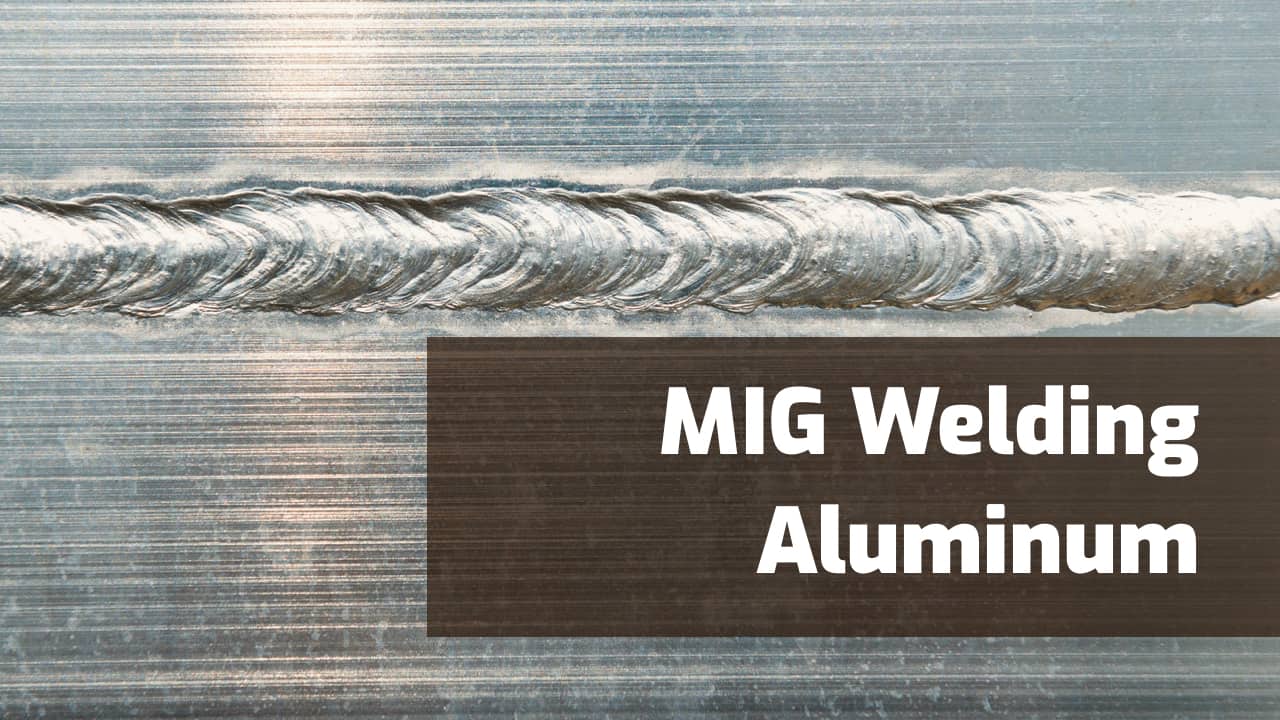
Pulsed MIG welding can be a game-changer for aluminum. Many modern MIG welders have pulse settings. This process alternates between a high peak current (to get good penetration and arc force) and a lower background current (to let the puddle cool slightly). This results in a much more controllable puddle, less heat input, and often a more aesthetically pleasing weld with that classic "stacked dime" look. If your machine has it, explore the pulse settings!
Common Problems and How to Fix Them
Even with the best intentions, you’re going to run into issues. It’s part of the learning process. Here are a few common culprits:
Porosity: The Tiny Bubbles of Doom
Porosity is those little holes or bubbles in your weld. It’s usually caused by contamination (dirt, oil, oxide) or poor shielding gas coverage.
Fix: Double-check your cleaning process. Ensure you’re using pure Argon at the correct flow rate. Make sure your gun liner is clean and your tips aren't clogged. Check for drafts in your welding area.
Lack of Fusion: It Just Won't Stick
Your weld looks okay, but the pieces aren’t actually joined together properly. This means the metal didn’t melt and fuse.
Fix: You’re likely not using enough heat (amperage) or you’re moving too fast. Increase your amperage, slow down your travel speed, and ensure you have good electrical stick-out.
Burn-Through: The Accidental Hole
You melted a hole right through your workpiece. Oops.
Fix: This is almost always a heat input problem. Reduce your amperage, speed up your travel, and consider using pulsed MIG if available. For thinner materials, you might need to use a slightly larger wire diameter to help carry heat away more effectively.
Feeding Issues: The Wire Just Stops
The wire stops feeding, your arc dies, and you’re left with a frustrated sigh.
Fix: This is usually a liner or roller issue. Make sure you have the correct nylon/Teflon liner. Check your drive rollers for damage and ensure they’re the right size and type for aluminum. Keep the wire feed path as straight as possible.
Practice Makes Perfect (Or at Least, Pretty Good)
Aluminum MIG welding is a skill that takes time and patience to develop. Don’t get discouraged if your first few attempts aren't magazine-worthy.
Grab some scrap pieces of aluminum of the same alloy you intend to weld. Practice different settings, different travel speeds, and different torch angles. Get a feel for how the puddle behaves. Listen to the arc.
The satisfaction you get from laying down a clean, strong aluminum weld is immense. It opens up a whole new world of projects. From fixing that ATV rack to building custom car parts or even some pretty slick DIY furniture, aluminum MIG welding is a valuable skill to have in your arsenal.
So, take a deep breath, double-check your setup, and give it another go. You’ve got this. And hey, if all else fails, you can always call it “abstract art.” Just don’t tell your dad I said that.