
Painting Light Fixtures With Metallic Paint
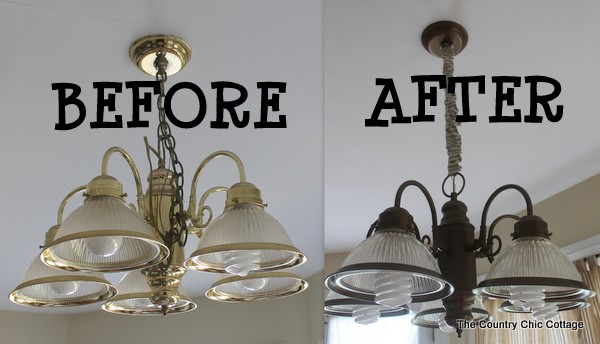
Alright, gather ‘round, you lovely humans who occasionally stare at your boring, beige light fixtures and think, "There has to be more to life than this." I'm talking about those ceiling-mounted offenders, those wall sconce wallabies, those pendant light monstrosities that are currently sucking the very joy out of your living space. You know the ones. They’re probably coated in a shade of white so bland it makes vanilla ice cream look like a spicy vindaloo. Well, fear not, my friends, because I’m here to tell you about a secret weapon, a sparkle-bringing superpower: painting your light fixtures with metallic paint!
Now, I know what you’re thinking. “Paint? On a light fixture? Won’t that… catch fire?” And to you, I say, “Whoa there, fire marshal!” We’re not talking about slathering on flammable hairspray and hoping for the best. We’re talking about a little bit of DIY magic that can transform a drab downer into a dazzling dazzler. Think of it as giving your old light fixture a ✨ cosmic makeover ✨. It's like putting a tiny disco ball on your ceiling, but without the questionable 70s music.
Let’s be honest, sometimes the light fixtures that come with a house are about as exciting as watching paint dry. Except, well, we’re about to make paint dry on them, but in a good way. These things are often chosen by someone whose design aesthetic is, shall we say, “aggressively neutral.” They’re the beige sweaters of the lighting world. But we, my friends, are the sequined jackets! We’re here to inject some pizzazz, some oomph, some pure, unadulterated shine!
So, how do we embark on this shiny adventure? It’s surprisingly simple, much like convincing a cat to wear a tiny hat (difficult, but rewarding when it works). First, you need to prep your fixture. This is like giving your light fixture a spa day. You don’t want to paint over dust bunnies that have been collecting for centuries, do you? That’s just asking for trouble, and possibly a miniature dust bunny uprising. So, grab a damp cloth, maybe a little mild soap, and give it a good wipe down. Think of yourself as a museum conservator, meticulously caring for a priceless artifact… that happens to hang from your ceiling.
Next, and this is crucial, turn off the power. Seriously. Unless you’re aiming for a truly electrifying DIY experience, and by that, I mean a trip to the emergency room, make sure those breakers are flipped. Safety first, shimmer second! We’re going for glamorous, not galvanic.

Now, let’s talk paint. You’re going to want to use specialized metallic spray paint. These bad boys are designed for all sorts of surfaces, and they come in a dazzling array of colors. We're talking antique gold, brushed nickel, rose gold that’s practically dripping with sophistication, and even some wild colors like iridescent teal that will make your guests wonder if they’ve accidentally stumbled into a unicorn stable. It’s like a treasure chest of shimmering possibilities!
When you’re spraying, find a well-ventilated area. Outside is usually best, unless you enjoy the aroma of metallic fumes lingering in your living room for the next decade. Imagine explaining that to your significant other: “Oh, that faint smell of… glitter and industrial solvents? That’s just my new living room vibe, darling.” A drop cloth is your best friend here, protecting your pristine floors from accidental metallic splatters. Think of it as a shimmering moat around your project. Nobody wants a floor that looks like it was attacked by a rogue disco ball.
You’ll probably want to apply multiple thin coats rather than one thick, gloppy one. Thin coats build up to a smooth, even finish. This is where patience, my friends, becomes a virtue. Resist the urge to go wild! Think of it like layering a delicious cake – each layer needs to be just right before adding the next. And trust me, a streaky, uneven metallic finish is about as appealing as finding a rogue raisin in your otherwise perfect chocolate chip cookie.

The real magic happens when you start seeing the transformation. That boring old fixture, the one that blends into the background like a chameleon in a beige paint factory, is suddenly glowing. It’s reflecting the light, it’s adding a touch of glam, it’s making your entire room feel more intentional and, dare I say, expensive! You’ll be strutting around your house, pointing upwards, and exclaiming, “Look at that! I did that!” It’s a feeling of accomplishment that’s almost as satisfying as finding a forgotten ten-dollar bill in an old coat pocket. Almost.
And here's a little-known fact: did you know that gold has been associated with wealth and luxury for millennia? Seriously, the ancient Egyptians were all over it. So, by painting your light fixture gold, you’re not just being stylish, you’re tapping into a timeless tradition of opulence. You’re basically a modern-day pharaoh, but with better lighting. It's the ultimate ancient-meets-modern glow-up!
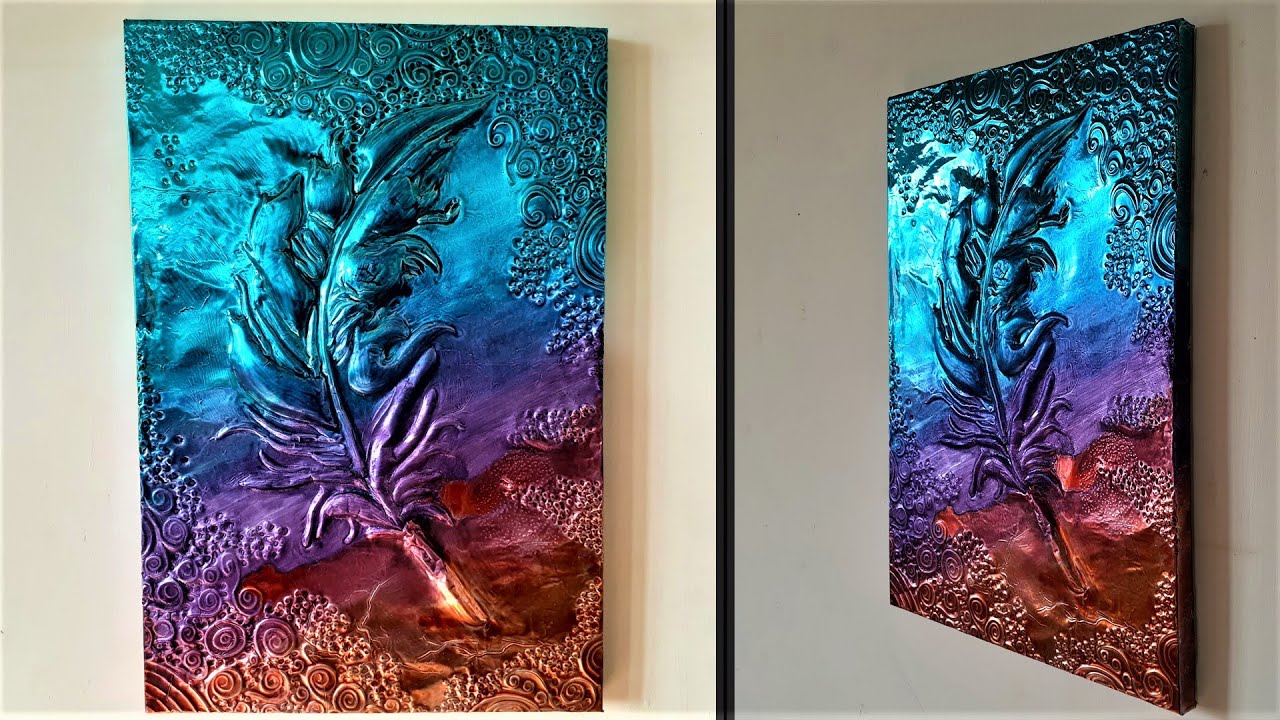
Now, for the truly adventurous, you can even mix and match! Imagine a brushed nickel base with antique gold accents. Or a deep bronze with a hint of copper. The possibilities are as endless as your desire to avoid another trip to the big box store for a bland new fixture. You’re basically Picasso, but with spray cans and a slightly higher risk of getting paint on your hair.
What kind of fixtures can you tackle? Oh, the world is your oyster… or rather, your light fixture! Pendant lights, chandeliers (though those can be a bit more involved, and maybe a job for a brave soul and a sturdy ladder), flush mounts, sconces… even those little dome lights that look like they belong in a 1980s dentist’s office. They can all be resurrected from their beige purgatory.
So, the next time you find yourself gazing up at a lighting fixture that makes your soul weep a little, remember this: you have the power. The power of the spray can, the power of metallic paint, the power to bring a little bit of sparkle and a whole lot of personality into your home. Go forth, my friends, and let your light fixtures shine!