Replacing T12 Fluorescent Tubes With Led
Hey there, DIY enthusiasts and anyone who’s ever been blinded by the flickering demise of an old fluorescent tube! If you’ve got those ancient, humming, energy-guzzling T12 fluorescent lights gracing your ceilings, then buckle up, buttercup, because we’re about to embark on a little adventure. We’re talking about ditching those clunkers and stepping into the bright, shiny future of LED! Think of it like upgrading from a flip phone to a smartphone – same basic function, but a whole lot more awesome.
Now, I know what you’re thinking. "LEDs? Isn't that complicated? Do I need an engineering degree and a hard hat?" Nope, my friend, you absolutely do not. This is way easier than assembling IKEA furniture (and with fewer existential crises, I promise!). So, let’s get down to brass tacks and figure out how to banish those gloomy tubes for good.
Why Bother Ditching the T12s?
Alright, let’s get real for a sec. Those T12s have been around for ages. They were the bees' knees back in the day, but let's face it, they’re like that uncle who still tells the same tired jokes at every family reunion. They’re inefficient, meaning they’re costing you a fortune on your electricity bill. Seriously, they’re practically throwing money out the window in the form of wasted energy. It’s like trying to fill a leaky bucket with a thimble – a lot of effort, not much to show for it.
And then there's the flickering. Oh, the flickering! It's enough to drive anyone to the brink of madness. It’s like a tiny disco party happening in your ceiling, and nobody invited you. Plus, let’s not forget the mercury. Yep, those old tubes are packed with the stuff. Not exactly something you want hanging around, especially if you have little ones or curious pets. It’s a bit of a hazardous party favor, if you ask me.
But the biggest kicker? They just aren't as bright or as nice as the new kids on the block. You know that warm, inviting glow you see in fancy showrooms? Yeah, T12s ain't doing that. They often have a slightly greenish or yellowish cast that just makes everything look… well, a bit sad. It’s like looking at the world through a slightly smudged window.
Enter the Hero: The Mighty LED!
Now, let's sing the praises of our glowing hero, the LED tube! These little marvels are the absolute rockstars of modern lighting. For starters, they sip energy like a delicate hummingbird sips nectar. We're talking about massive energy savings, often slashing your lighting energy consumption by up to 80%! Cha-ching! That’s more money in your pocket for fun things, like… well, more lights! Or maybe a nice vacation. The possibilities are endless.
And the light quality? Oh, mama! LEDs produce a cleaner, brighter, and more consistent light. You can get them in different color temperatures, too. Want that cozy, warm glow like a sunset? You got it. Need that crisp, cool light for your workspace that makes you feel like you’re in a futuristic laboratory? No problem. They’re like chameleons of illumination, adapting to your every whim.
Plus, they’re super durable. Unlike those fragile glass fluorescent tubes, LEDs are often made with plastic or more robust materials. This means fewer breakages, which is a win for your sanity and your toes (no more stepping on shattered glass!). And the best part? They last an unbelievably long time. We're talking tens of thousands of hours. Think of it this way: while your T12s are burning out faster than a candle in a hurricane, your LEDs will be happily glowing on, year after year. It’s like having a light bulb that’s in it for the long haul.
The Big Question: How Do I Actually Do This?
Okay, deep breaths. This is where things get practical, but don't worry, we're keeping it light and breezy. There are generally two main ways you can tackle this LED upgrade, depending on your fixture and your comfort level. It’s like choosing between two paths on a scenic hike – both lead to the same beautiful view, just with slightly different scenery along the way.
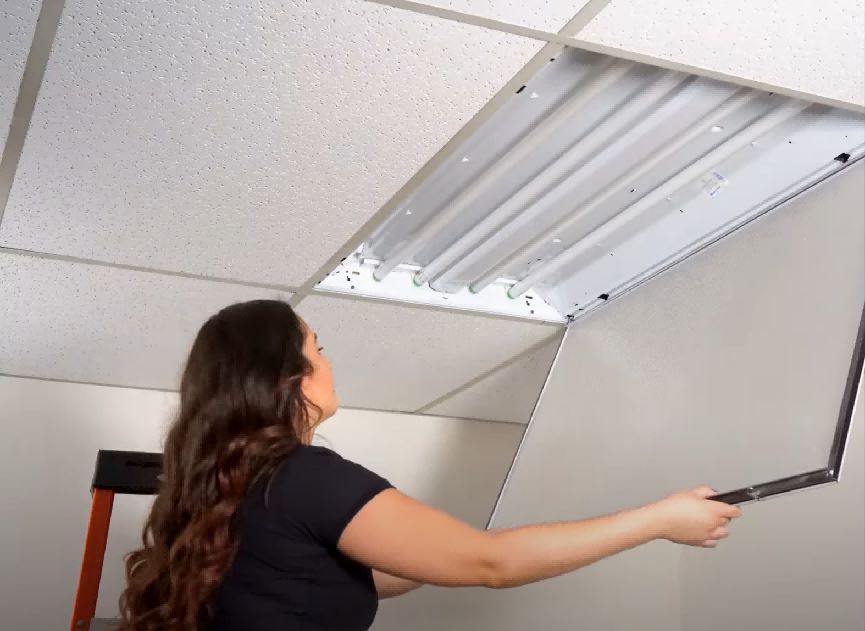
Option 1: The "Plug-and-Play" Miracle (Type A LED Tubes)
This is the easiest route, the express train to LED town. These are what we call Type A or "ballast-compatible" LED tubes. The magic here is that they are designed to work with your existing fluorescent ballast. That’s the boxy thingy that makes your old fluorescent tubes hum and flicker. With these tubes, you just pop out the old T12s, screw in the new LED tubes, and… voilà! You’re done. It’s like magic, but with less glitter and more actual light.
Pros of Type A:
- Super Simple: Literally plug and play. No rewiring needed.
- Fast: You can convert a whole room in minutes.
- Budget-Friendly Initial Cost: Usually a bit cheaper upfront than other options.
Cons of Type A:
- Still Relying on the Ballast: While the LEDs are efficient, the ballast itself is still an older technology and consumes a small amount of energy. It's like having a brand new engine in an old car chassis – it works, but it's not peak performance.
- Limited Lifespan of the Ballast: The ballast will eventually fail. When it does, you’ll have to replace it, and then you'll need to switch to a different type of LED tube (more on that in a sec). So, it's a good temporary solution, but not a forever fix.
- Potential Compatibility Issues: While most ballasts are compatible, there can be rare instances where a specific ballast might not play nicely with a Type A tube. Always check the manufacturer's recommendations!
Pro Tip: When buying Type A tubes, make sure they are specifically listed as "ballast compatible" and check the manufacturer's list of compatible ballasts. Don't just assume it will work!
Option 2: The "Bypass and Bloom" Powerhouse (Type B or Type C LED Tubes)
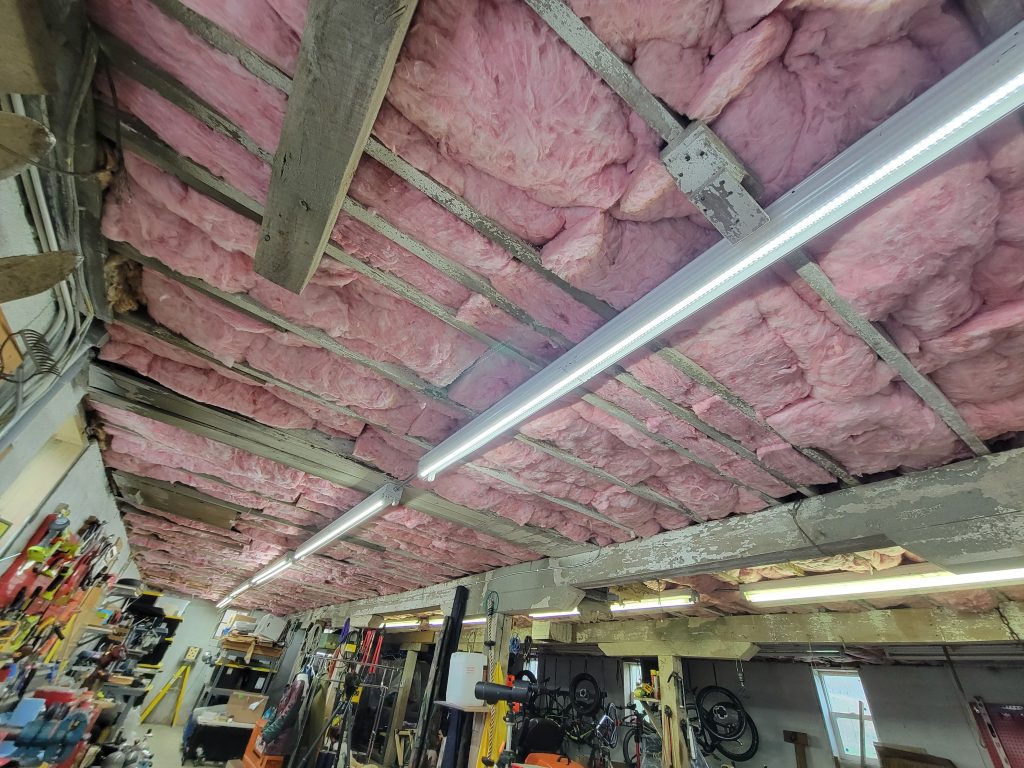
This option requires a little more effort, but it’s the ultimate in efficiency and longevity. We're talking about bypassing the old ballast entirely. These are typically Type B (ballast bypass) or sometimes called "direct wire" LED tubes. With these, you're essentially rewiring your fixture to connect the LED tubes directly to the power source. Think of it as giving your light fixture a full engine transplant.

Type B (Direct Wire): This is the most common ballast bypass method. You'll need to access the ballast and remove it (or at least disconnect it from the power and the sockets) and then wire the sockets directly to the AC power. This means the LEDs are getting pure, unadulterated power. It’s like switching from filtered water to a natural spring – clean and pure!
Type C (External Driver): Less common for general home use, but you might see these in commercial settings. These use an external LED driver (kind of like a power converter) instead of a ballast. They offer great control and efficiency but are usually more complex and expensive for DIYers.
Pros of Type B/C:
- Maximum Energy Efficiency: No ballast means no wasted energy. This is the most efficient way to go.
- Longest Lifespan: Since you’re removing the component most likely to fail (the ballast), your LED system will last significantly longer.
- No Flickering: Because there's no ballast to cause issues, you get a perfectly stable, flicker-free light.
- Future-Proof: Once you’ve done the bypass, you’re set. No more worrying about ballast failures.
Cons of Type B/C:
- Requires Rewiring: This is the big one. You'll need to be comfortable with basic electrical work, or hire an electrician. If you’re not handy with wires, seriously consider hiring a pro. Safety first, always!
- Higher Initial Cost (Potentially): Sometimes the tubes themselves or the need for an electrician can make the upfront cost a bit higher.
- Slightly More Time-Consuming: The rewiring process takes longer than simply swapping tubes.
Safety Warning: If you choose to bypass the ballast, you are dealing with electricity. ALWAYS turn off the power at the breaker box before you start. If you have any doubts whatsoever, call a qualified electrician. It’s better to spend a little extra than to risk a shock, a fire, or a trip to the emergency room. Nobody wants that kind of excitement!

What About the Fixtures Themselves?
Sometimes, instead of replacing the tubes, you might consider replacing the entire fixture. There are some really cool LED fixtures out there now that are designed specifically for LED lighting. These can be a great option if your old fluorescent fixtures are looking a bit tired, dingy, or are just plain difficult to work with.
When to Consider New Fixtures:
- Damaged or Old Fixtures: If your current fixtures are rusty, cracked, or just generally past their prime, a new LED fixture is a fresh start.
- Want a Different Look: LED fixtures come in all sorts of styles, from sleek and modern to minimalist. You can really update the look of your space.
- Easier Installation: Sometimes, a brand-new LED fixture can be easier and safer to install than rewiring an old fluorescent one.
Think of it like giving your ceiling a facelift. New fixtures can totally transform the feel of a room. Plus, many new LED fixtures are designed for optimal light distribution, so you won't have those dark corners anymore.
Let's Talk About the Nitty-Gritty: Choosing Your LED Tubes
Alright, you’ve decided to take the plunge! High fives all around! Now, let’s make sure you pick the right LED tubes. It’s not rocket science, but there are a couple of things to keep in mind.
Size Matters (Usually!)
Most T12 tubes are 4 feet long, but they come in different diameters. The most common are T12 (1.5 inches in diameter) and T8 (1 inch in diameter). While you can get LED tubes that mimic the size of your old T12s, make sure you order the correct length and diameter. Measure your old tubes (not the fixture!) to be sure. Nobody wants to buy a fancy new LED only to find it’s too short or too fat for the housing. It’s a classic case of "measure twice, buy once," but with more glowing potential.
Color Temperature: The Mood Setter
This is where you get to be an artist! Color temperature is measured in Kelvin (K). Here's a quick guide:

- 2700K-3000K (Warm White): This is like a cozy fireplace or a soft incandescent bulb. Great for living rooms, bedrooms, and dining areas where you want a relaxed, inviting atmosphere.
- 3500K-4000K (Cool White/Neutral White): This is a good all-rounder. It's brighter and crisper than warm white, making it suitable for kitchens, bathrooms, and general living spaces where you need good visibility.
- 5000K-6500K (Daylight): This is a very bright, bluish-white light that mimics natural daylight. Excellent for garages, workshops, or any area where you need to see fine details clearly. It can sometimes feel a bit stark for living areas.
Think about the vibe you want in each room. Do you want to relax with a book or do some intricate crafting? The right color temperature makes a world of difference!
Color Rendering Index (CRI): How True Are the Colors?
This is a bit more technical, but important for certain applications. CRI measures how accurately a light source reveals the true colors of objects. A CRI of 100 is perfect. For most home applications, a CRI of 80 or higher is perfectly fine. If you’re an artist or a photographer, you might want to look for a CRI of 90+.
DLC Listed and Energy Star Certified: The Seal of Approval
Look for tubes that are DLC (DesignLights Consortium) listed or Energy Star certified. These certifications mean the product has met strict performance and efficiency standards. It's like getting a gold star for being super efficient and reliable.
The Grand Finale: The Moment of Truth!
So, you’ve got your new LED tubes, you’ve decided on your path (plug-and-play or rewire), and you’re ready to shine! If you went with Type A, it’s as simple as a swap. If you went with Type B, and you’re feeling confident after turning off the power, carefully follow the instructions for bypassing the ballast. Remember that safety first mantra!
And then… flick the switch. Take a deep breath. And behold! The glorious, steady, energy-sipping light of your new LEDs. It’s like the clouds have parted, and the sun has decided to move into your ceiling. Watch how much brighter and clearer everything looks. You’ll probably notice colors popping like never before. Your walls might even look a different color (in a good way!).
You’ve not only saved yourself money and reduced your carbon footprint (go you!), but you’ve also dramatically improved the ambiance and functionality of your space. It’s a win-win-win situation. You’ve banished the flicker, embraced the future, and probably earned yourself a gold star in home improvement. So go ahead, bask in the brilliance, and smile. You’ve just made your home a whole lot brighter, literally and figuratively!