Tasco Telescope How To Use
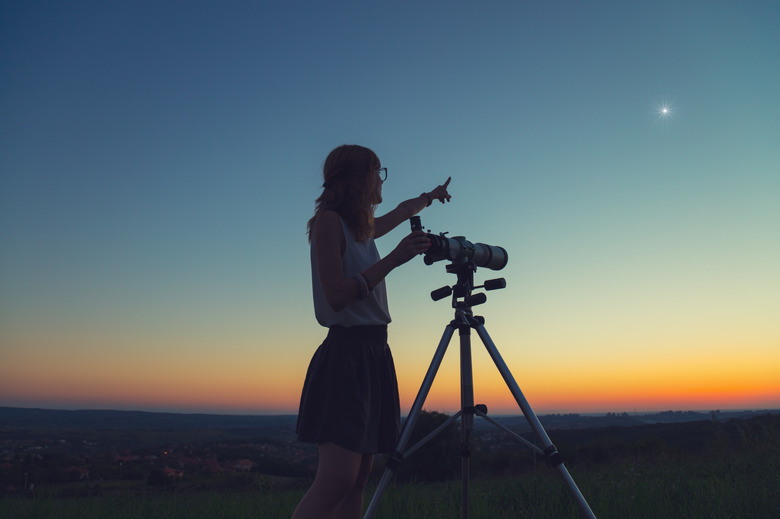
Remember the first time I ever looked through a telescope? It was a chilly autumn evening, the kind where you can practically taste the crisp air. My dad, bless his patient soul, had dug out this old, clunky Tasco telescope from the garage. It looked like something out of a 70s sci-fi movie, all beige plastic and slightly wobbly metal. We’d spent ages setting it up, fumbling with knobs and trying to attach the finder scope (which, let’s be honest, felt more like a glorified beer-can holder at the time). I was expecting, you know, alien spacecraft or at least a really clear view of the moon's landing sites. What I got was… a blurry, fuzzy white blob. I was so disappointed, I almost gave up right then and there. But then, my dad, with that quiet understanding of his, tweaked a little knob, pointed the whole contraption a tiny bit to the left, and suddenly… BAM!
There it was. The Moon. Not a fuzzy blob, but a world. I could see craters, mountains, shadows dancing across its surface. It was like a tiny, perfect pearl hanging in the black velvet sky. That single moment, that shift from utter confusion to pure awe, is what owning a telescope is all about. And that, my friends, is why we’re going to talk about how to actually use your Tasco telescope without ending up with just a blurry blob. Because those things, even the older ones, are capable of some serious cosmic magic.
So, you’ve got a Tasco telescope. Awesome! Maybe it’s a shiny new one, maybe it’s a hand-me-down like my dad’s. Either way, you’re holding a portal to the universe, and it’s probably not as complicated as you think. Forget those intimidating diagrams and jargon-filled manuals for a sec. We’re going to break this down, nice and easy. Think of me as your friendly, slightly-less-clueless-than-you-were-initially stargazing buddy. We’re in this together!
Unboxing Your Galactic Gateway (Without Losing Your Mind)
First things first: unboxing. This can be the most exciting and also the most nerve-wracking part. Did you get all the pieces? Is anything broken? Take a deep breath. Most Tasco telescopes, especially the beginner-friendly ones, are designed to be pretty straightforward. You'll usually find the main telescope tube, a tripod, and a few different eyepieces.
Don't panic if there are a bunch of little screws and bolts. They’re usually for attaching the tripod legs or mounting the telescope. Tasco often includes the tools you need, which is a nice touch. Just lay everything out on a clean, flat surface. It’s like a treasure hunt, but the treasure is the cosmos!
Pro tip: Keep the box and any protective packaging for a while. You never know when you might need to transport your telescope or if you accidentally decide to return it (though I doubt you will after your first clear night!).
Assembly: Building Your Cosmic Chariot
This is where things start to get real. Assembling the tripod is usually the first step. Most tripods have legs that extend and locks to keep them in place. You want it to be stable. A wobbly tripod is the enemy of good stargazing, and it's incredibly frustrating. Imagine trying to hold a camera steady with shaky hands – same principle, but with the universe!
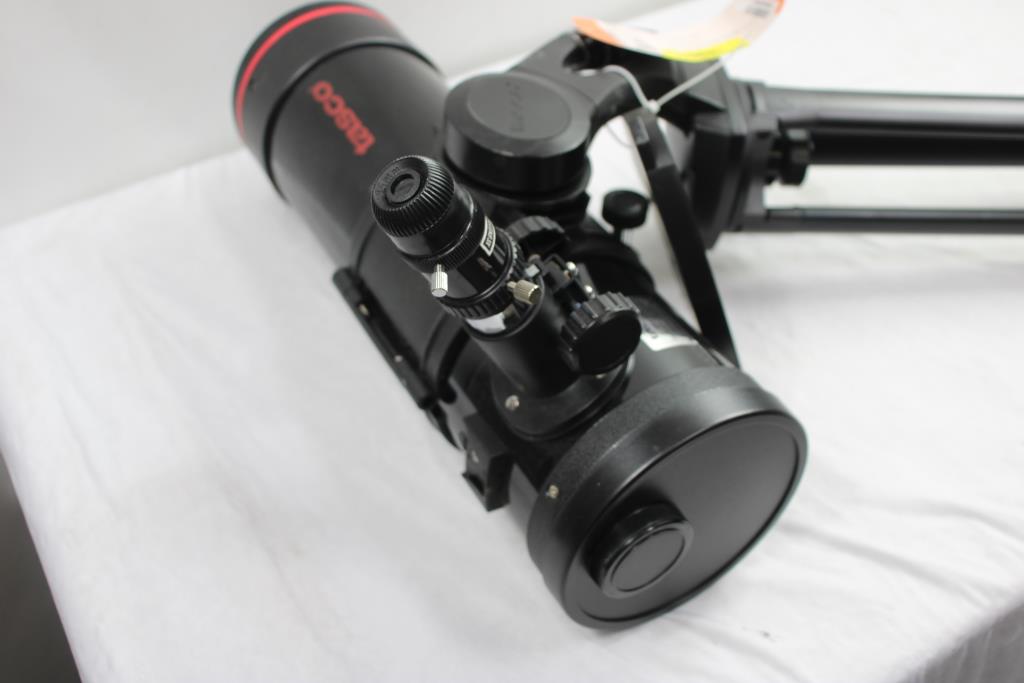
Once the tripod is set up, you’ll need to attach the main telescope tube. There’s usually a mount on top of the tripod, and the tube will have a dovetail plate or a similar mechanism to connect. It should slot in and then you’ll tighten some screws to secure it. Don’t overtighten! Just make it snug so it doesn't wiggle around. You don't want to strip the threads or damage anything.
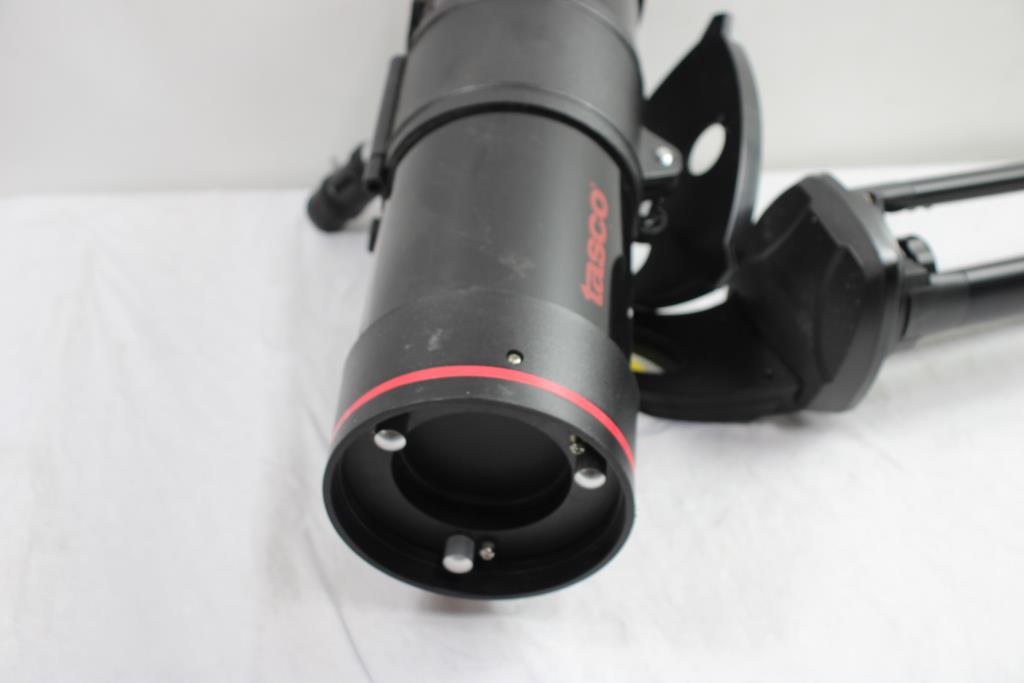
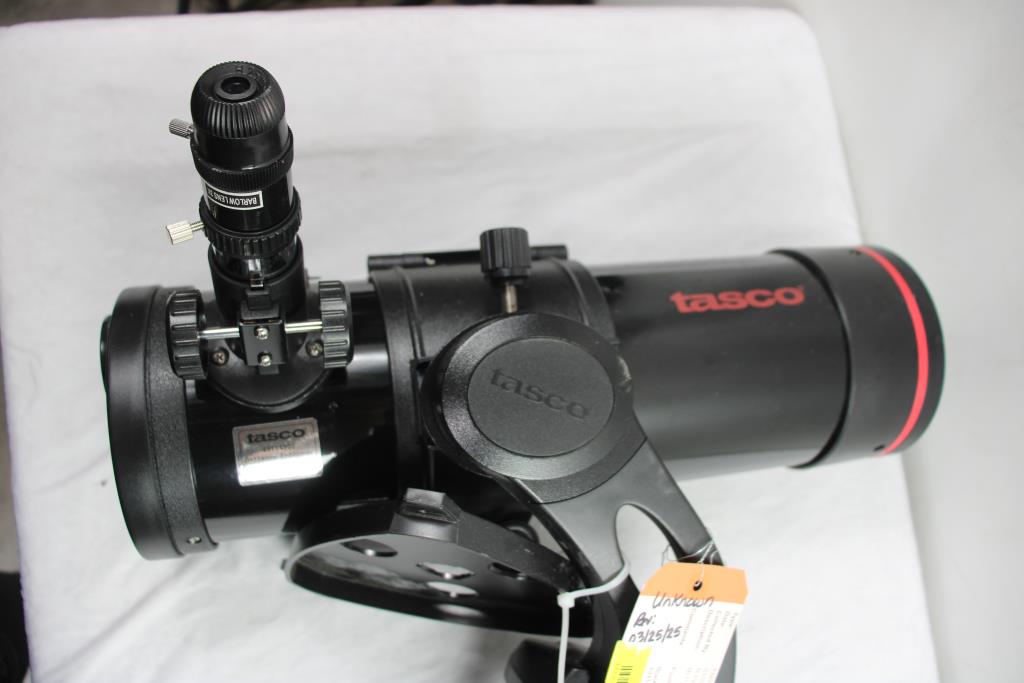
Now, about that finder scope. This is the little, usually red-dot or low-magnification scope that attaches to the side of your main tube. It’s crucial! Trying to find anything with just the main telescope is like trying to thread a needle from across the room. The finder scope acts like a wide-angle lens, helping you point your main scope where you want it. It should just screw or clip on. If it feels loose, tighten it up.
A little secret: Sometimes, especially with older models, the finder scope might not be perfectly aligned with the main tube. This is totally fixable! We'll get to that later.
The Eyepieces: Your Cosmic Zoom Lenses
Ah, the eyepieces. These little cylinders are your windows to different levels of magnification. You’ll typically get a couple with your Tasco telescope, often labeled with numbers like “25mm” and “10mm”. The lower the number, the higher the magnification. This is a common point of confusion, so let’s say it again: lower mm = bigger view (but also shakier and dimmer).
You’ll want to start with the eyepiece that has the highest millimeter number (e.g., 25mm). This gives you the widest field of view and the lowest magnification. It’s like using the zoom-out button on your phone – it helps you get your bearings and find your target. Once you’ve found something interesting with the low-power eyepiece, you can switch to a higher magnification (lower mm) eyepiece for a closer look.
To insert an eyepiece, you’ll usually find a small screw or thumbscrew on the focuser tube (the part that moves in and out). Loosen this screw, gently insert the eyepiece, and then tighten the screw again to hold it in place. Make sure it’s seated properly!
Focusing: The Key to Clarity
This is where the magic happens, or rather, where it doesn’t happen if you don’t get it right. The focuser is the knob (or sometimes two knobs) on the side of the telescope tube that moves the eyepiece in and out. You’ll need to get this just right to get a sharp image.
Before you even try to focus on a distant object, focus on something close by. A distant tree, a rooftop, a streetlamp – anything that’s relatively far away. Point your telescope at it, look through the eyepiece, and slowly turn the focuser knob. You’ll see the image go from blurry to sharp, and then back to blurry again. You’re looking for that sweet spot where the image is crisp and clear. It takes a little practice, but you’ll get the hang of it.
Important note: When you’re looking at the Moon, the image might seem a bit too bright. Many Tasco telescopes come with a moon filter, or you can buy one. It’s usually a small, dark disc that screws onto the bottom of the eyepiece. It helps reduce glare and makes lunar viewing much more comfortable.
Aligning the Finder Scope: Your Cosmic Compass
Remember that slightly wonky finder scope I mentioned? This is where we fix it. You need to make sure your finder scope is pointing at the exact same spot as your main telescope. If they're not aligned, you'll be looking through the finder scope, seeing your target, and then when you move to the main telescope, it will be nowhere in sight. Frustrating, right? Don't worry, it’s a common issue and easily remedied.
The best time to do this is during the daytime. Find a distant, stationary object – like the top of a tree, a chimney, or a power line insulator. Make sure it’s far away, at least a few hundred yards, so the slight difference in angle between the finder scope and the main scope is minimal.
1. Point your main telescope at the distant object and center it in the field of view of your lowest magnification eyepiece (the one with the highest mm number). Lock the telescope in place so it doesn't move.
2. Now, look through your finder scope. You should see the same object, but it might not be centered. There are usually small adjustment screws on the finder scope mount. Gently turn these screws until the object you’re looking at in the main telescope is also perfectly centered in the finder scope’s view. Think of it as nudging the finder scope until it’s looking at the same exact thing your main tube is.
3. Once it's aligned, tighten the finder scope adjustment screws just a little bit to keep it in place. Test it by moving the telescope slightly and re-centering the object in both the main scope and the finder scope. They should track together.
This simple step will save you SO much time and frustration when you’re out under the stars.
Choosing Your Celestial Targets
So, you've assembled it, focused it, and aligned your finder scope. What now? The night sky is your oyster! For beginners, especially with a Tasco telescope which might not have the highest aperture, it's best to start with bright and easy targets. Trying to find faint galaxies right away can be disheartening.
The Moon: Your First Friend
The Moon is, hands down, the best starting point. It’s huge, bright, and always changing. You can see craters, mountains, and the terminator (the line between day and night on the moon), which is where the shadows are most dramatic and interesting. Get a good moon map, and you can even identify specific features. It’s like a celestial treasure map!
Planets: Our Solar System Neighbors
Depending on the time of year and your telescope’s capabilities, you can often see the planets. Jupiter is a fantastic target. With even a moderate telescope, you might be able to see its four largest moons (the Galilean moons) as tiny dots of light orbiting the planet. You might even glimpse some of its cloud bands. How cool is that? You’re looking at another world!
Saturn is another showstopper. If your Tasco telescope is decent, you might be able to see its rings! It’s a truly breathtaking sight the first time you see it. Seeing those iconic rings is a moment you won't forget. It’s proof that those pictures you see aren’t just CGI!
Mars can be tricky. It often appears as a reddish disc, and sometimes you can see dark patches on its surface, indicating geological features. Its visibility depends on its position in its orbit relative to Earth.
Venus is always bright, but it appears as a phase, much like our Moon. You won’t see much detail, but its brightness and phase are interesting to observe.
Star Clusters and Nebulae: A Little More Advanced
Once you're comfortable with the Moon and planets, you can try star clusters. The Pleiades (M45), often called the Seven Sisters, is a beautiful, bright open star cluster that’s visible to the naked eye and looks stunning through a telescope. You can also try looking for the Orion Nebula (M42) during winter. It’s a bright, fuzzy patch that, with a bit of patience, reveals glowing gas and newly forming stars.
A word of caution: Don’t expect to see vibrant colors like in Hubble photos. Those are often long-exposure images. Through your eyepiece, you’ll see more subtle, monochromatic views. But that doesn't make them any less amazing. It’s about the real, direct experience of seeing these celestial wonders with your own eyes.
Tips for a Stellar Stargazing Session
Okay, you’re ready for the night sky. But before you head out, a few tips to make your experience even better.
Location, Location, Location!
Light pollution is the enemy of good astronomy. If you live in a city, try to get away from bright streetlights and buildings. A park, a field, or even your backyard if it's not too light-polluted, can work. The darker the sky, the more you’ll see.
Give Your Eyes Time to Adjust
Your eyes need about 20-30 minutes to fully adapt to the dark. Avoid looking at your phone or any bright lights. If you need light, use a red flashlight. Red light doesn't affect your night vision as much as white light. Tasco might not have included one, but it’s a cheap and invaluable accessory!

Be Patient, Young Padawan
Stargazing requires patience. Don’t get discouraged if you can’t find something immediately. Keep trying. Sometimes you need to let your eye adjust, or the object might be lower on the horizon. Enjoy the process. It’s not a race.
Dress Warmly
Even on a mild evening, it can get surprisingly cold when you’re standing still for extended periods. Layer up! You’ll thank me later when you’re not shivering instead of marveling at Jupiter.
Document Your Discoveries
Keep a notebook! Jot down what you saw, the date, the time, and your impressions. Maybe even try sketching what you observe. This helps you learn and remember your celestial adventures. You'll be amazed at how much you improve over time.
Troubleshooting: When the Stars Seem Stubborn
Sometimes, despite our best efforts, things don’t go perfectly. Here are a few common Tasco telescope hiccups and how to deal with them:
“I can’t find anything!”
This usually comes down to a few things:
- Finder scope alignment: Go back and re-align it during the day.
- Eyepiece choice: Are you using the lowest magnification (highest mm number) eyepiece? Start there.
- Target too faint: Are you trying to see something too faint for your telescope or the current sky conditions? Stick to brighter objects.
- Too much light pollution: Even on a clear night, city lights can wash out fainter objects.
“The image is always blurry!”
This is almost always a focusing issue.
- Focuser knob: Gently turn the focuser knob back and forth. Don’t force it.
- Atmospheric conditions: Sometimes the air itself is turbulent (called "seeing"). This makes the image shimmer and blurry. You can’t do much about this except wait for calmer air.
- Incorrect eyepiece: Are you sure the eyepiece is seated correctly and securely?
“Everything looks upside down or backwards!”
For astronomical telescopes, this is actually normal! Most telescopes produce an inverted image. This is because they are designed to view objects in the sky, where up and down doesn’t really matter. Don’t worry, your telescope isn’t broken! Some Tasco models might come with a diagonal prism that can correct the image orientation, but often, for stargazing, it’s not necessary.
Owning a telescope, even a Tasco, is an invitation to explore. It’s a journey of discovery that can start right in your own backyard. That initial frustration with my dad’s old Tasco quickly gave way to wonder, and that’s the power these instruments hold. Don’t be intimidated. Embrace the learning curve. Every night you spend under the stars is a chance to learn something new, to see something incredible, and to connect with the vast, awe-inspiring universe. So go ahead, point that tube skyward, twist those knobs, and prepare to be amazed. Happy stargazing!