Tig Welding Aluminum For Beginners
So, you've been eyeing that shiny, lightweight metal and thinking, "Could I weld that?" My friend, the answer is a resounding YES! And if you're curious about TIG welding aluminum, buckle up, because we're about to dive into a world of smooth, silvery welds that’ll make your projects shine. Forget those intimidating welding videos that make it look like rocket science. We're talking about making aluminum play nice, and honestly, it’s way more fun than you might think!
Why aluminum, you ask? Well, think about all the cool stuff it’s used in: bicycles, car parts, even those sleek kitchen countertops. It's a fantastic material to work with, and learning to TIG weld it opens up a whole new universe of DIY possibilities. Imagine building your own custom bike frame, fabricating some snazzy aluminum storage boxes for your car, or even creating some unique metal art. The possibilities are, quite literally, endless. And trust me, the satisfaction of seeing those beautiful, glassy welds come to life? Priceless!
The "Magic Wand" of TIG Welding
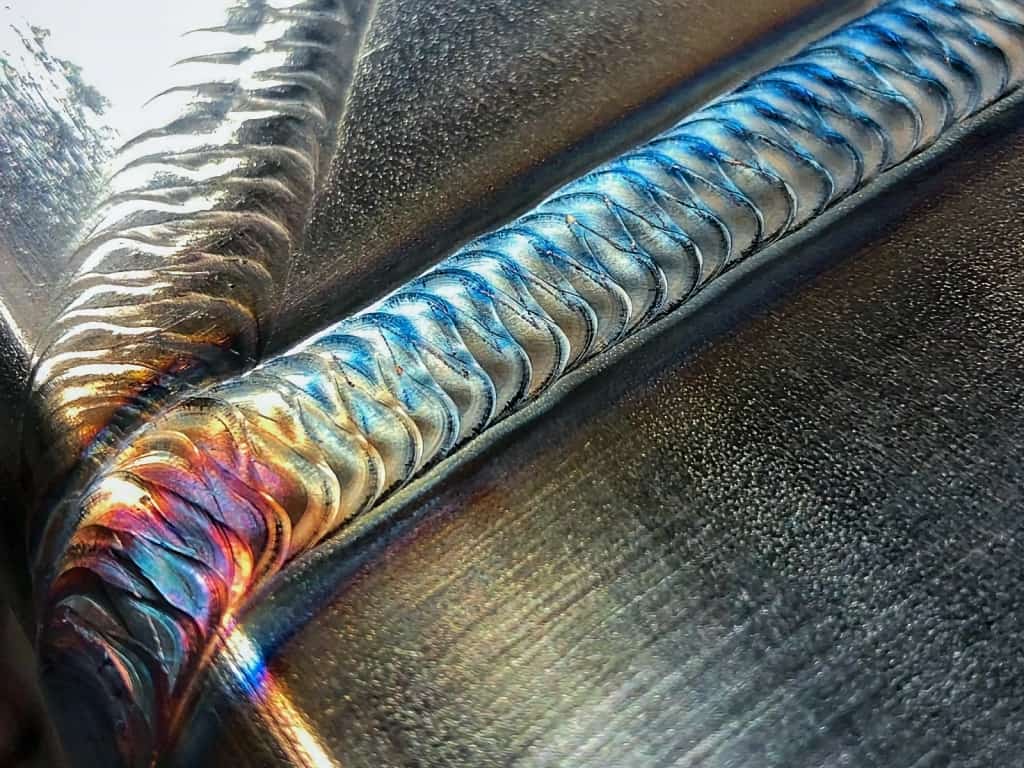
Now, let's chat TIG. If you're new to this, TIG stands for Tungsten Inert Gas welding. It's often considered the "Cadillac" of welding processes because it offers incredible control and produces some of the cleanest, prettiest welds out there. Think of it as a precision tool, not a brute-force hammer. You get to be a bit of an artist with it, delicately feeding the filler rod and dancing the torch. Pretty cool, right?
And aluminum? It’s got its own special quirks. It’s a bit like a diva – requires specific attention, but when you get it right, oh boy, does it perform! The main thing to remember is that aluminum oxidizes super fast. That’s like a protective, invisible shield that forms on the surface. You need to get rid of it before you can actually melt and fuse the metal underneath. But don't let that scare you; it's an easy step once you know what you're doing.
Getting Geared Up: What You'll Need
Alright, let's talk tools. You don't need a whole workshop to get started. A basic TIG welder capable of AC (alternating current) is your key. Why AC? Because aluminum welding requires it to break through that pesky oxide layer. Think of AC as giving your torch a little wiggle-jiggle to clean the surface as you go. Some machines are AC/DC, which is great because you can also weld steel and stainless steel with them. Versatility, baby!
Then there's your torch. You'll want a good quality TIG torch, maybe a 17 or 26 series, something comfortable in your hand. And don't forget the tungsten! For aluminum, you'll typically use pure tungsten or a zirconiated tungsten. These are usually marked with a green or brown band, respectively. They're chosen because they create a nice, balled-up tip on AC, which is exactly what you want for aluminum.
We also need shielding gas. For aluminum, that’s almost always 100% argon. This gas creates that “inert” environment we talked about, protecting your molten puddle from atmospheric contaminants. It’s like giving your weld a cozy, private bubble bath. And last but not least, filler rod! For aluminum, you’ll use aluminum filler rods. Common alloys are 4043 (often called "the all-rounder" and great for beginners) or 5356 (for stronger applications). Start with 4043; it’s forgiving and flows beautifully.
Prep Work: The Secret Sauce to Shiny Welds
This is where the magic really begins. For aluminum, prep is king. You must clean the surface thoroughly. A stainless steel wire brush dedicated only to aluminum is your best friend here. Seriously, dedicate it to aluminum and nothing else! You don't want any accidental contamination. Brush in one direction, and do it just before you weld. This stuff oxidizes quickly, remember?
Beyond brushing, many welders also use a chemical cleaner or degreaser. This helps get rid of any oils or surface contaminants. Think of it as giving your aluminum a spa treatment before its big welding debut. The cleaner the surface, the happier your weld will be.
Setting Up Your Machine: Finding That Sweet Spot
Now, let's talk settings. This is where things can feel a little overwhelming at first, but we'll break it down. You'll be setting your amperage, your gas flow rate, and your AC balance. Amperage is your heat control. Too low, and you won't melt. Too high, and you'll burn through faster than you can say "oops!"
Your gas flow rate is crucial for that protective bubble. Too little, and you'll get porosity (little holes in your weld). Too much, and it can actually disrupt the arc. A good starting point is usually between 15-25 CFH (Cubic Feet per Hour), but always check your machine's manual and experiment.
The AC balance is a bit more technical. It controls the cleaning action versus penetration. For aluminum, you generally want a good balance between cleaning the oxide layer and getting decent penetration. Many beginners find that a balance around 50-70% EN (electrode negative) is a good starting point. But honestly, the best advice here is to practice. Set your machine, grab some scrap aluminum, and see what happens!
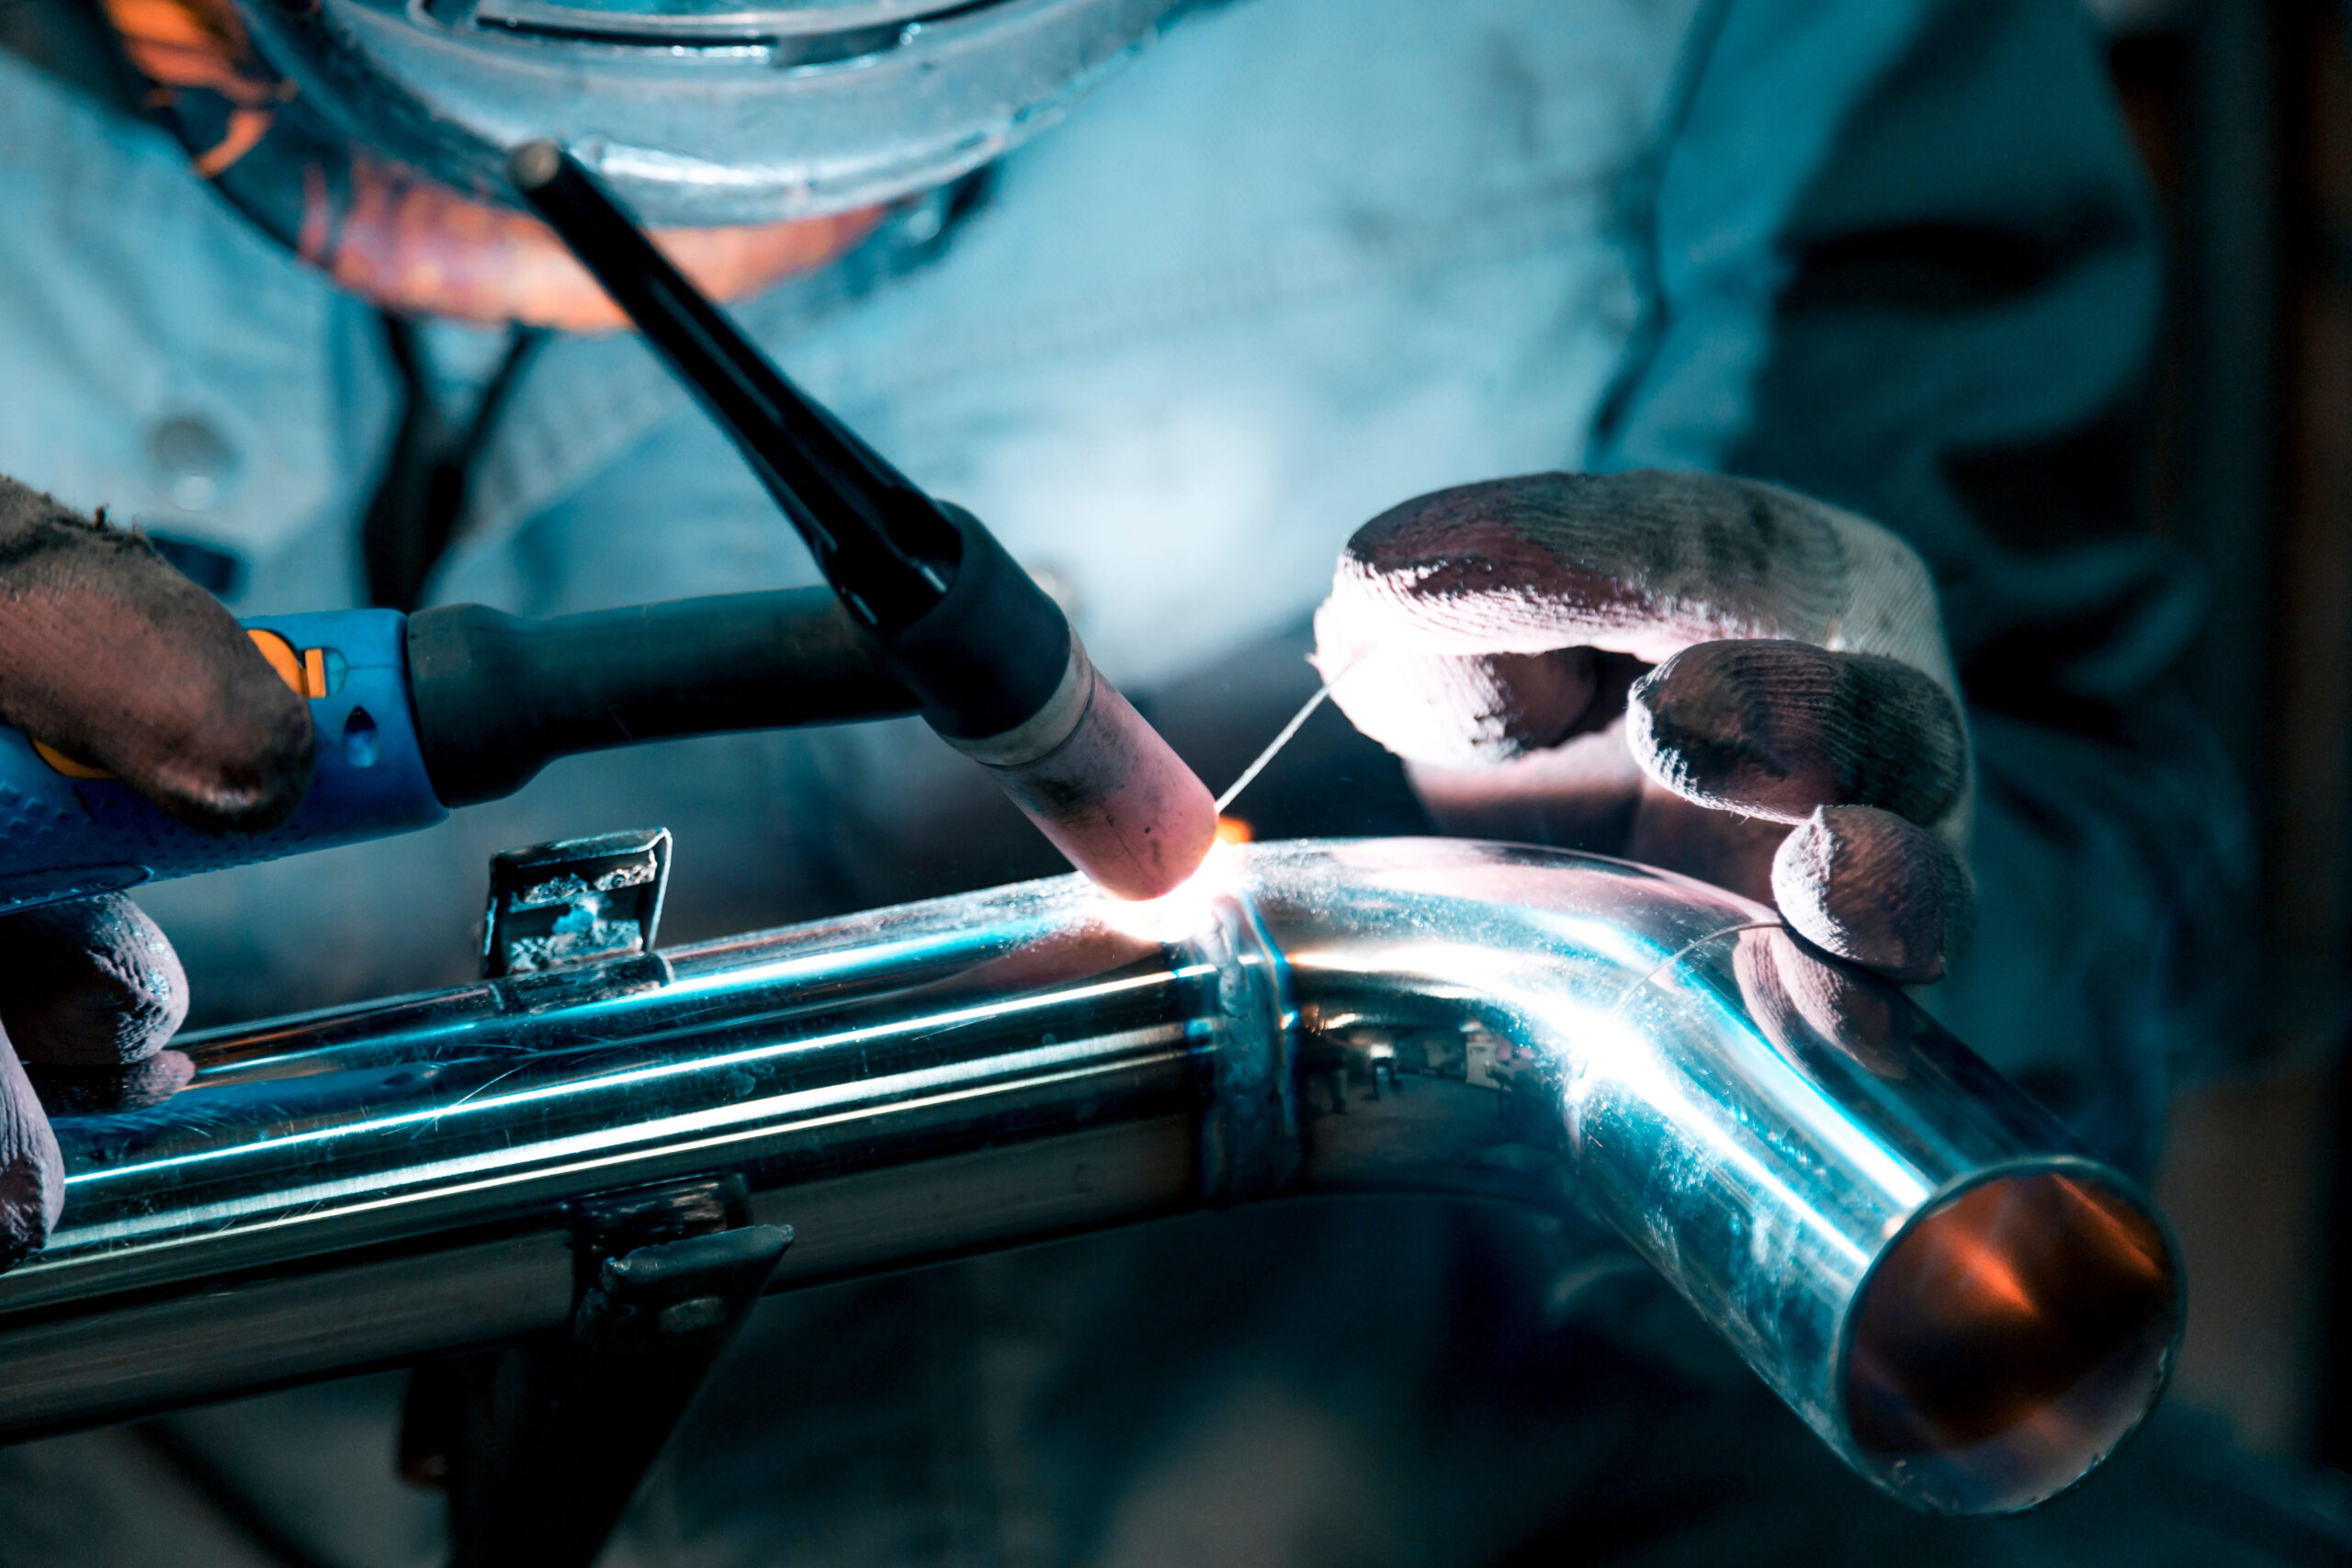
The Dance of the Torch and Rod
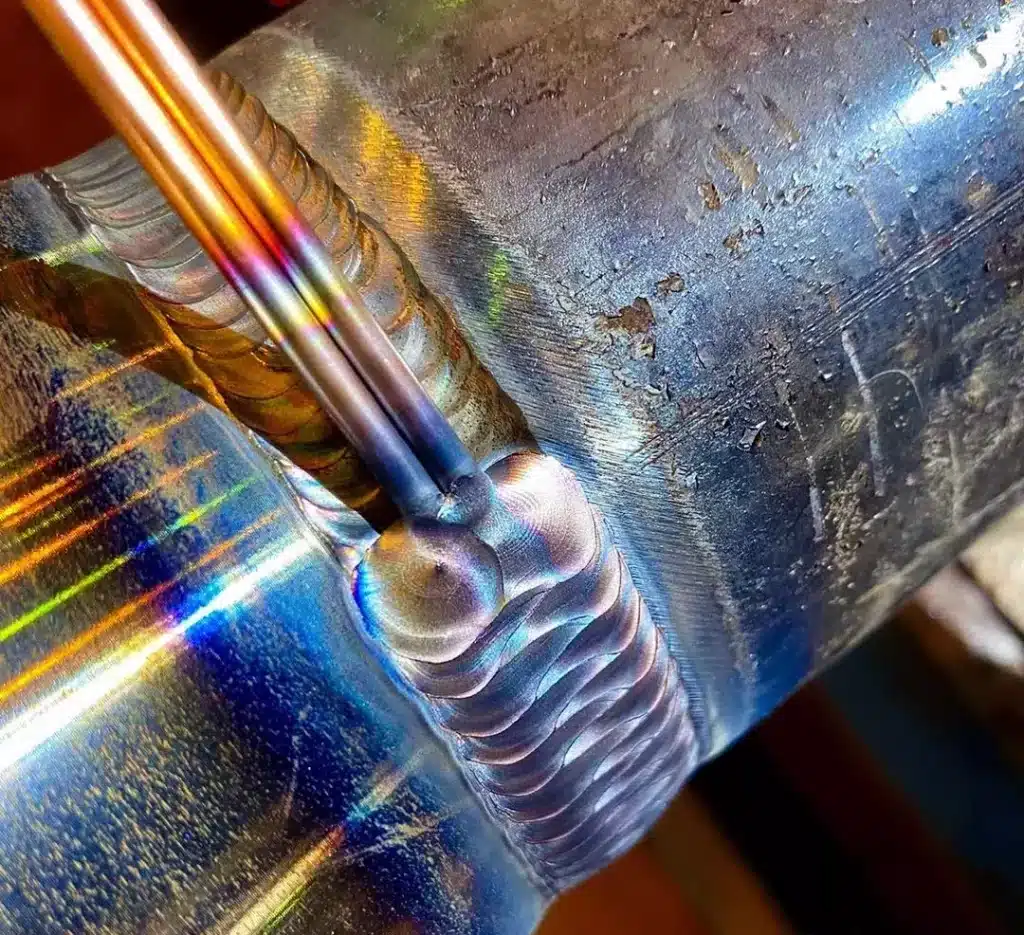
Here's the fun part: actually welding! Hold your torch at a slight angle, about 10-15 degrees, and keep a consistent distance between the tungsten and the workpiece. You’ll see that oxide layer start to “crater” or break apart as you apply heat – that’s your cue!
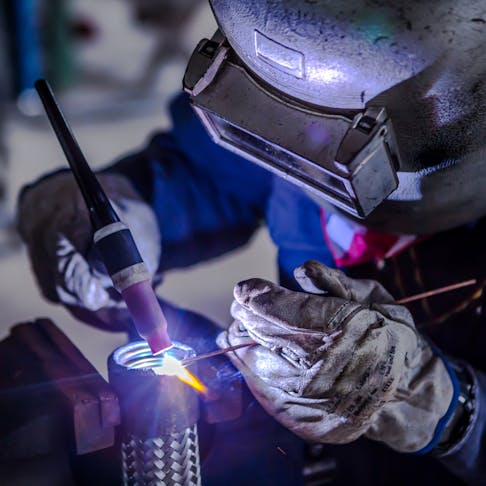
Once you have a nice, molten puddle, you introduce the filler rod. Keep the filler rod tip just outside the shielding gas stream, so it doesn't get contaminated. Dip it into the puddle, let it melt, and then pull it out slightly. It's a rhythmic, back-and-forth motion. Think of it as feeding a tiny, molten metal baby. You want to keep the arc length consistent and the filler rod feeding smoothly.
You'll notice aluminum melts and flows very quickly. It’s not as forgiving as steel. So, you’ll need to be a little quicker with your movements. Start slow on thicker material, and when you're feeling brave, try some thinner stuff. The key is consistency. Try to make those short, even dips. You’ll get the hang of it!
Common Pitfalls (and How to Dodge Them)
Don't worry if your first few welds look like a silver lumpy mess. We've all been there! One of the most common issues is contamination. Again, cleanliness is paramount. Another one is lack of fusion, meaning your filler rod isn't properly melting into the base metal. This often comes down to not enough heat or not letting the puddle get hot enough before adding filler.

Porosity is another one to watch out for. This is often caused by insufficient shielding gas, contaminated filler rod, or not cleaning the aluminum properly. If your welds are looking bubbly, it's usually a gas or cleanliness issue. And if you're burning holes (and you will, it’s part of the learning curve!), you might need to decrease your amperage or move a bit faster.
The best way to overcome these is practice, practice, practice! Get some scrap pieces of aluminum, different thicknesses if you can, and just keep welding. Experiment with your settings. Watch how the puddle behaves. You'll start to develop an intuition for it. And honestly, even imperfect welds are a learning opportunity!
The Joy of Aluminum Creation
TIG welding aluminum might seem a bit daunting at first, but once you get past the initial learning curve, it's incredibly rewarding. The feeling of control, the precision, and the beautiful, shiny results are truly addictive. You’ll find yourself looking at everyday objects and thinking, "I could make that!"
It’s a skill that not only lets you create amazing things but also boosts your confidence and problem-solving abilities. Plus, you get to play with fire and fancy equipment, which is always a win in my book! So, go ahead, grab some aluminum, fire up that TIG welder, and start creating. The world of shimmering, welded aluminum wonders awaits you. You’ve got this, and the journey of learning is half the fun!